|
|
Post by Brandon on Mar 1, 2012 21:48:38 GMT -6
This thread is for images only!
**** Ira wants us to be able to upload the builds as we finish them, instead of holding everything until the deadline. In theory, this should inspire and encourage others to keep building instead of having a rush at the beginning and the end... so... for all you early birds surfing the inspiration, feel free to post away. The rest of you do not hesitate to post progress pics in the Rules and Progress thread as you go....
As always:
Comments and attaboys belong in the discussion thread. Any non-entry posts on this thread will be deleted.
Please include a short description if you'd like, and limit your images to 4 or 5. You can add multiple entries within the same post, or you can make a separate post for each build.
|
|
|
|
Post by modelcarfan on Mar 9, 2012 13:48:59 GMT -6
|
|
|
|
Post by plastimatic on Mar 28, 2012 19:22:30 GMT -6
|
|
|
|
Post by models4life on Apr 1, 2012 8:49:57 GMT -6
My first build posted here. Lots of fun, hope you like it. - Japanese Kit - Snappin' Dragon wheels, tires, chassis & base - 1:25 Muscle Machines engine - Misc. from the parts box - Testor's 1 coat paint 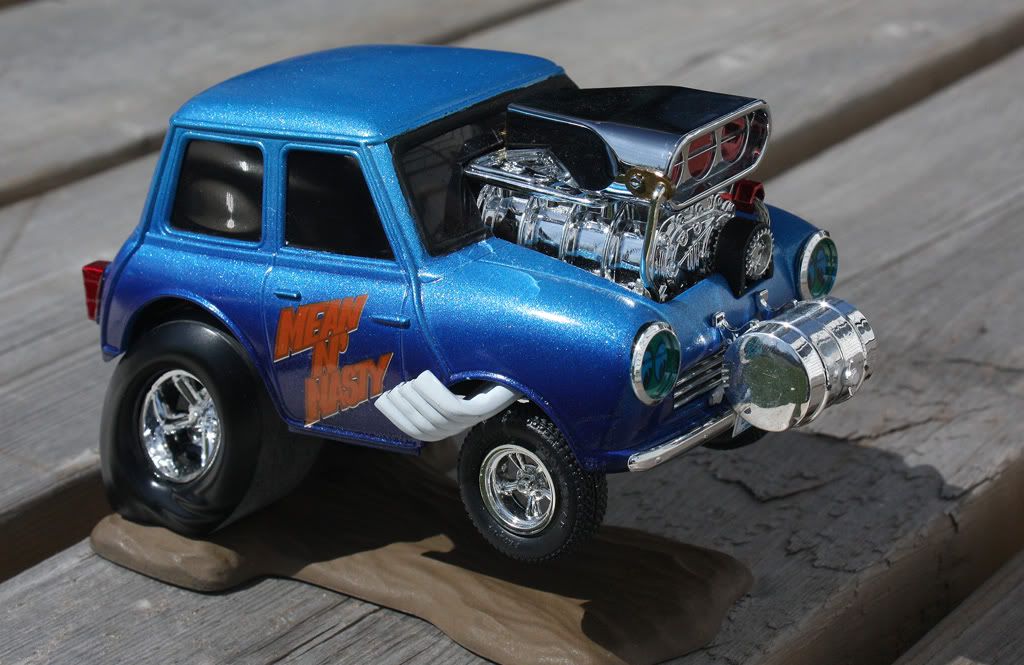 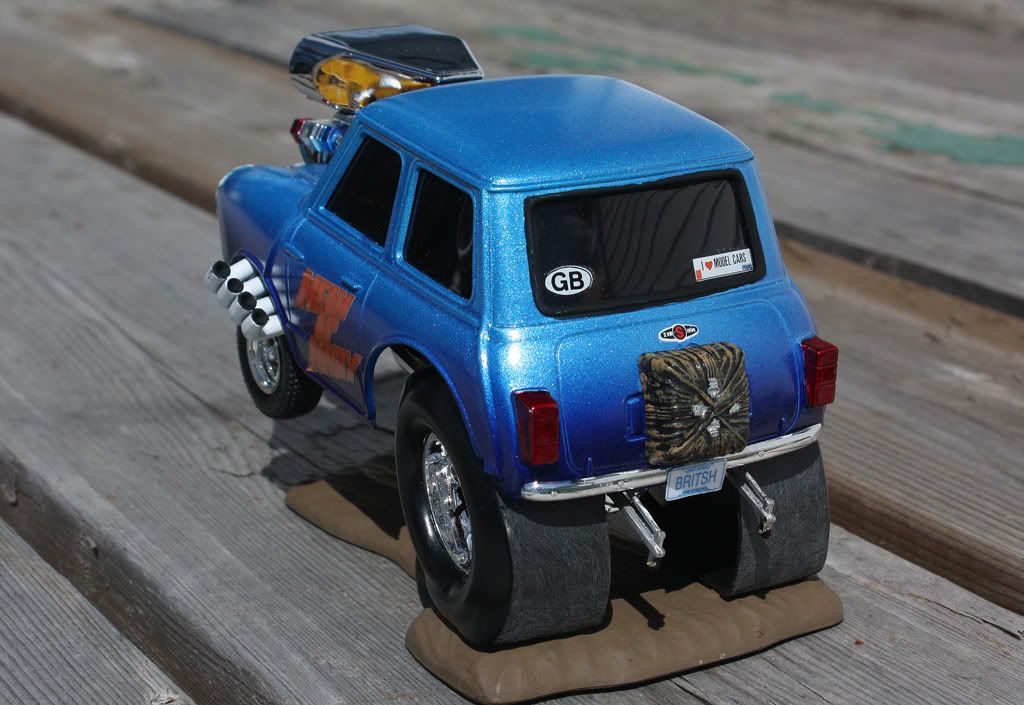 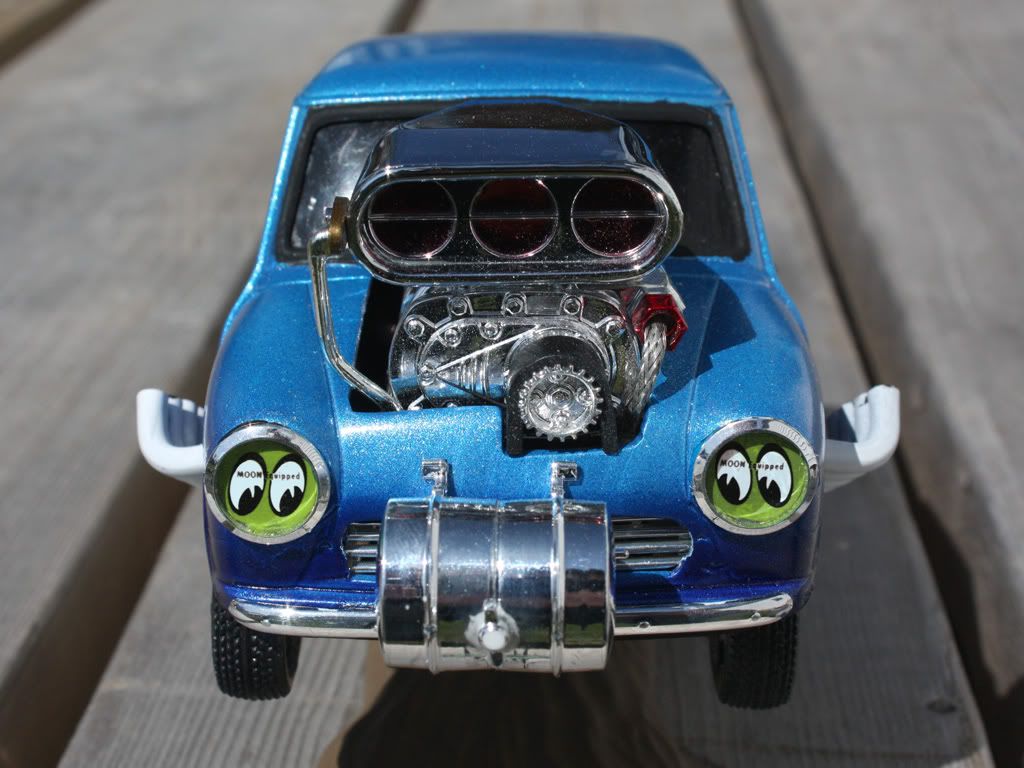 Next up... - Airfix Renault 1:25 kit - Snappin' Dragon wheels, tires, chassis & base - Gridiron Grabber blower & motor - Misc. from the parts box - Testor's 1 coat paint 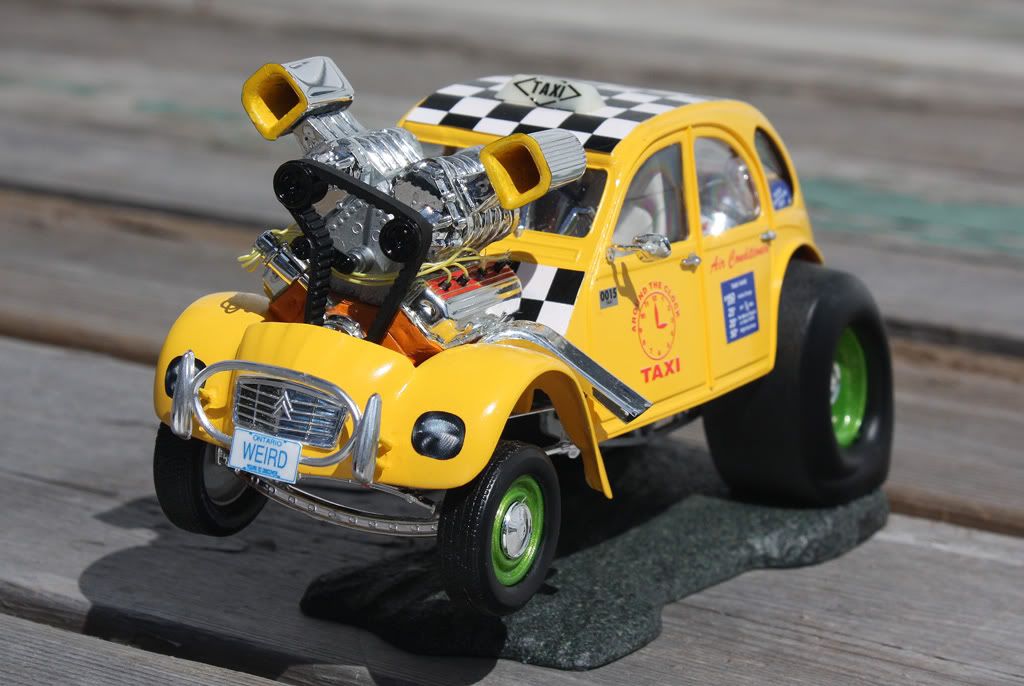  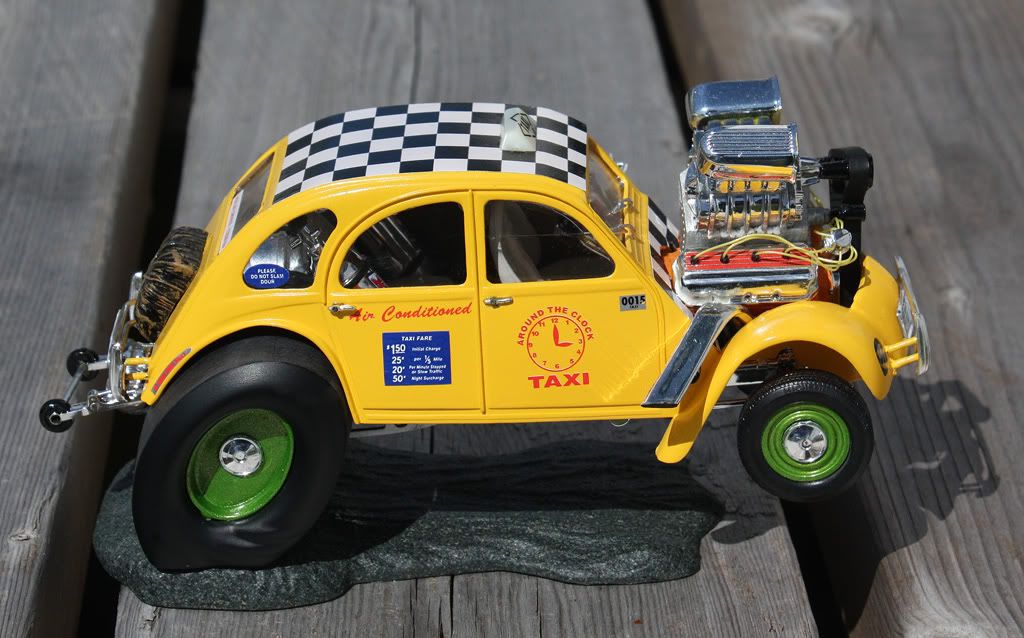 |
|
|
|
Post by hobbybobby on Apr 1, 2012 10:41:18 GMT -6
|
|
|
|
Post by hobbybobby on Apr 1, 2012 11:02:57 GMT -6
|
|
|
|
Post by plastimatic on Apr 9, 2012 11:16:14 GMT -6
The Flintmobile from the 1993 movie kit, built as the two-seater Fred and Barney were often seen driving in the cartoon. Log frame was shortened just enough take out one row of seats. The roof supports were shortened as well, and the hard plastic kit roof was replaced with stiffened paper, to look more like the cartoon version. Of course, copious amounts of drybrushing. ;D 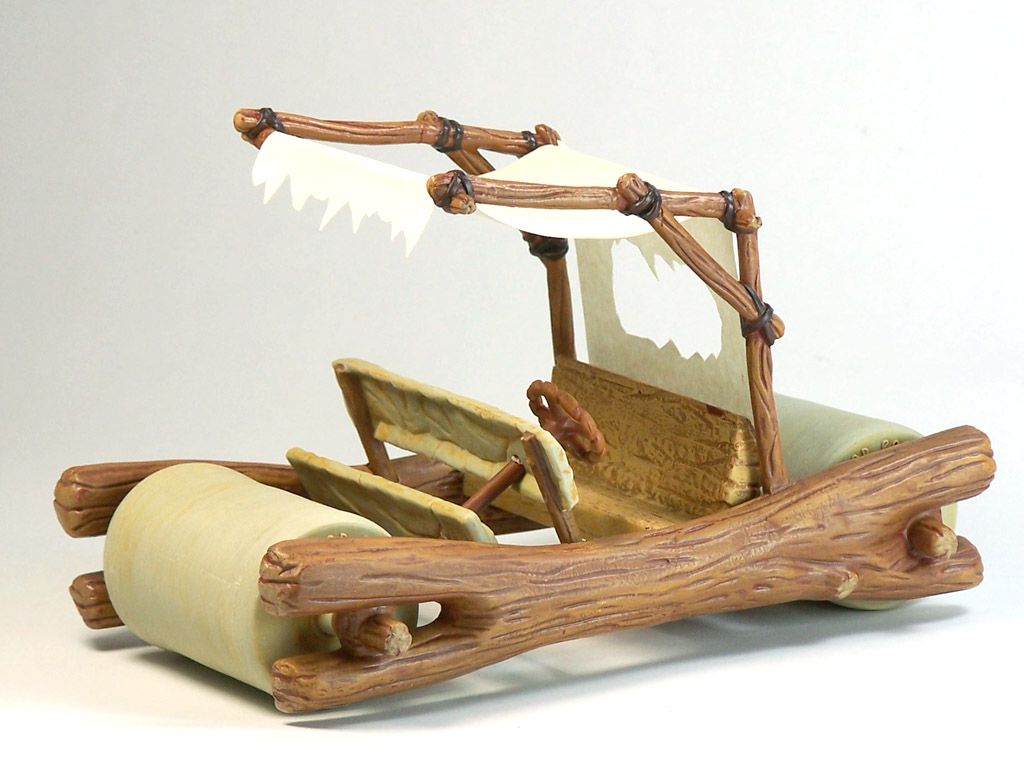  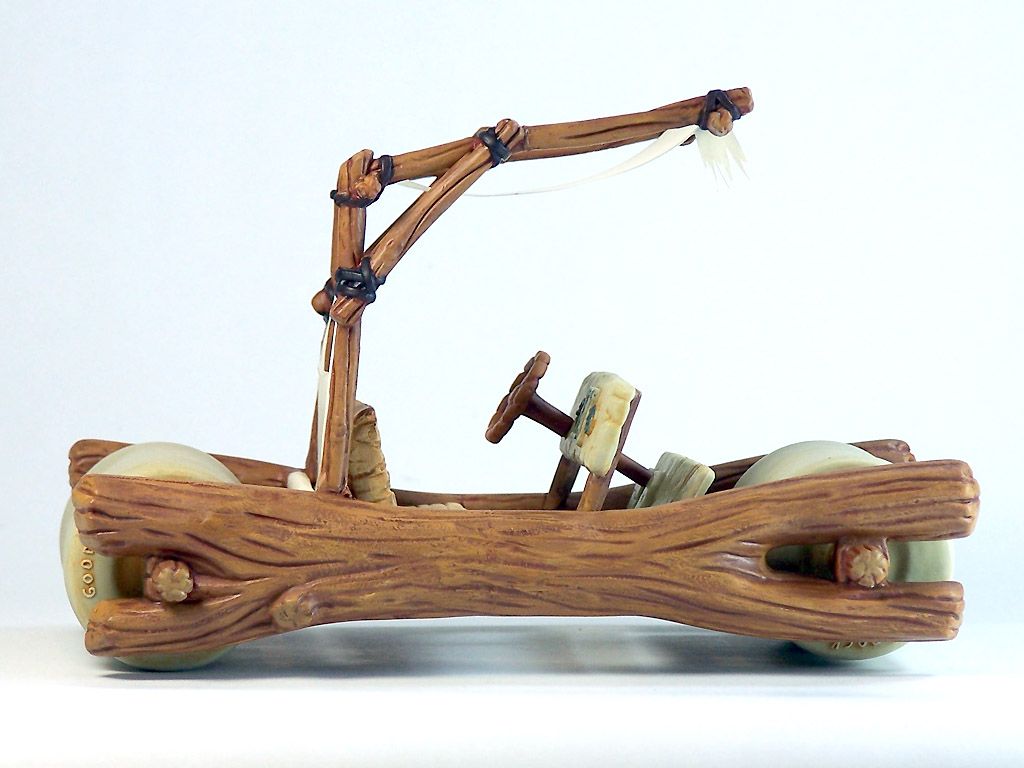 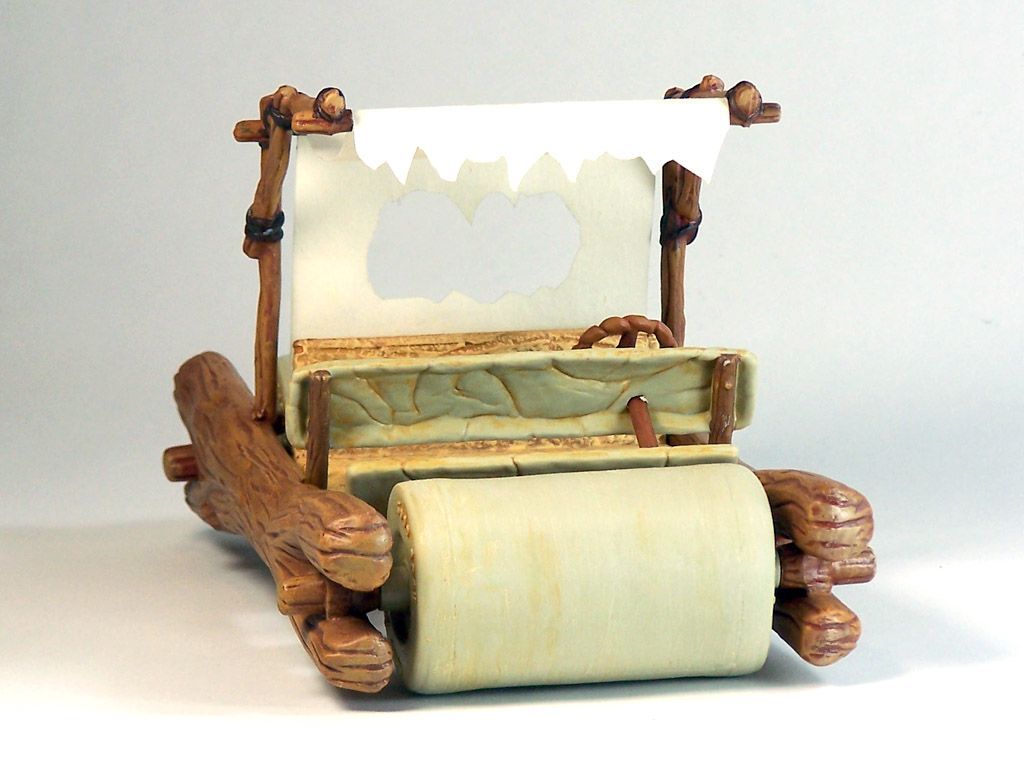 Just right for a couple of Stoner boys on a night out! |
|
|
|
Post by gfgcollects on Apr 12, 2012 23:35:08 GMT -6
|
|
|
|
Post by plastimatic on Apr 14, 2012 17:56:48 GMT -6
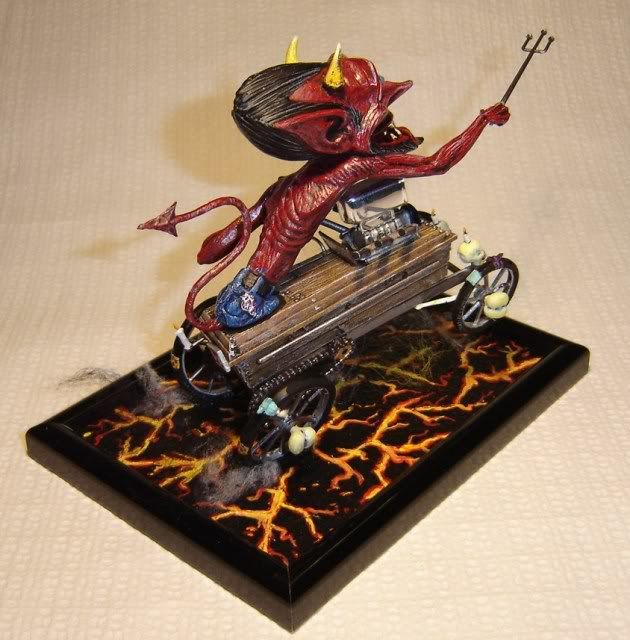
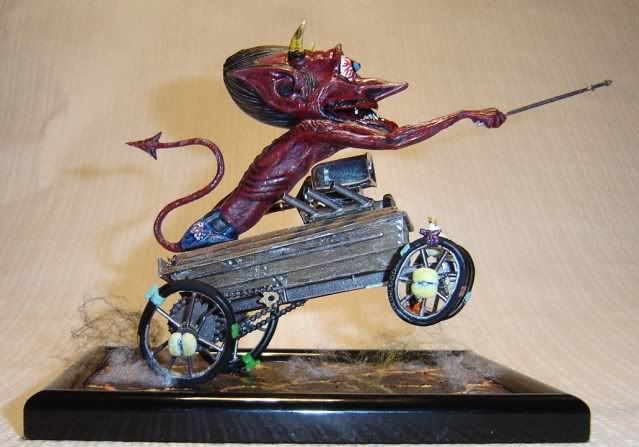
The Devil went out to Cali He was lookin' for a rod surreal Tho he did his best Nothin' passed the test 'Til he met a big guy named Deal.... The Devil's Deal: 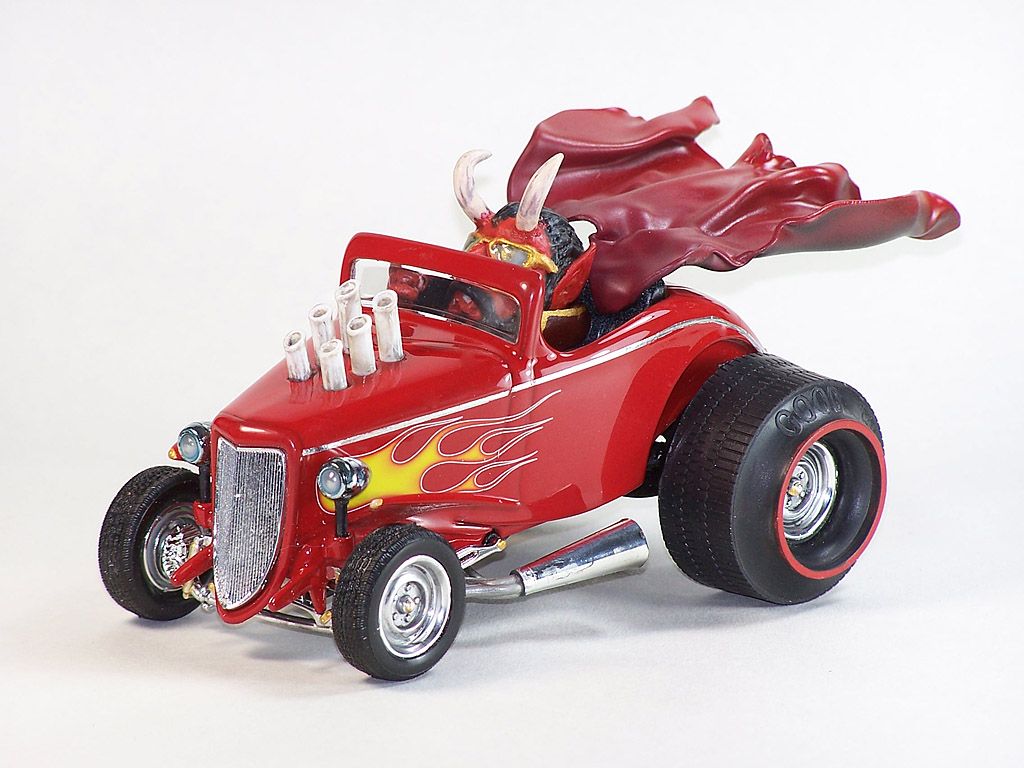 Started with a 34 Ford snap kit. Removed the roof, shortened the body and recut the cockpit. Scratch-built PVC interior with cut seat and dash. Satan is a modified Stink-Ray driver (some say it's Dave himself - heck, he already had the beard) and modified right hand from the Z-zz 28. Horns are twisted sprue, cape is torch-shaped sheet PVC. Cowl pipes are deformed PVC tube, which I had originally considered Alclading, but I like 'em as bone-takes ;D Rear Deal's Wheels have had 2 lines of tread removed. 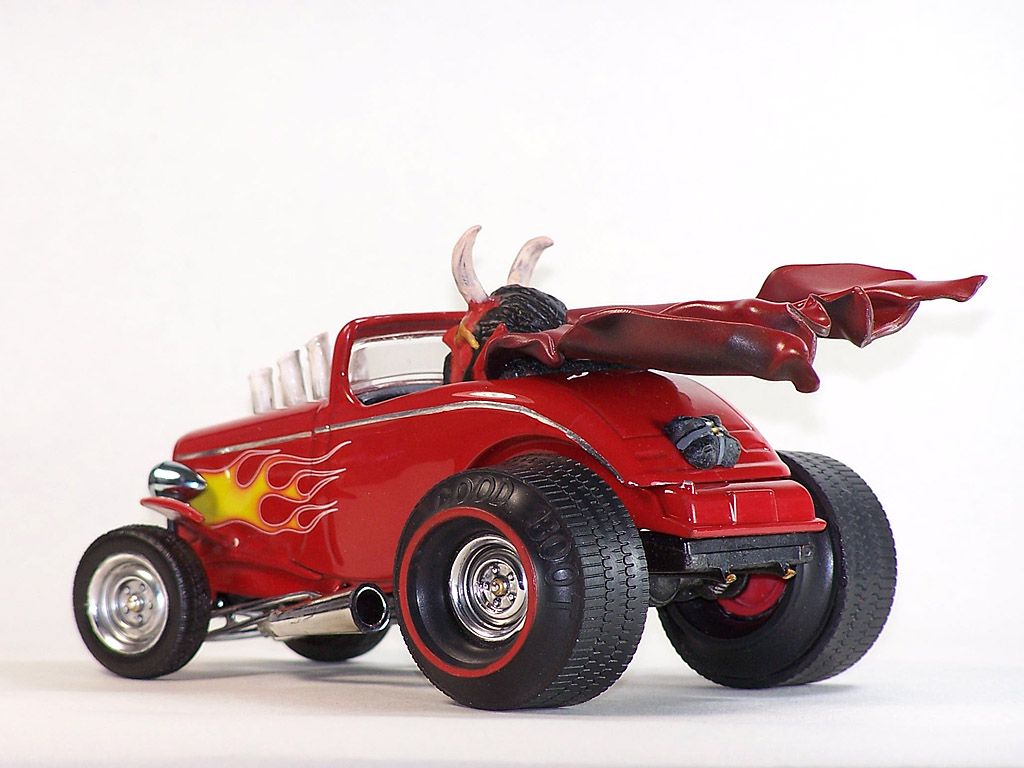 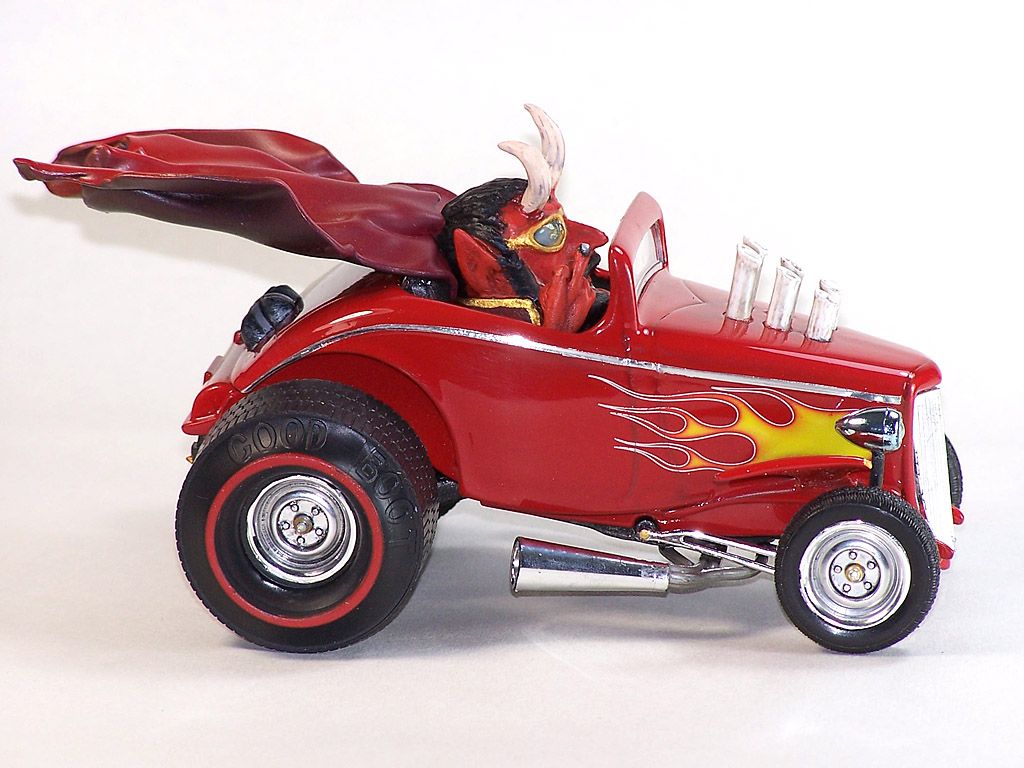 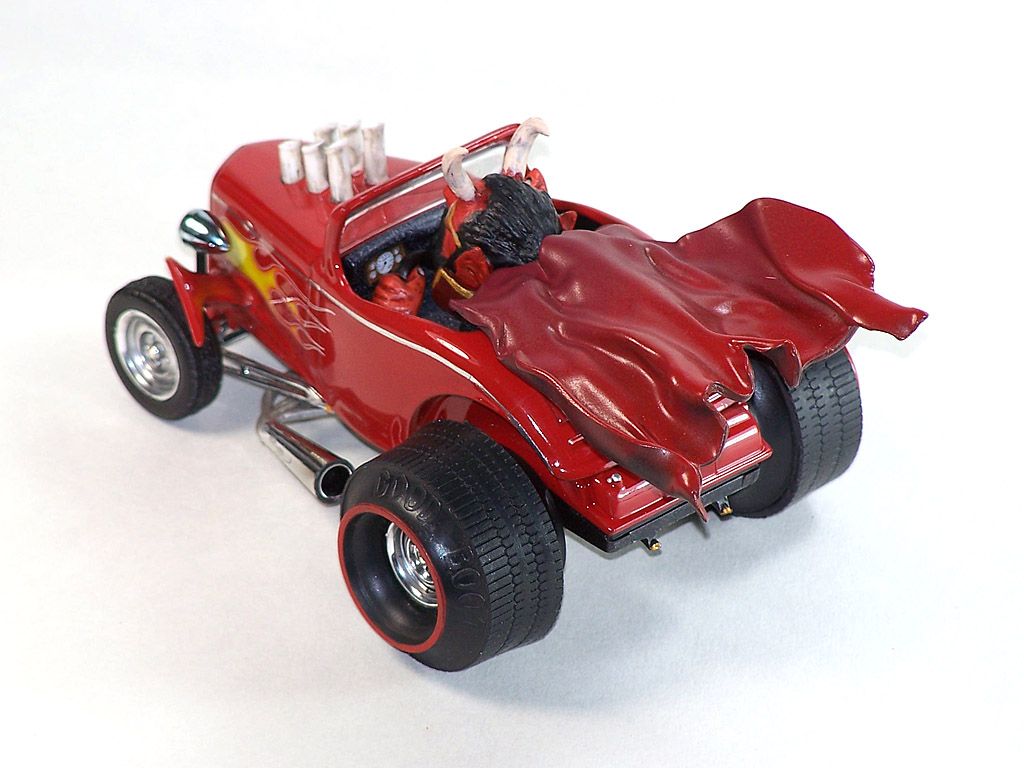 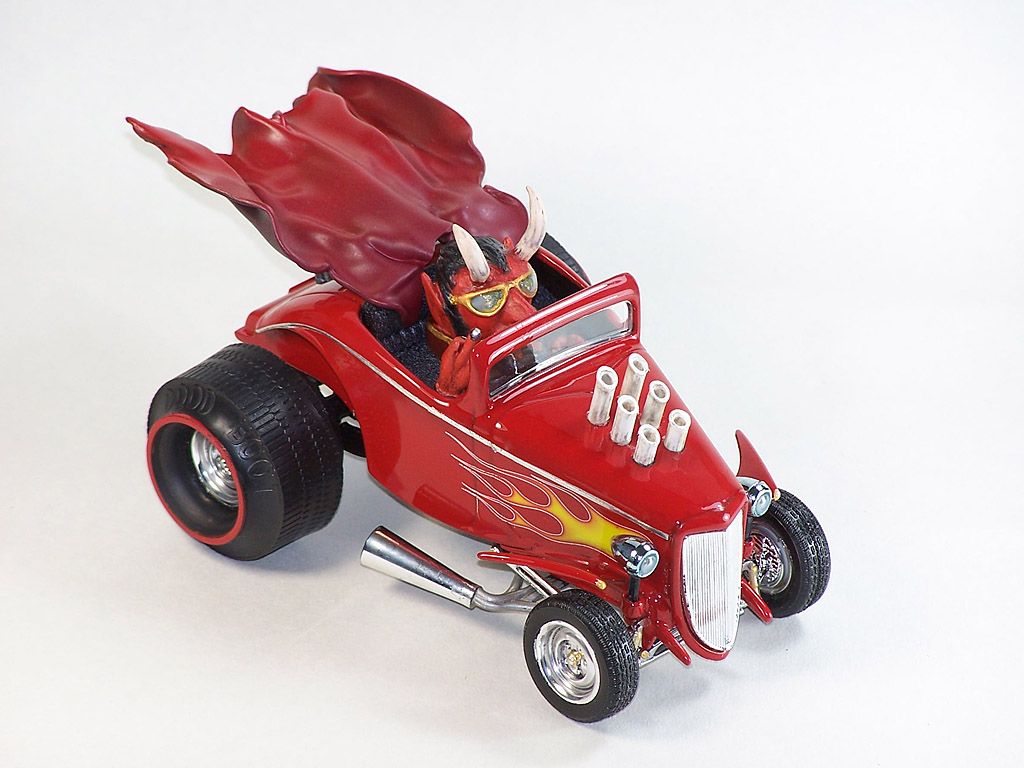 Capeless: 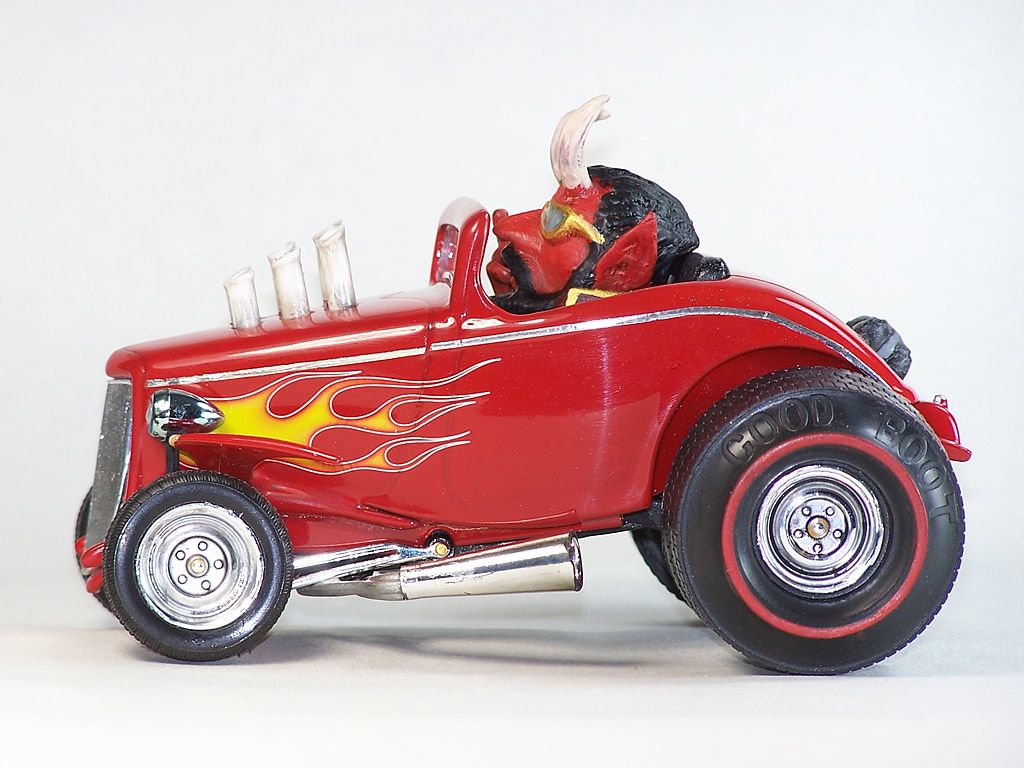 |
|
|
|
Post by badroadahead on Apr 15, 2012 12:40:40 GMT -6
Vegabond This is my first “Cartoon Car”. I started with a yard sale original 1974 Vega ($3) that was started and heavily glued. I cut up the body and “shrunk” the length and roof. I scratch built the tires (Firen - Brimstones)and dashboard. The interior is a flat sheet of styrene with the top of the seat cut off and glued. The model was missing the taillights and rear bumper so I scratched the taillights and used a bumper from the parts box. There was no glass either and I cut some from a thin clear binder cover. The supercharger and scoop are from the parts box. Side exhausts are from the S’Cool Bus. The color is a silver metalcote with translucent blue over it with a pearl on top of that followed by a few coats of clear. I hope you like it. Dave      |
|
|
|
Post by hobbybobby on Apr 15, 2012 16:01:43 GMT -6
|
|
|
|
Post by hobbybobby on Apr 16, 2012 16:09:00 GMT -6
Dracula`s DragsterThe AURORA kit was molded in all black, the POLAR LIGHTS kit is now a camel tan color and clearly marked with the PL logo and the new production date of 1999. There is no way of confusing a vintage kit wit this reproduction.  The main body of the car was sprayed with Tamya Spray cans, Dark Blue, Mica Blue, covered with Pearl Clear, the rest of the car and Dracula himself were hand painted in enamels and acrylics, and I dry brushed a lot... The martini glass (though not too politically correct by today’s standard) is a nice comedic touch to this kit. Molded in clear, I painted the inside flat red, then painted some veins onto the heart, topped off with a real wooden stake skewer. Assembling it in his hand, Dracula now has his “Bloody Mary” to go. This was a fun little kit, mostly boxstock, although the nice thing about these kits is the creative freedom. Hope you like it. 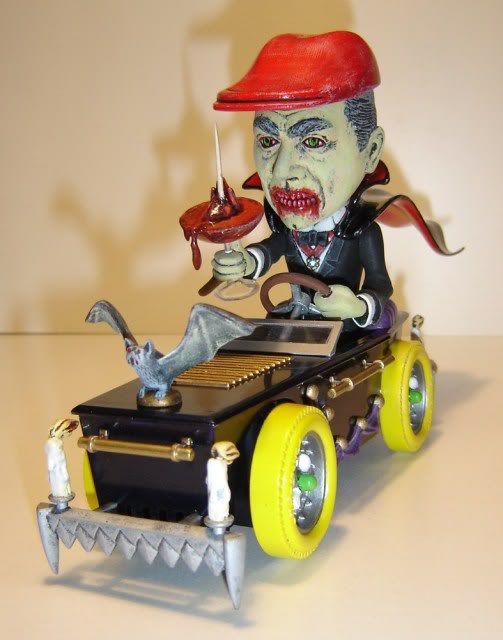 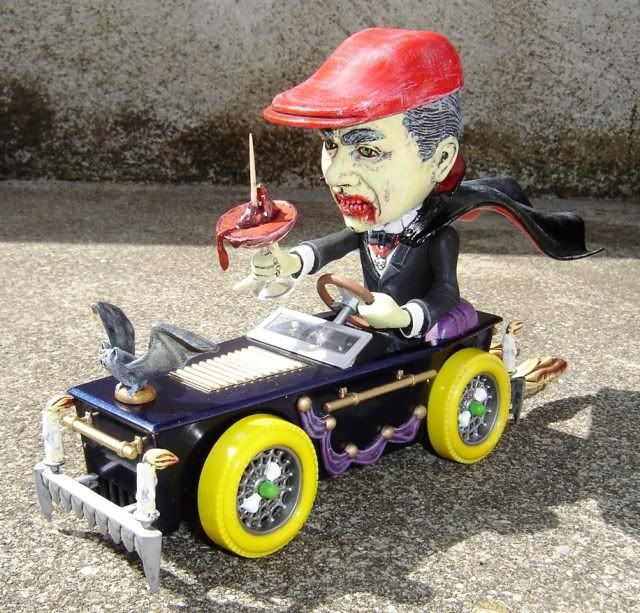 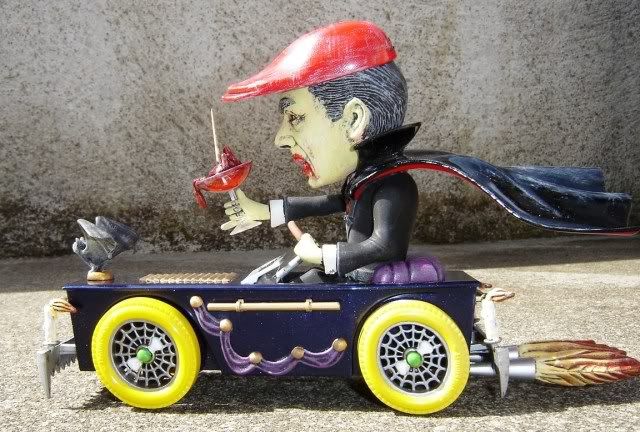 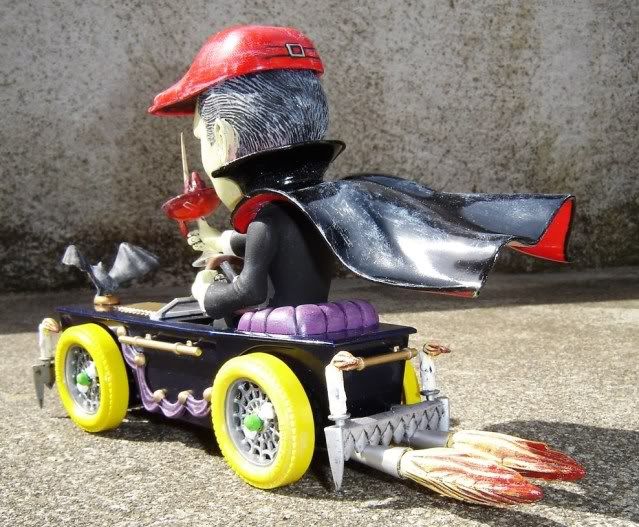 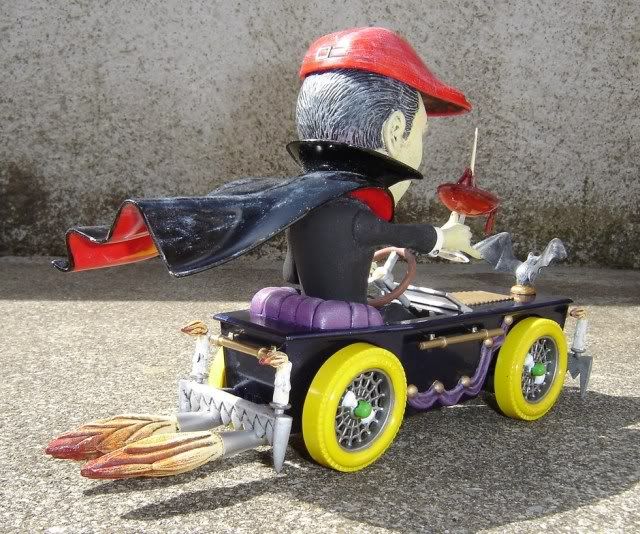 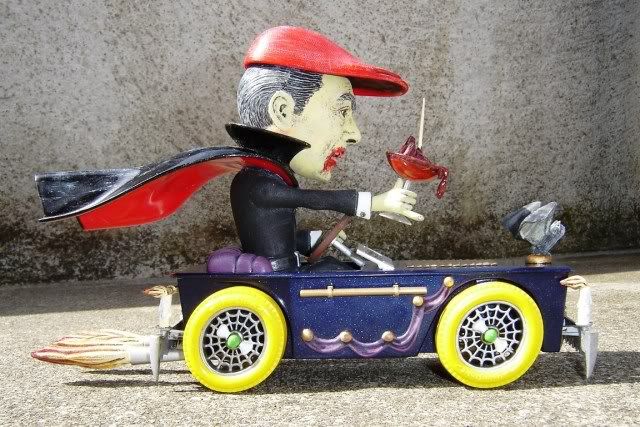 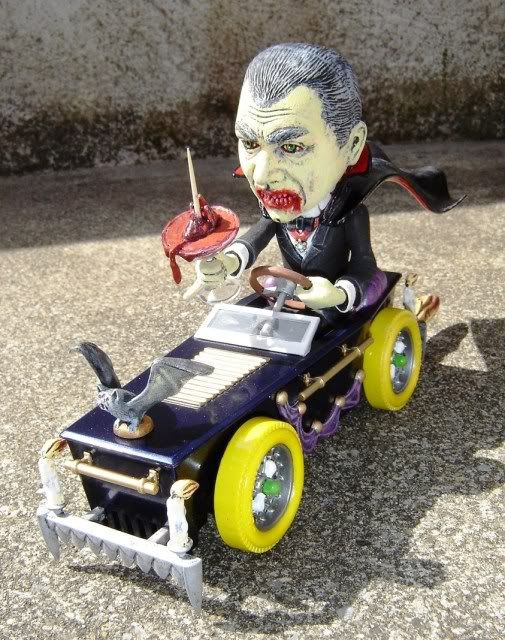
|
|
|
|
Post by gfgcollects on Apr 17, 2012 23:31:48 GMT -6
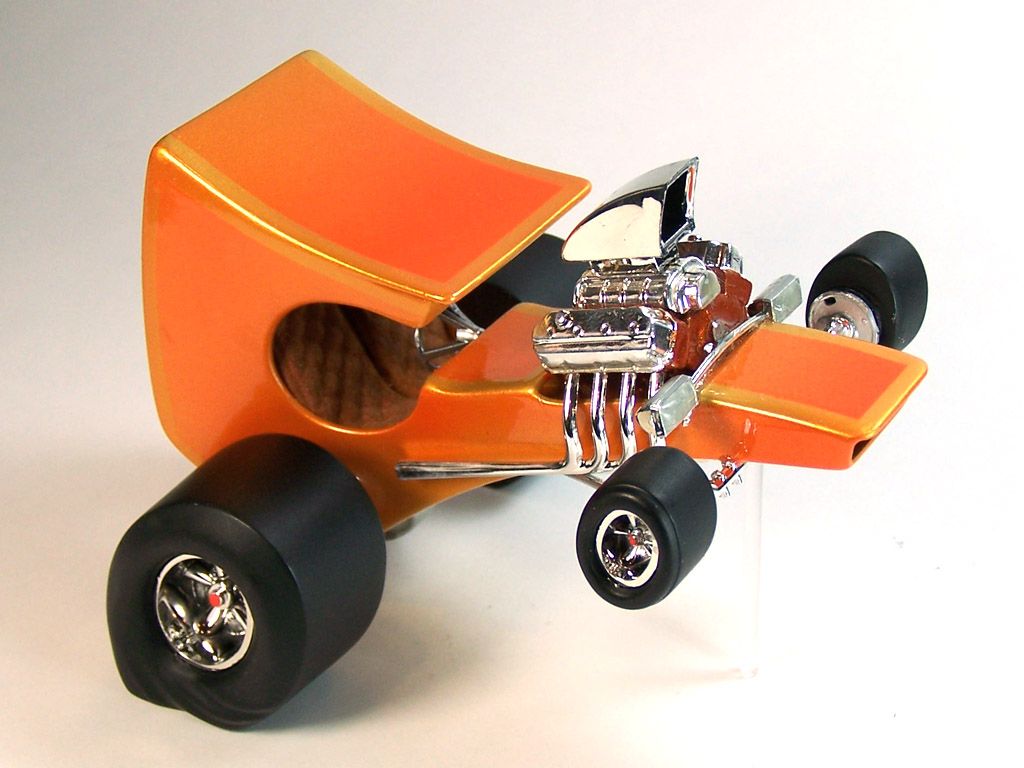
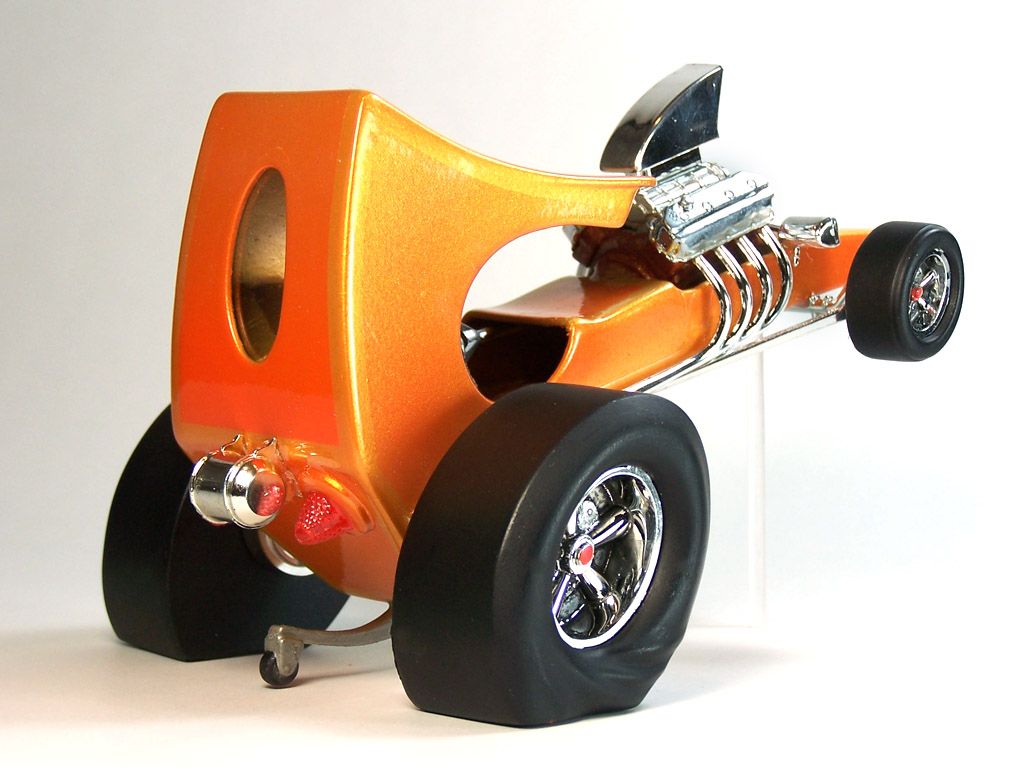
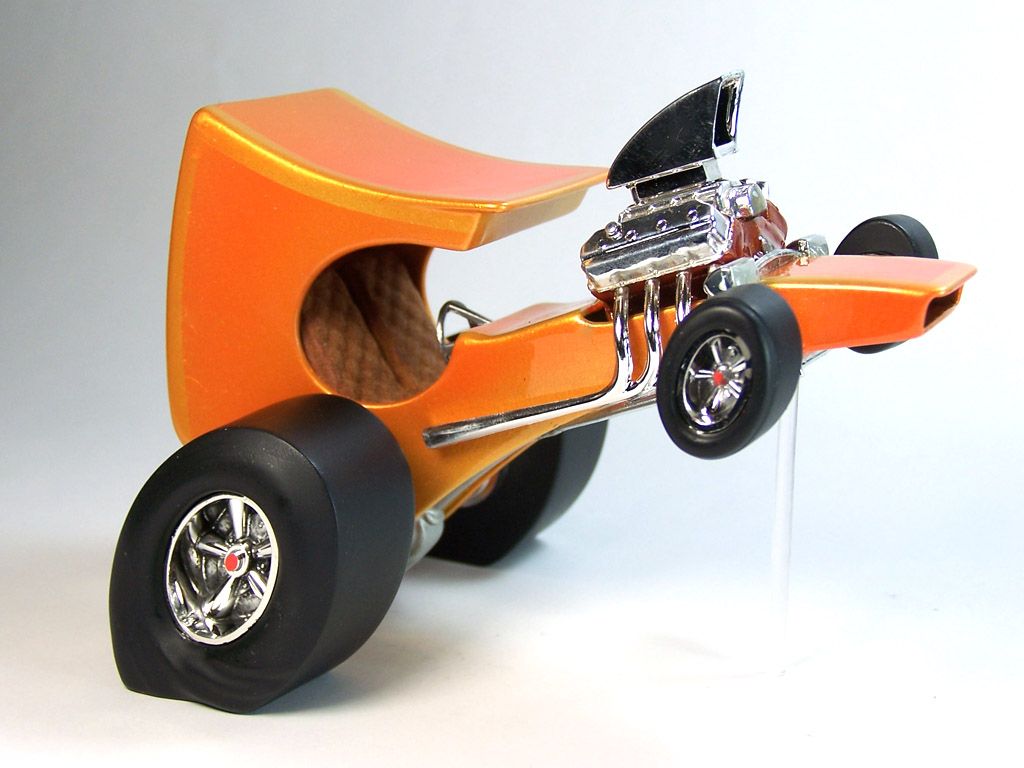
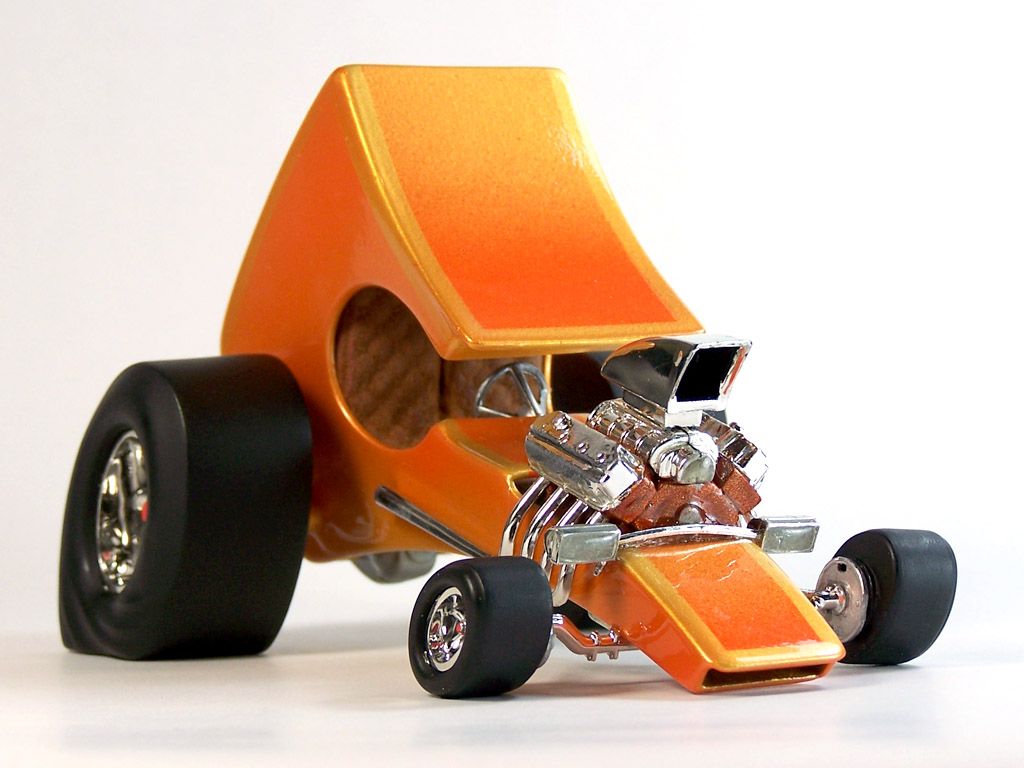
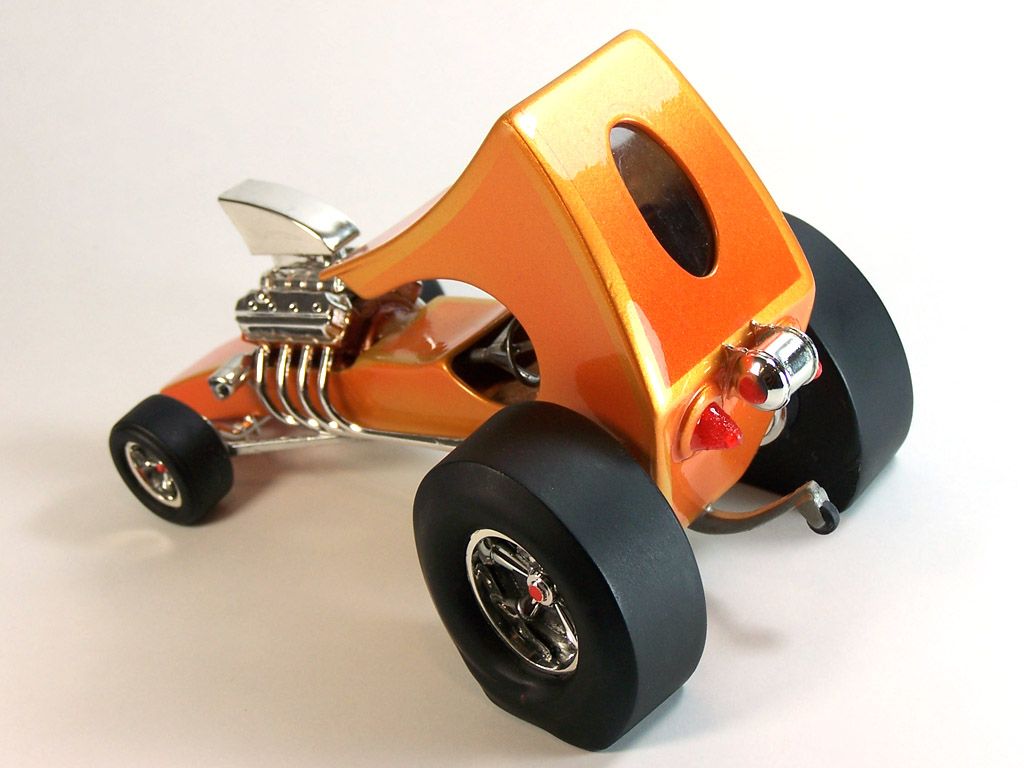
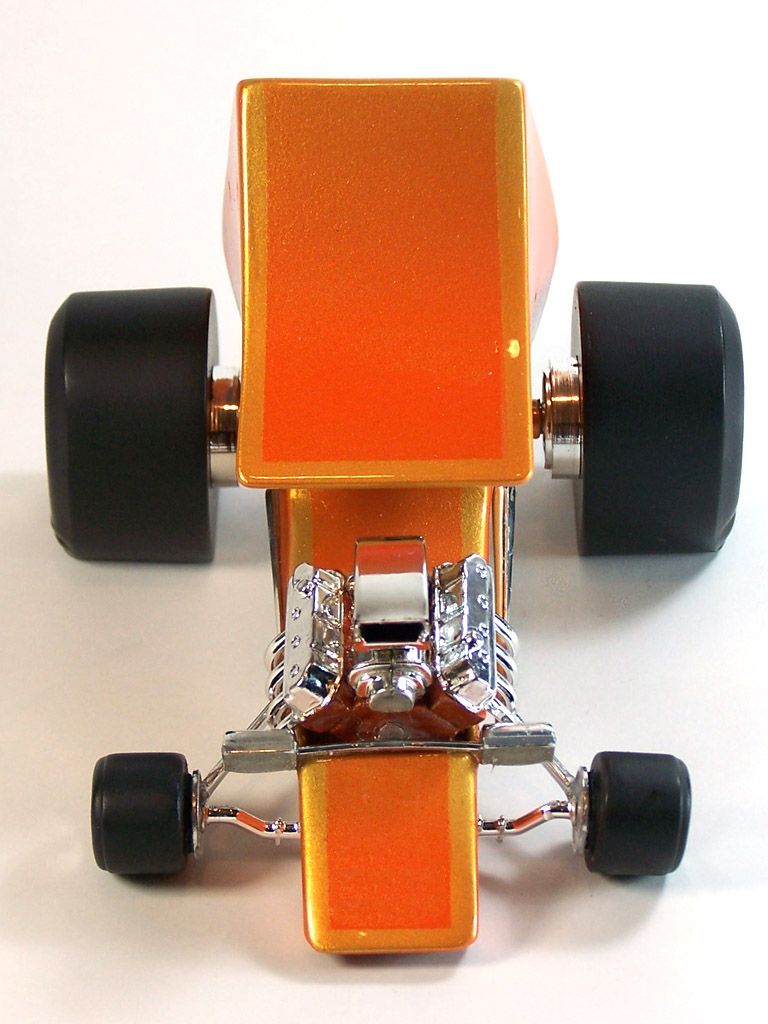
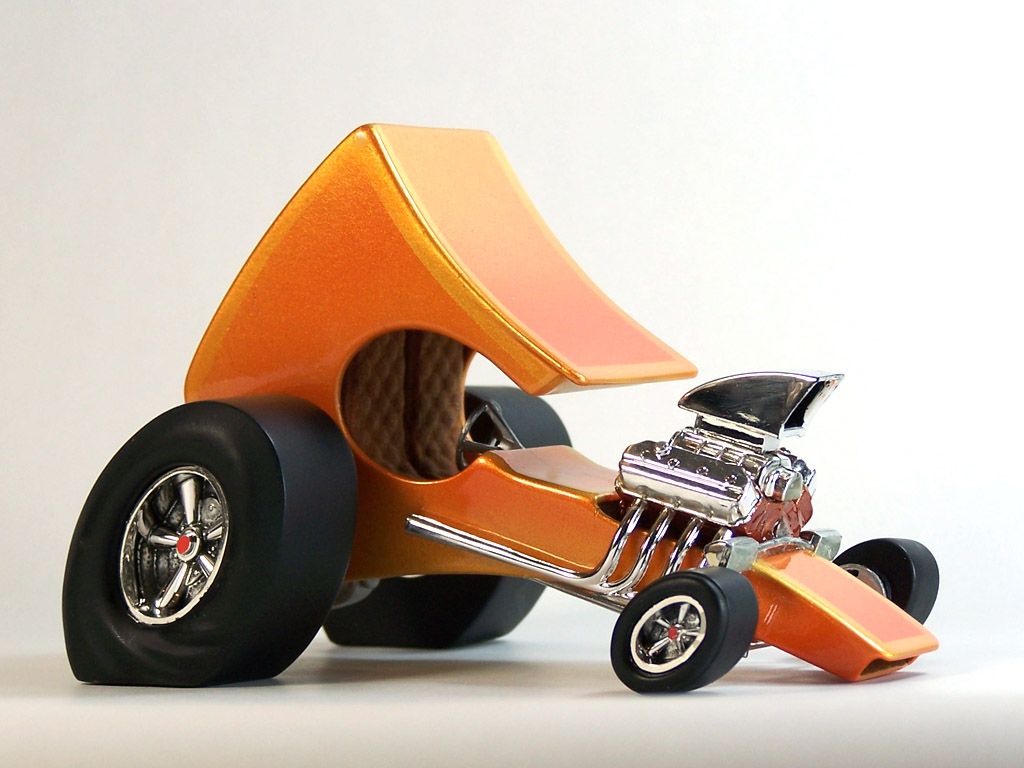
All righty then, here's my second foray into this genre... the Zzzzz 28.   Orange line tires?!? Must be Tiger Paws.     Time permitting I'll do the Van next, fingers crossed. ;D Gerry G |
|
|
|
Post by hobbybobby on Apr 26, 2012 2:23:23 GMT -6
Wolfman`s WagonBack in the early 1960's, following the success of several monster kits, the Aurora Plastic Company introduced six outrageous fantasy monster vehicle or "odd rod" kits. The Wolf Man's Wagon was one of these great "odd rods". This classic reissue of the Wolf Man's Wagon was produced by Polar Lights using the same molds as the original from Aurora. The main body of the car was sprayed with Tamya Spray cans, Mica Red, over a silver base, same on the shifter ball, the rest of the car and Wolfman himself were hand painted in enamels and acrylics, and I dry brushed a lot... This was a fun little kit, mostly boxstock, although the nice thing about these kits is the creative freedom, the only thing that's changed is the shifter, and the horn bracket. 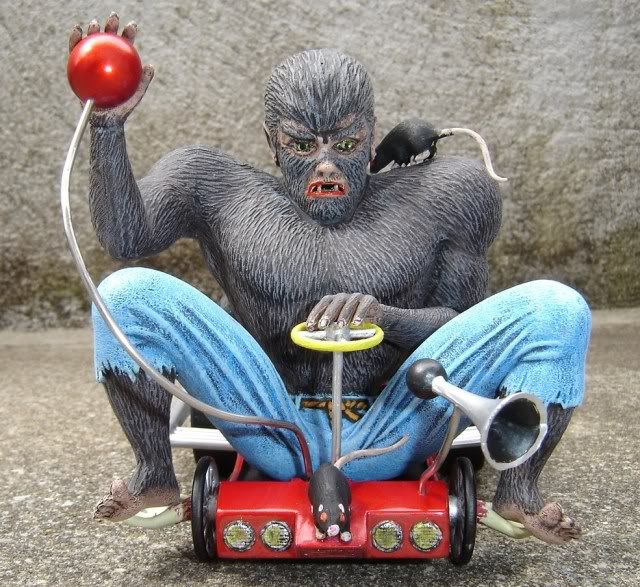 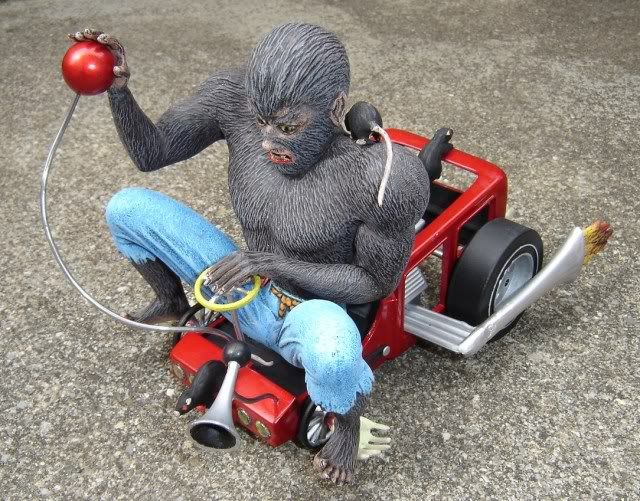 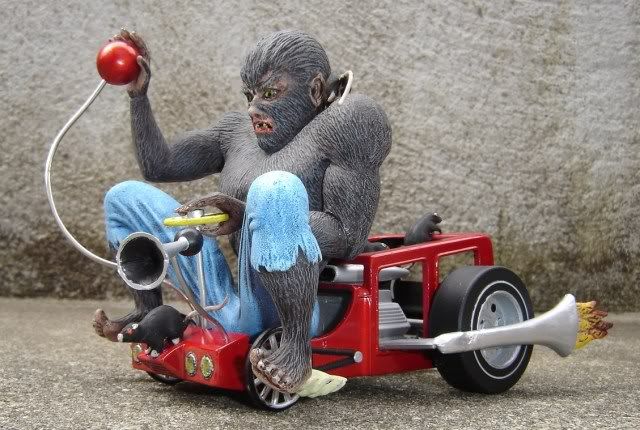 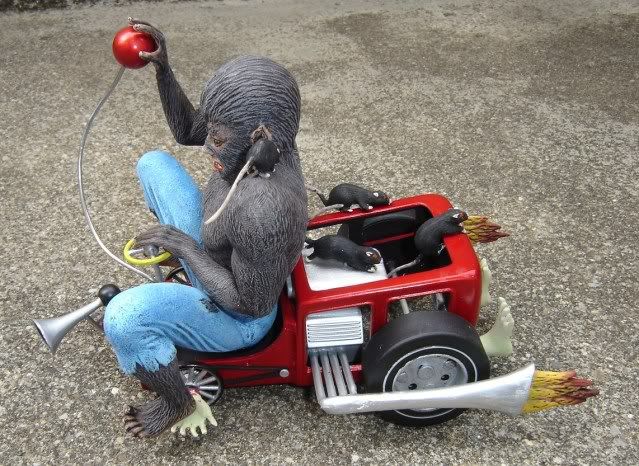 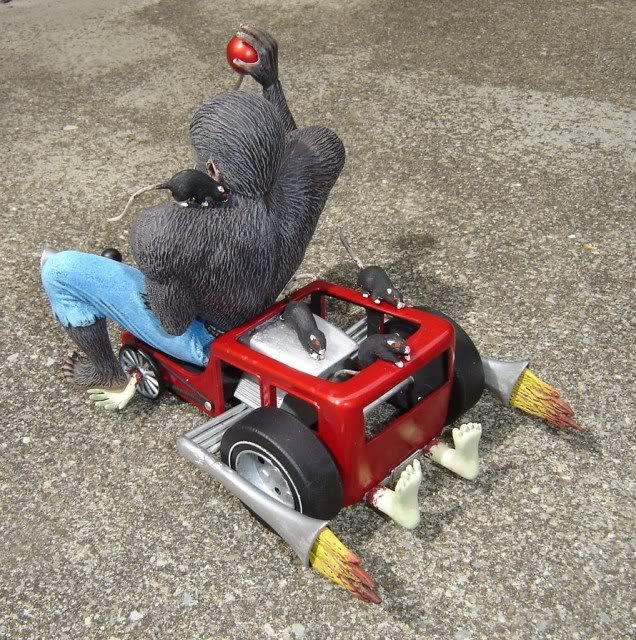  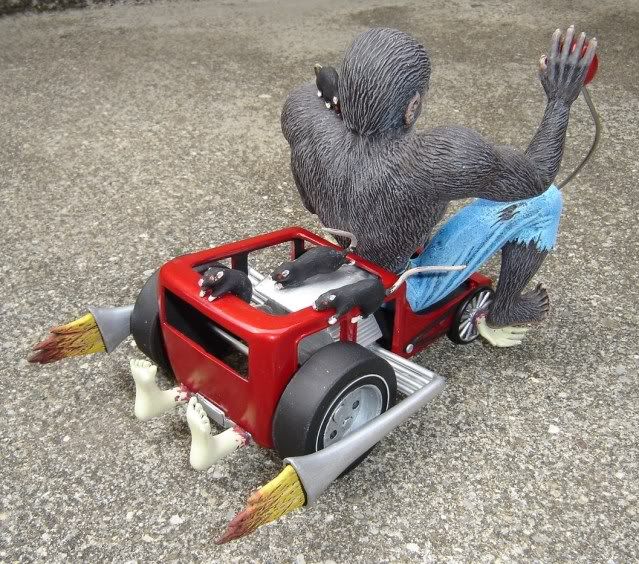 
|
|
|
|
Post by hobbybobby on Apr 26, 2012 2:53:55 GMT -6
Huey`s Hut RodThe "Weird-Oh's" kits were designed by Bill Campbell, and were originally released by Hawk in the sixties. These comical kits featured bug eyed, big toothed monsters, crazed race car drivers, wacky beach bums, and far out rock and rollers. This one is made by LINDBERG from the original HAWK vintage molds. All parts sprayed with Spray can, flat black, then hand painted in enamels and acrylics, and I dry brushed a lot... This was a fun little kit, mostly boxstock, although the nice thing about these kits is the creative freedom, the only thing that's changed is the shifter, the hat, hair & added fuel line. 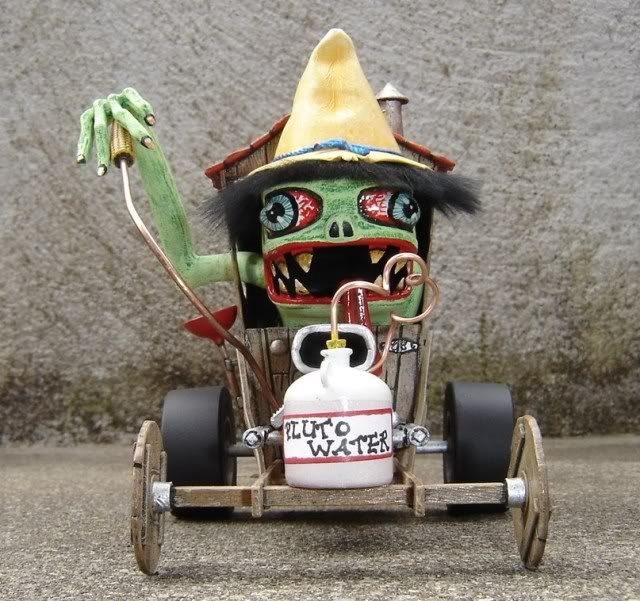 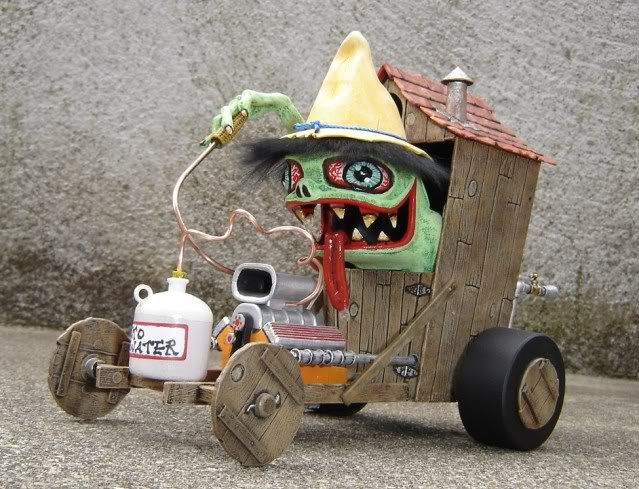 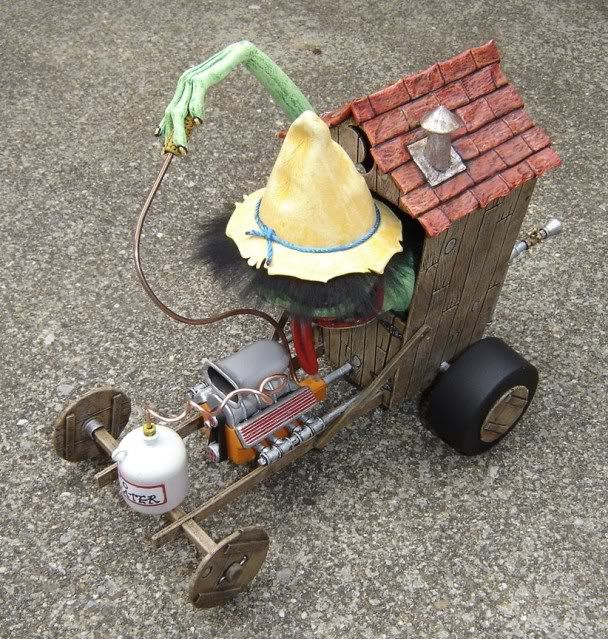  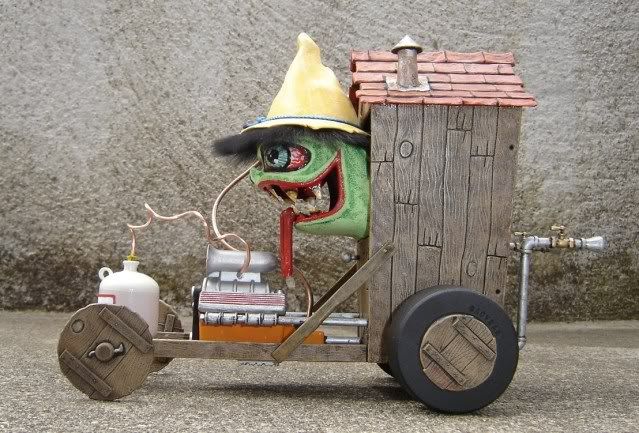 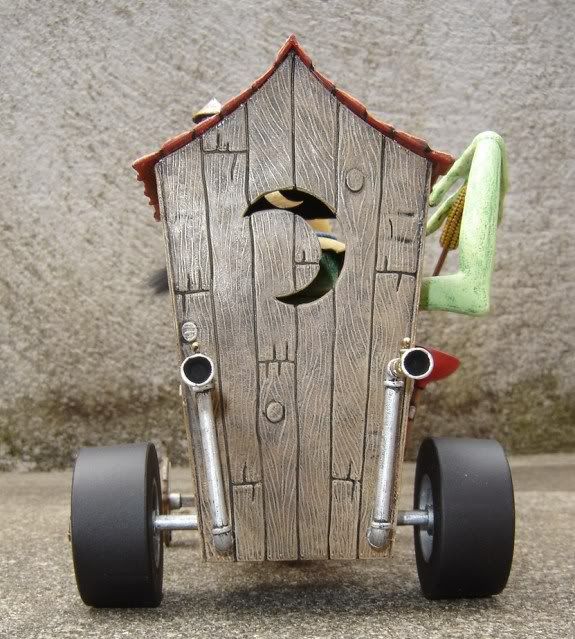 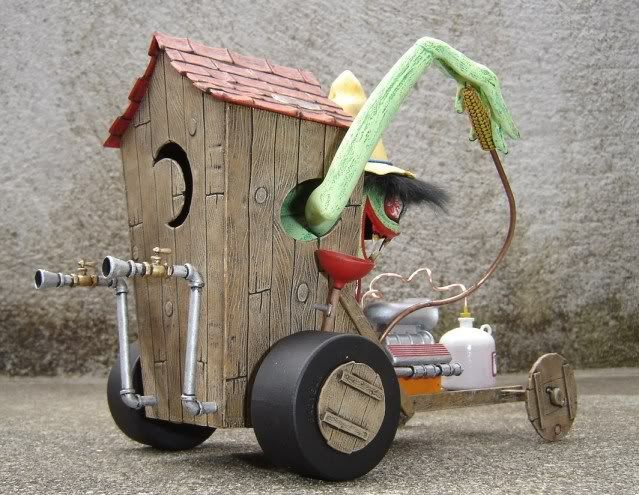 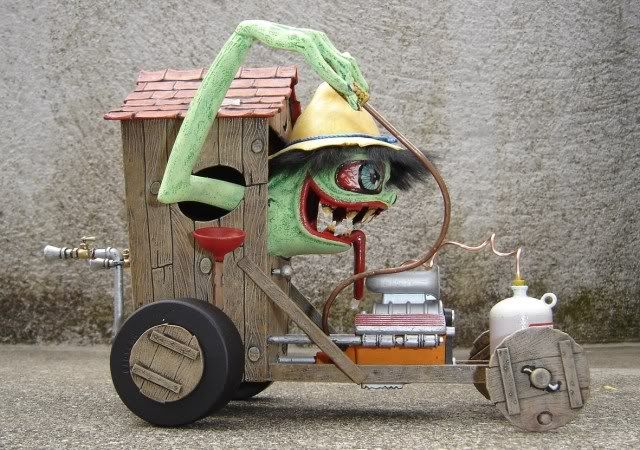 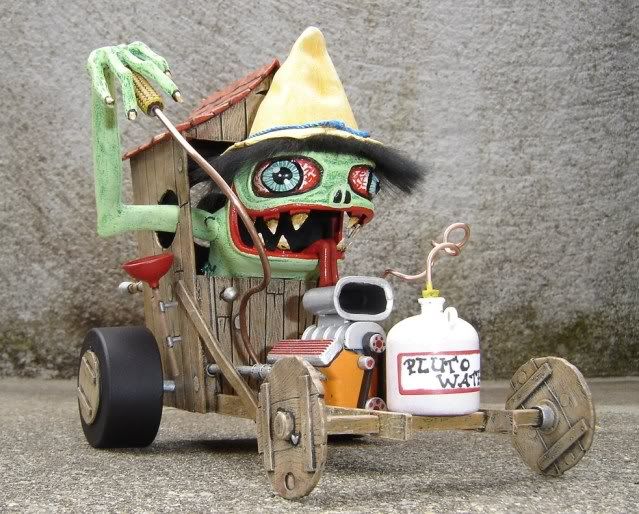
|
|
|
|
Post by carl2404 on Apr 29, 2012 12:05:24 GMT -6
|
|
|
|
Post by itsonlyakit on May 5, 2012 22:38:08 GMT -6
Deals Wheels ZZZZzzzzzzzz28  Engine replaced with wired, blown chevy, gear shift and gauges added to interior. Driver painted in oils after radical nose job. Overhead shot, note wooofur speaker in back window 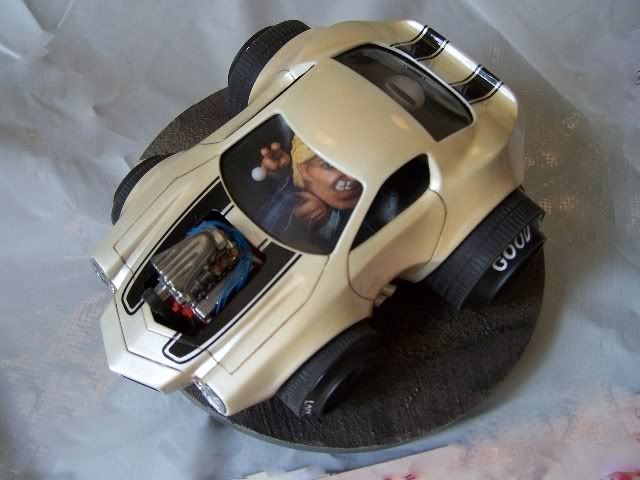 Paint is createx white pearl, chalk shading and rattle can clear. |
|
|
|
Post by hobbybobby on May 7, 2012 11:53:07 GMT -6
The Flintstone`s FlintmobileSnap Fit 1/20 scale plastic Model Kit, 1994 (skill level 1, no glue required)... Yabba-Dabba-Doooo!! The Flintmobile was cartoon caveman Fred Flintstone's snazzy set of wheels. In fact, that was ALL it was - a set of wheels, it had no engine. The car was "Fred-powered." Fred would have to put his feet to the earth and run like mad to pick up speed... and then he could lift his legs and zoom along! All parts sprayed first with a Spray can, flat black, then hand painted in enamels and acrylics, and I dry brushed a lot... This was a fun little kit, boxstock. The only thing missing is a giant rack of Brontosaurus ribs! The Flintmobile, ready to cruise Bedrock in style, here the pics, hope, you like it. 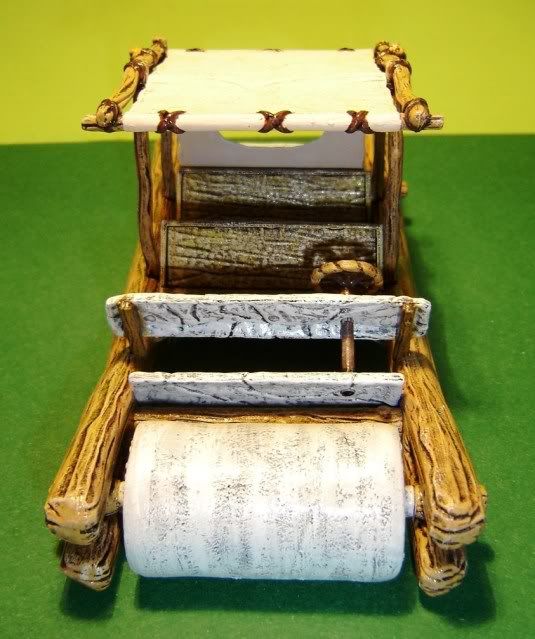 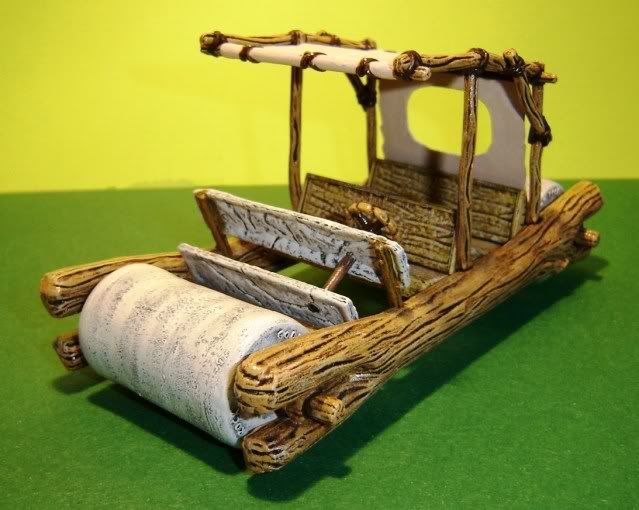 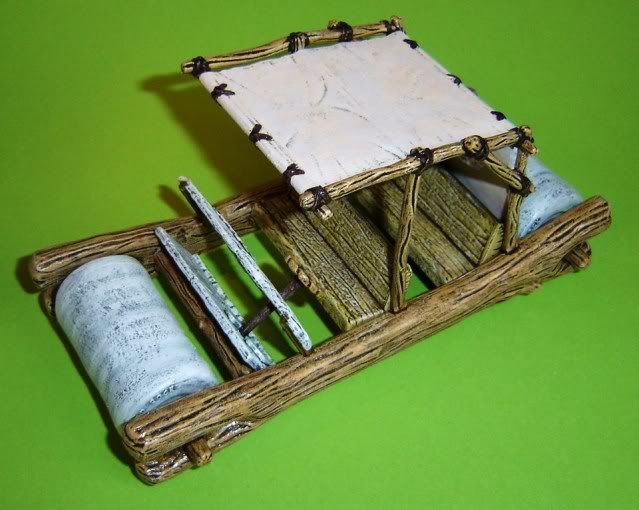 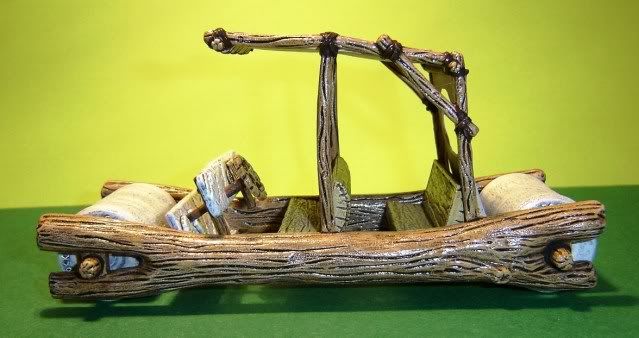  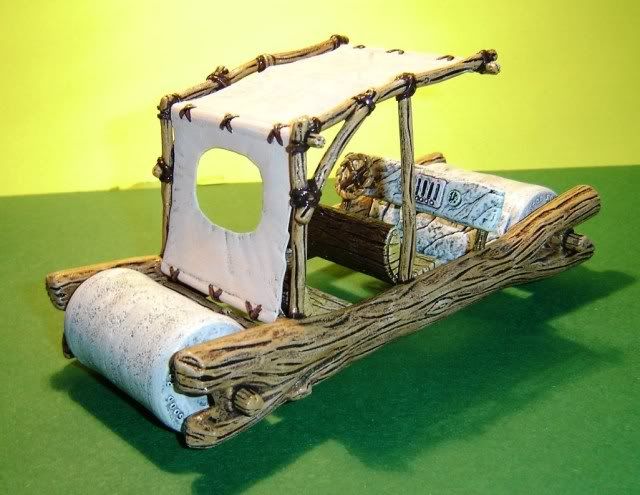   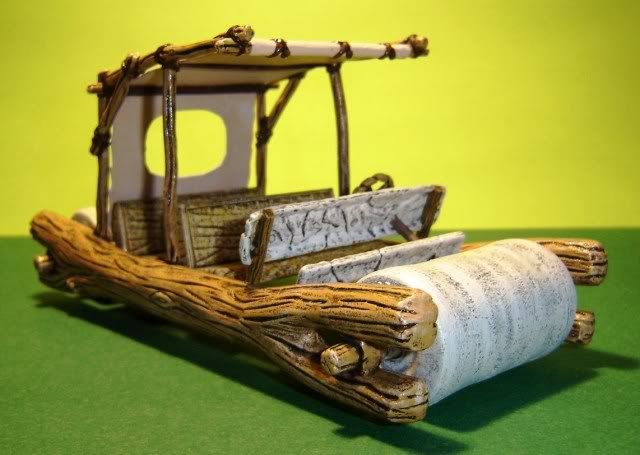
|
|
|
|
Post by hobbybobby on May 8, 2012 4:30:44 GMT -6
The Flintstones - Le Sabretooth 5000Snap Fit 1/20 scale plastic Model Kit, 1994 (skill level 1, no glue required)... Yabba-Dabba-Doooo!! If you haven't seen the movie yet, I will only say that Fred Flintstone gets caught up in a scheme to embezzle a large amount of money from Mr. Slate, the owner of the quarry. At one point, Fred finds himself with enough dollars to enjoy a lavish lifestyle a la Bedrock. I only know of two kits that were made based on the movie, both were by Lindeberg. The Flintstone's family car and Fred's little indulgence, the Le Sabretooth 5000. All parts sprayed first with a Spray can, flat black, then hand painted in enamels and acrylics, and I dry brushed a lot... The car was a blast to build, boxstock. That's something about kits like this that makes them lots of fun: you can color outside the lines!! Le Sabretooth 5000, ready to cruise Bedrock in style, here the pics, hope, you like it. 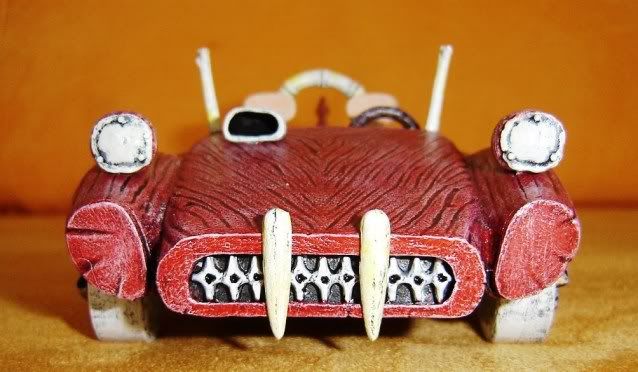 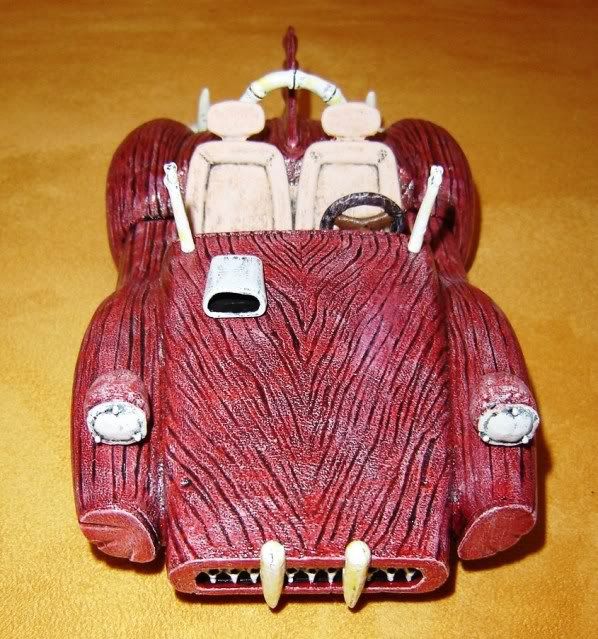 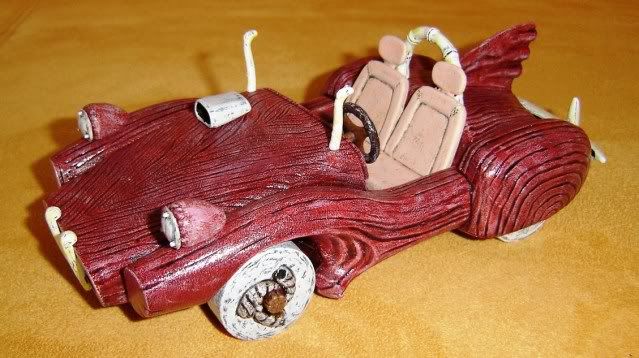 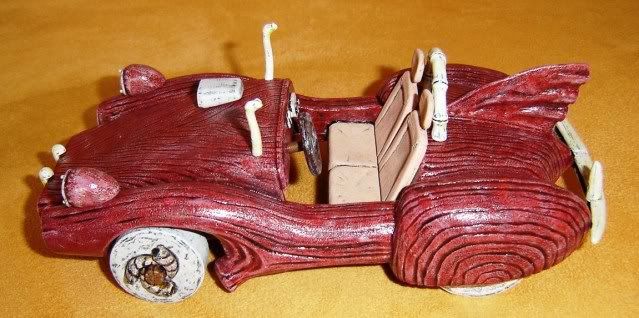  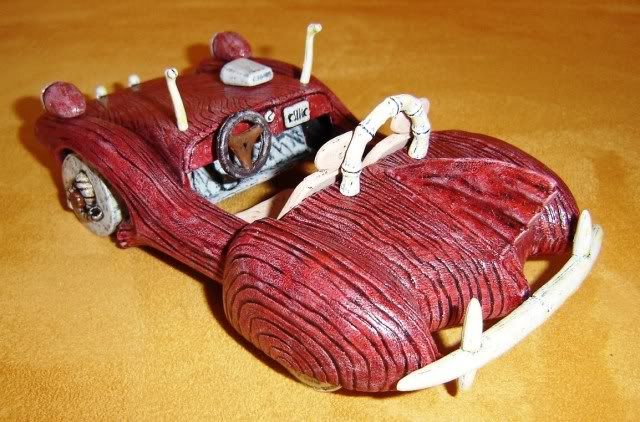 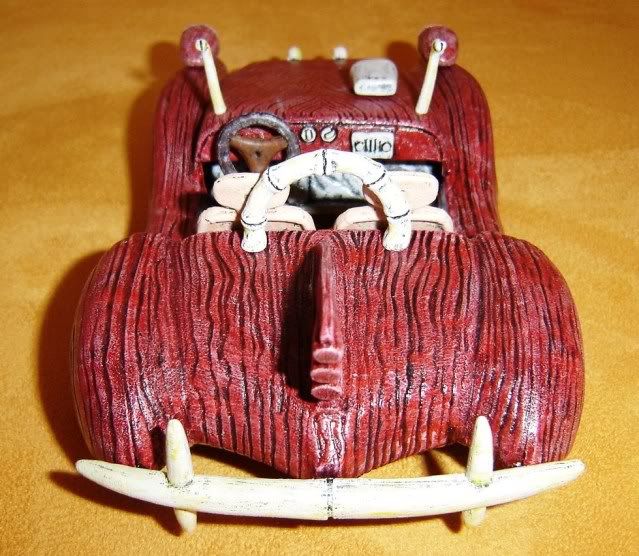 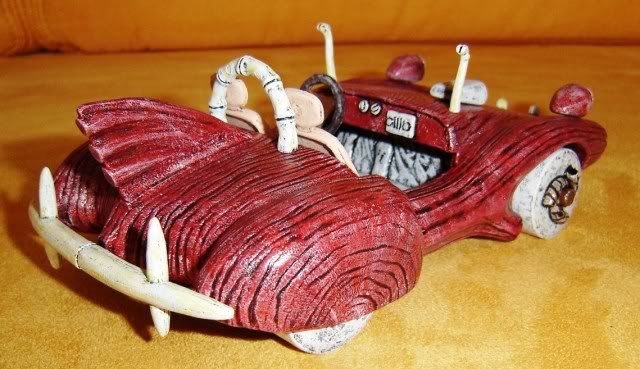 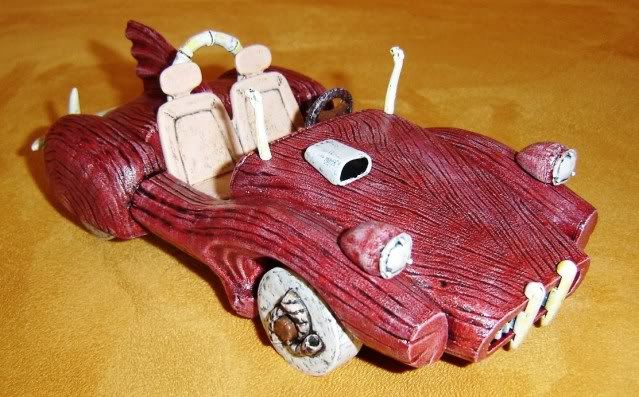
|
|
|
|
Post by scotttansley on May 9, 2012 7:55:29 GMT -6
|
|
|
|
Post by hobbybobby on May 9, 2012 18:23:57 GMT -6
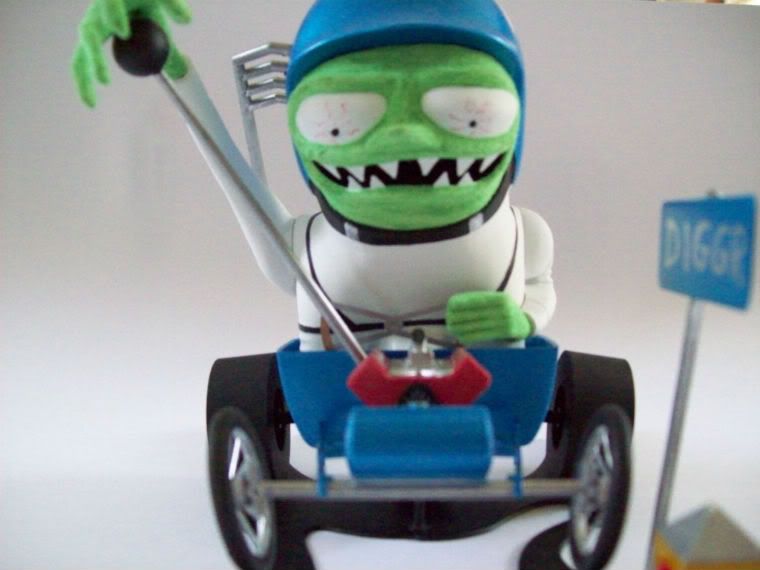
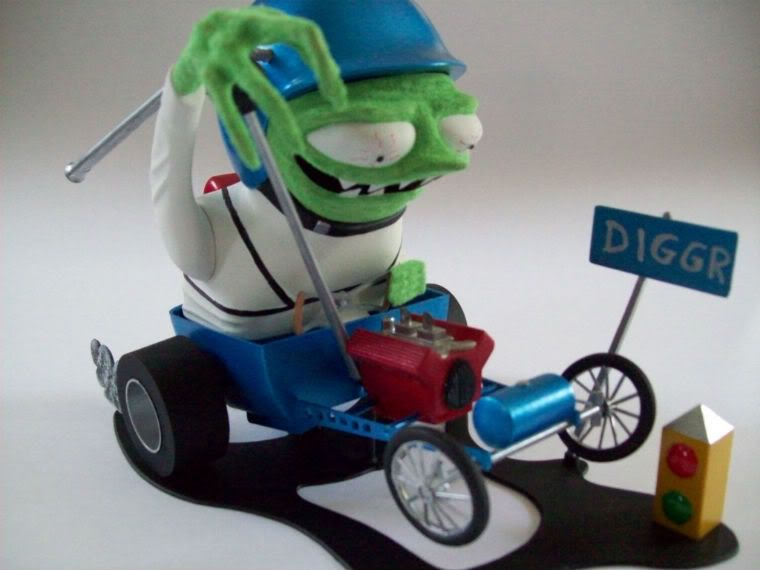
The Go CartThe Aurora Godzilla's Go Cart2.bp.blogspot.com/_JWRaqDnEIzk/S58EeSI_0aI/AAAAAAAAAM4/vweLeDAHepU/s1600-h/Go-Cart.jpgThe Aurora Godzilla's Go Cart kit was manufactuered in 1966. A 1/12 scale model kit molded in green and yellow plastic, this was kit number 485 in the Aurora line. This kit is considered by many to be the single most desirable and most elusive of all Aurora monster kits, and the box alone can cost a small fortune. Aurora was forced to stop production on the kit by Toho because it apparently "demeaned" Godzilla's trademark. Meaning, one supposes, that Goji wouldn't ride a go cart.  Soo... The Polar Lights Go Cartwww.timemachinetoys.com/polarlights/PLGoCart.JPGReproduced from the original rare Aurora kit by Polar Lights, in 1999, this kit was only on the market for about a year, before Polar Lights discontinued production. Polar Lights did not have the proper licensing to produce and sell this kit with the likeness of Godzilla. The subsequent law suit made the production run and public sales limited. I have the Polar Lights version, The Go Cart... ;D The main body of the cart was sprayed with Tamya Spray cans, light Blue, covered with clear, the rest and Goji himself were hand painted in enamels and acrylics, and I dry brushed a lot... The kit has always been a grail for me, It took many years to get it, and even more to build it, finally I made it! Almost boxstock, a few small changes, the wheels are modified DW `s, therefore the brake had to be repositioned and some engine details... The only thing missing is this, eye glass, I've searched everywhere, no idea where that is, so I leave this hole in the nose, if this part shows up again someday... Here are the pics, hope, you like it. 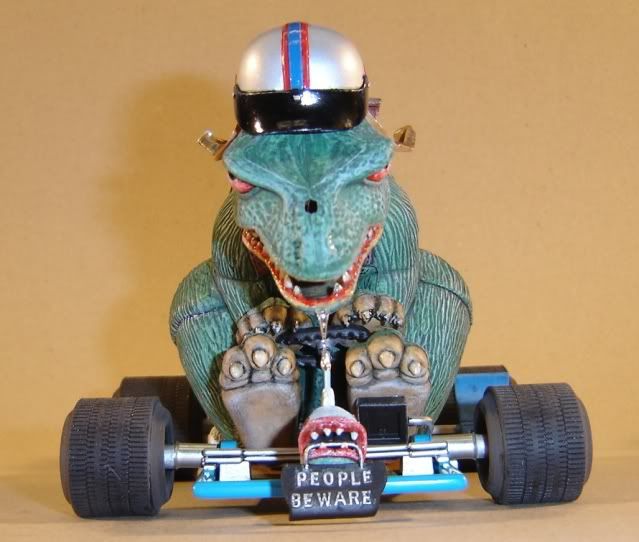 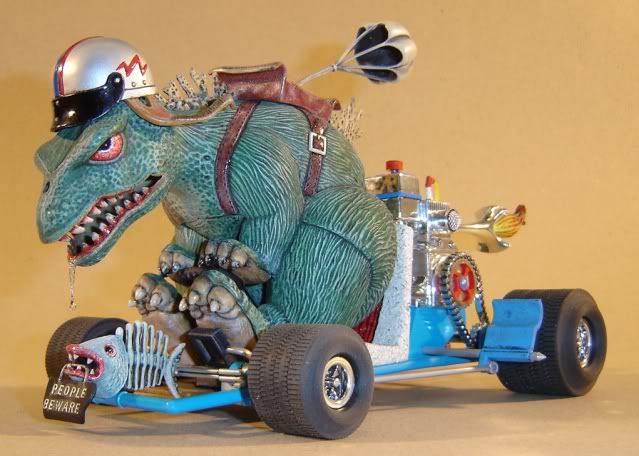 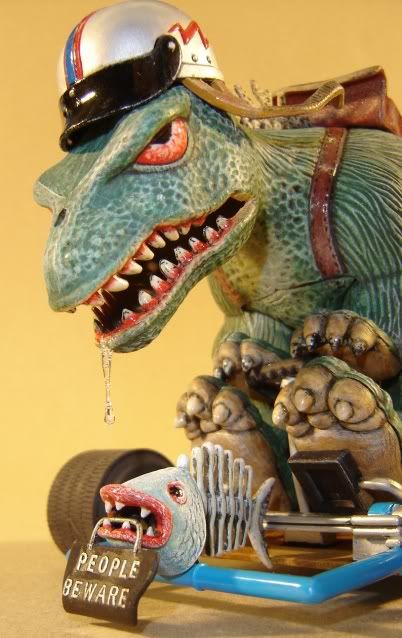 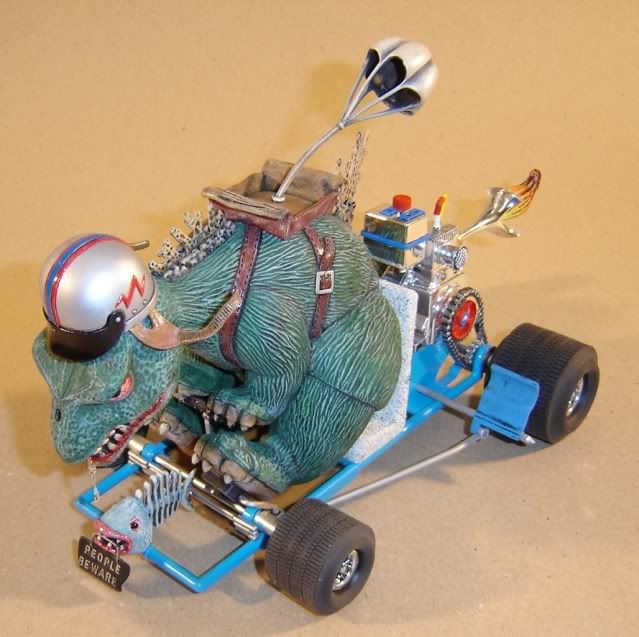 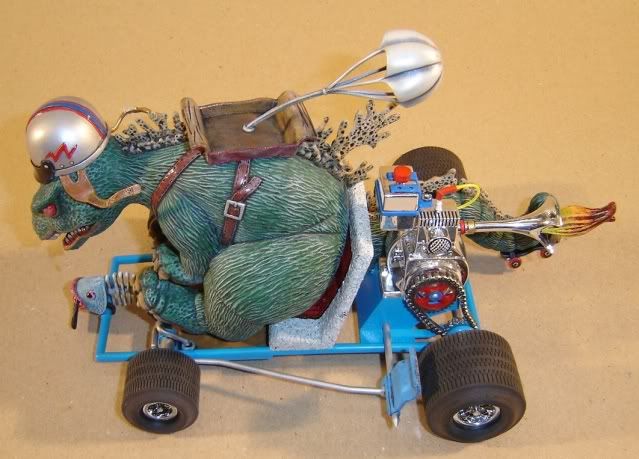 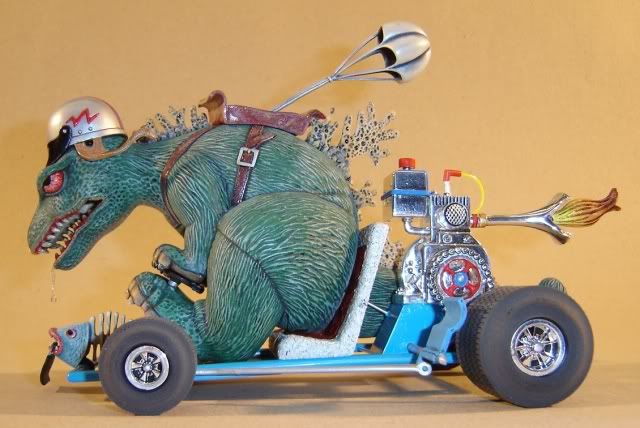 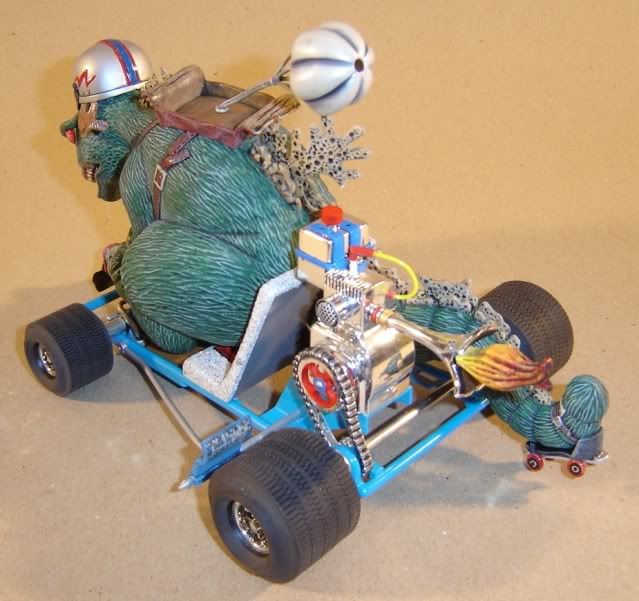 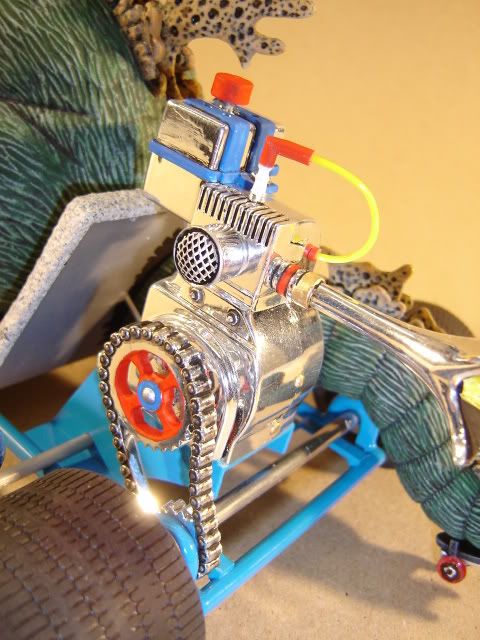 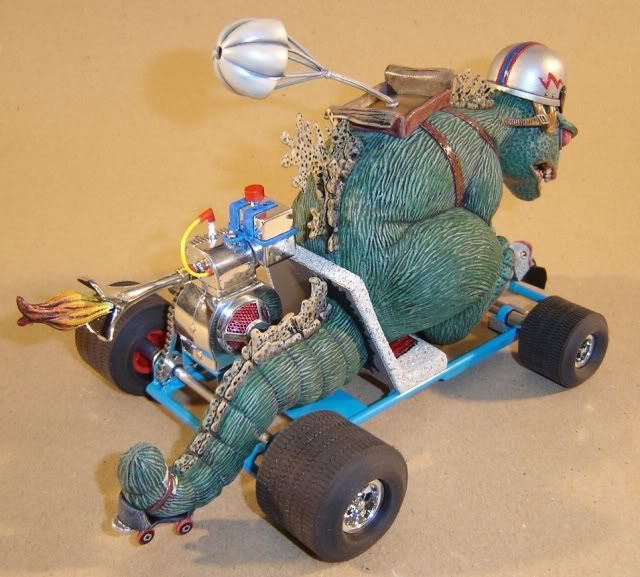 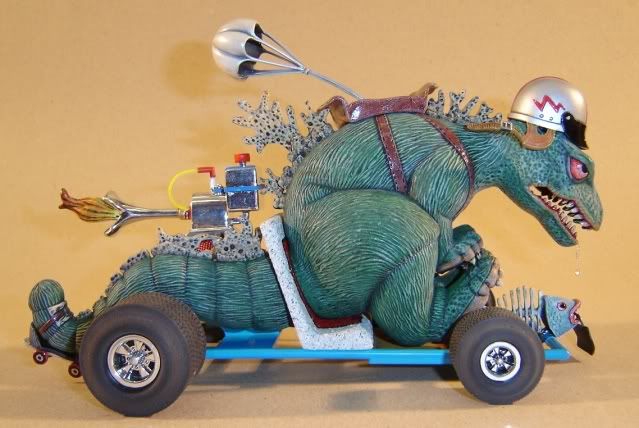 
|
|
|
|
Post by itsonlyakit on May 11, 2012 1:04:15 GMT -6
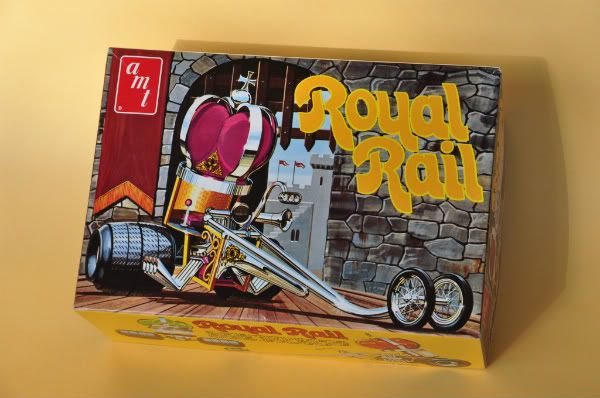 Royal Rail Box Art 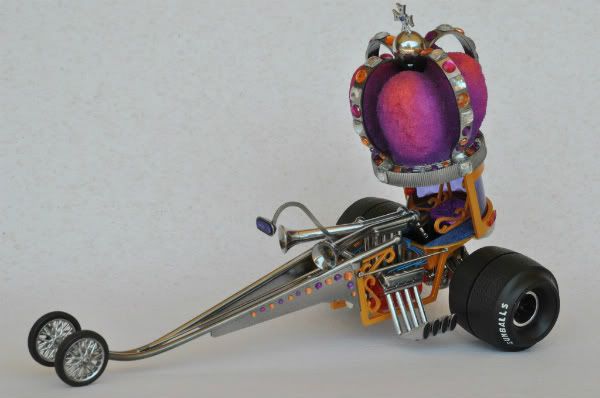 Royal Rail Show Rod  Show car (diorama) as entry at a custom car show 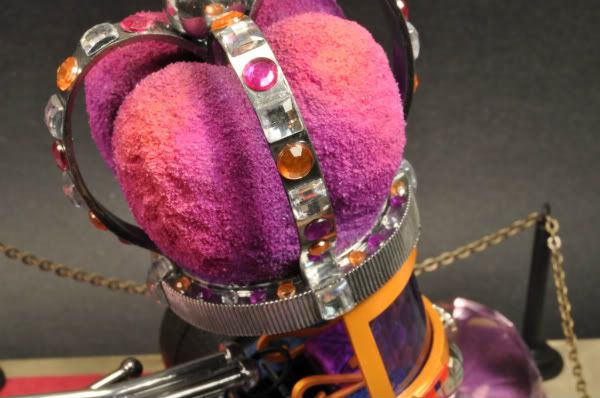 Detail shot of crown, many extra jewels added. |
|
|
|
Post by modelcarfan on May 11, 2012 10:25:31 GMT -6
|
|
Deleted
Deleted Member
Posts: 0
|
Post by Deleted on May 14, 2012 20:28:59 GMT -6
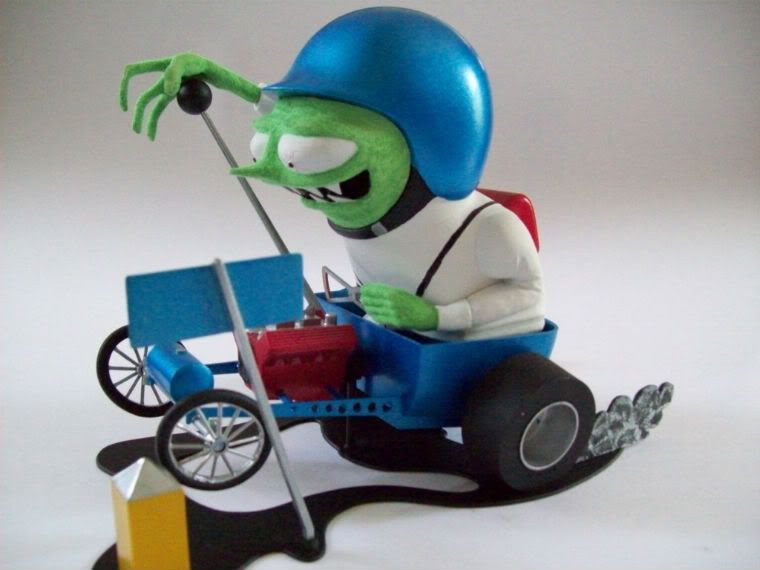
This thread is for images only! [ 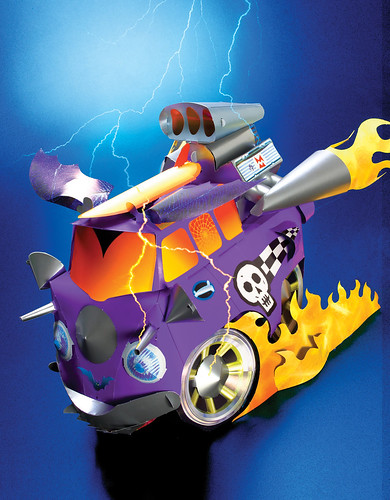 Motor Monsters Vanpire Motor Monsters Vanpire by ptstudio1, on Flickr] 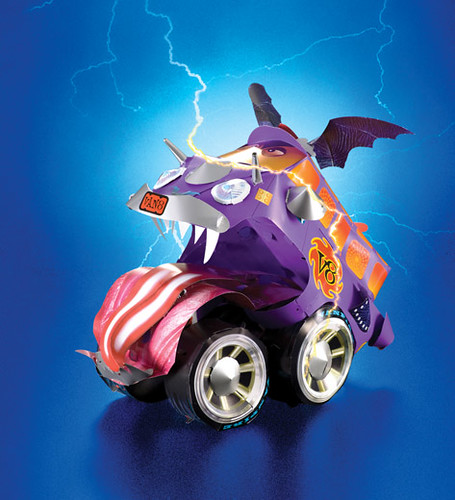 Paper Toy Vanpire Paper Toy Vanpire by ptstudio1, on Flickr] 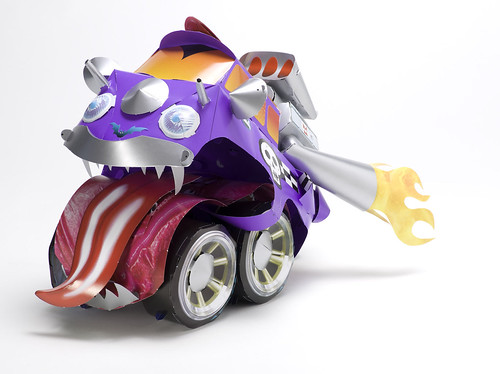 Paper Toy Vanpire Paper Toy Vanpire by ptstudio1, on Flickr 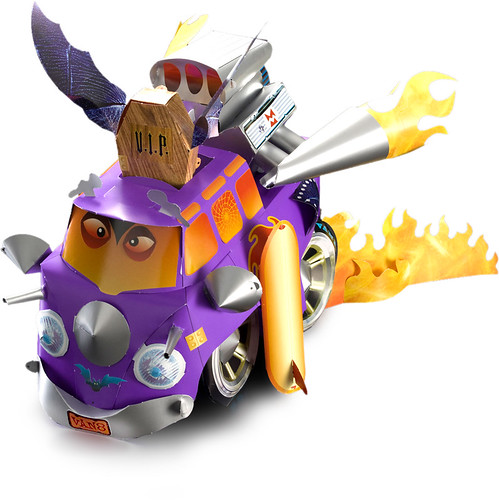 Motor Monsters Vanpire Motor Monsters Vanpire by ptstudio1, on Flickr 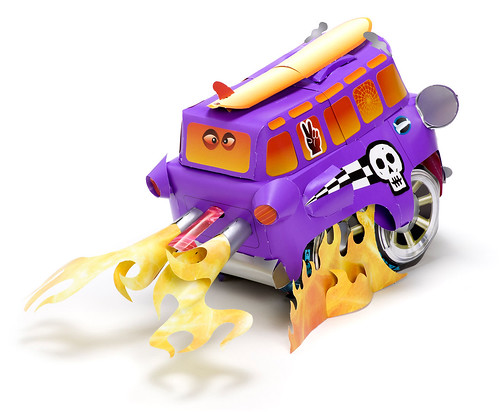 Motor Monsters Vanpire Motor Monsters Vanpire by ptstudio1, on Flickr Here is the Vanpire – inspired by the "cartoon" car models that I built in my youth by Dave Deal and Tom Daniels. it's one of my four paper models that I published in book form as Motor Monsters and sold in US for kids to punch out and assemble. They don't require glue and stickers are used for assembly and customising just like decals. They transform their shape a little and can swap parts with other Monsters in the series. When I was a kid in 1971, I made paper models of my own when I couldn't afford the real Deal's Wheels kits. My father would feel sorry for me and buy the Kits for me out of pity. I got a hot wheels track using this same ploy, but not a dragster bike, unfortunately. I know this is different to the usual styrene material but the results are similar. Thanks for creating this contest. PT |
|
|
|
Post by plastimatic on May 15, 2012 11:24:04 GMT -6
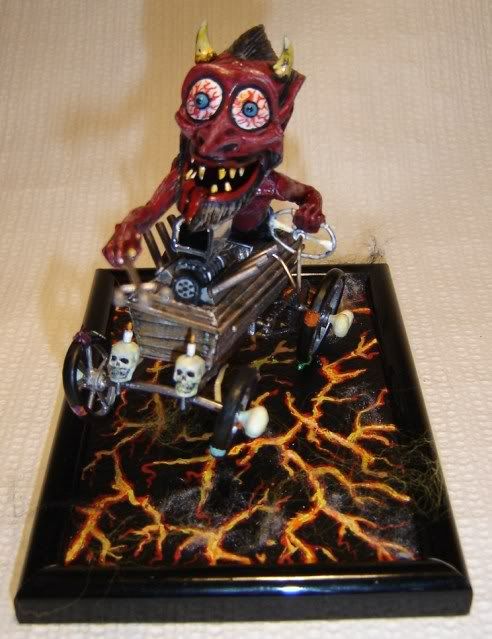
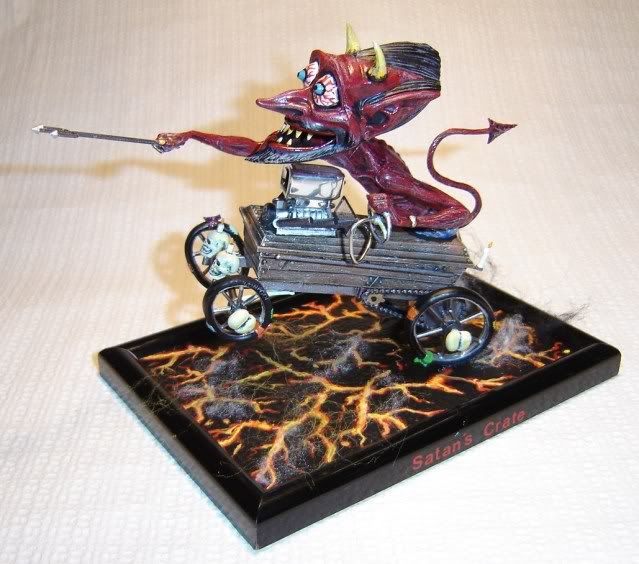
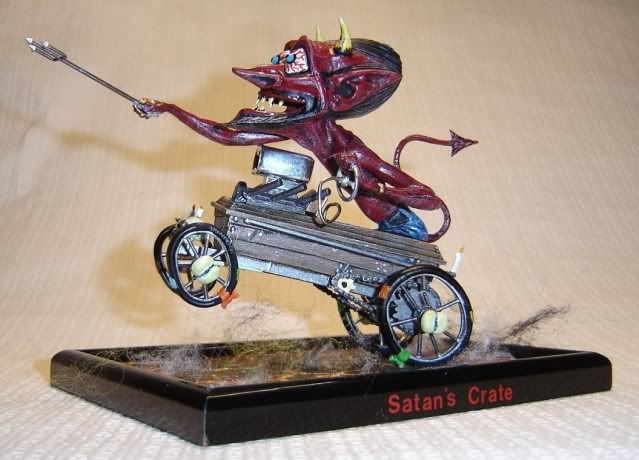
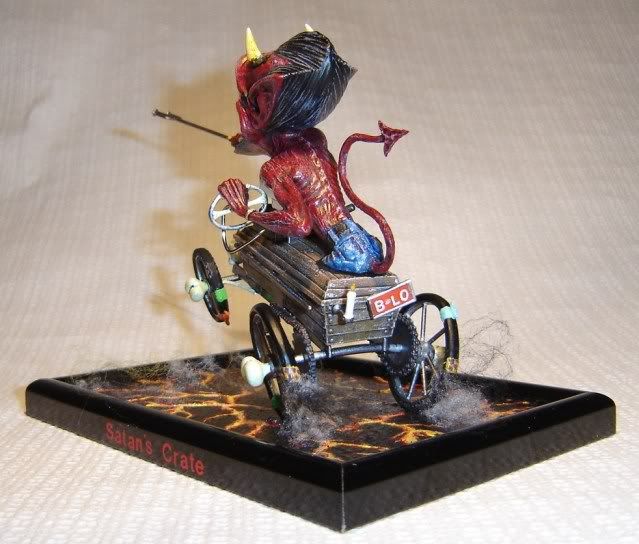
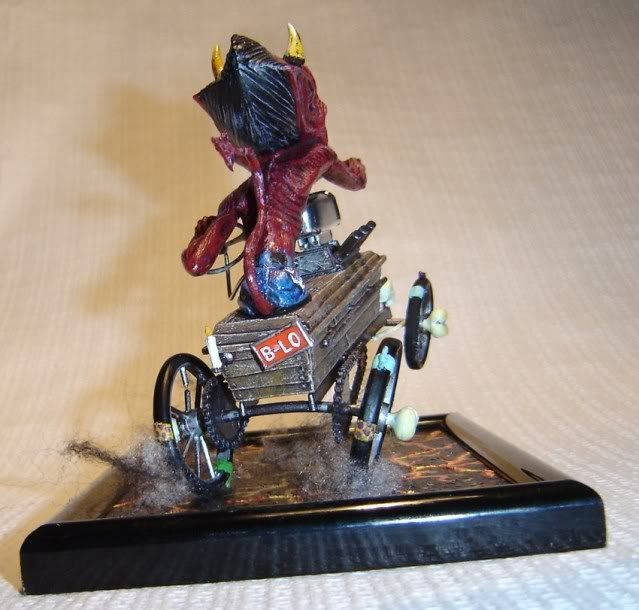
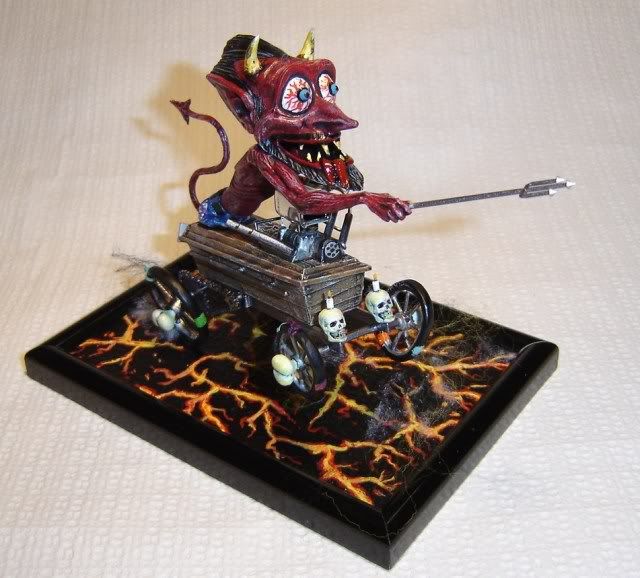
Satan's Crate 2A beefier version of the Crate! Those old wheels looked a little rickety, so they got swapped for the Creepy T set. This meant he needed his struts and transmission upgraded, as well. And, heck, let's give him some flaming pipes to scare the kiddies! Crate was drybrushed to look moldy, Lucifer has a combo of airbrush, drybrush, and washes. The flames are heated, stretched and twisted clear sprue pieces, coated in clear yellow and red. 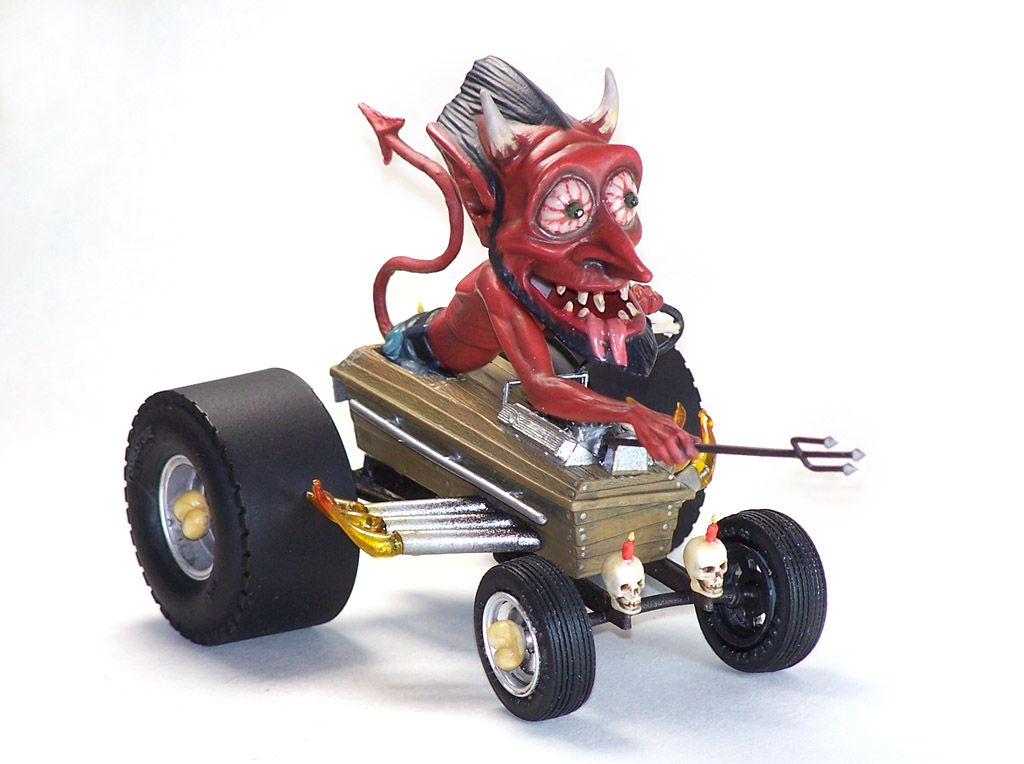 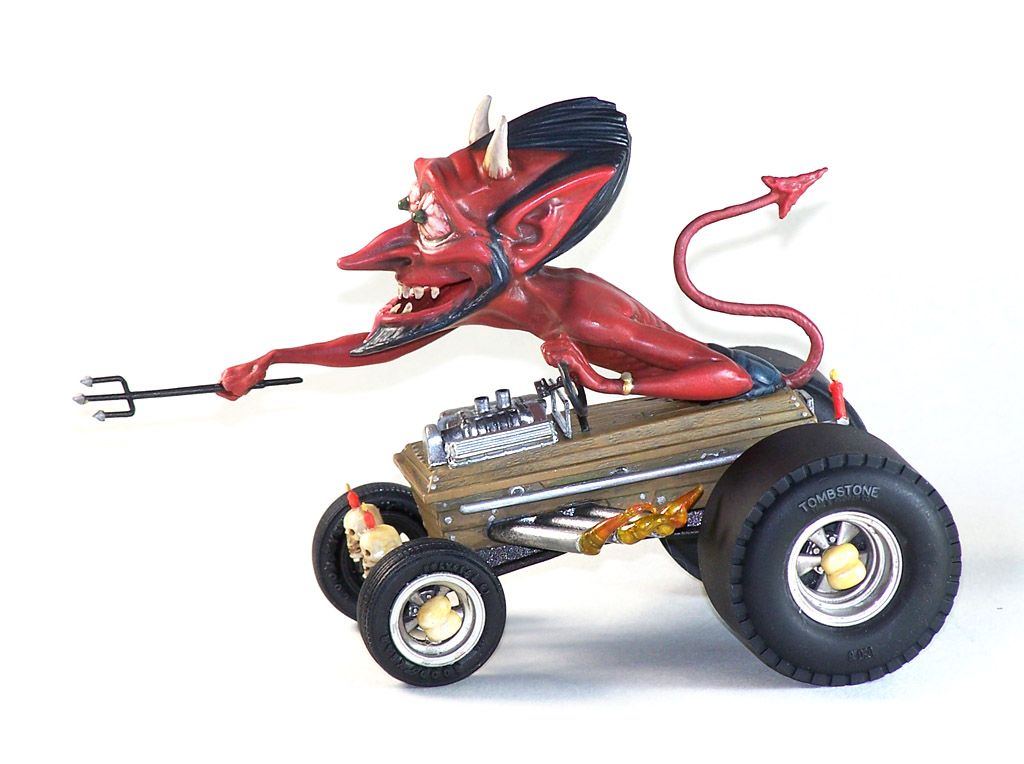 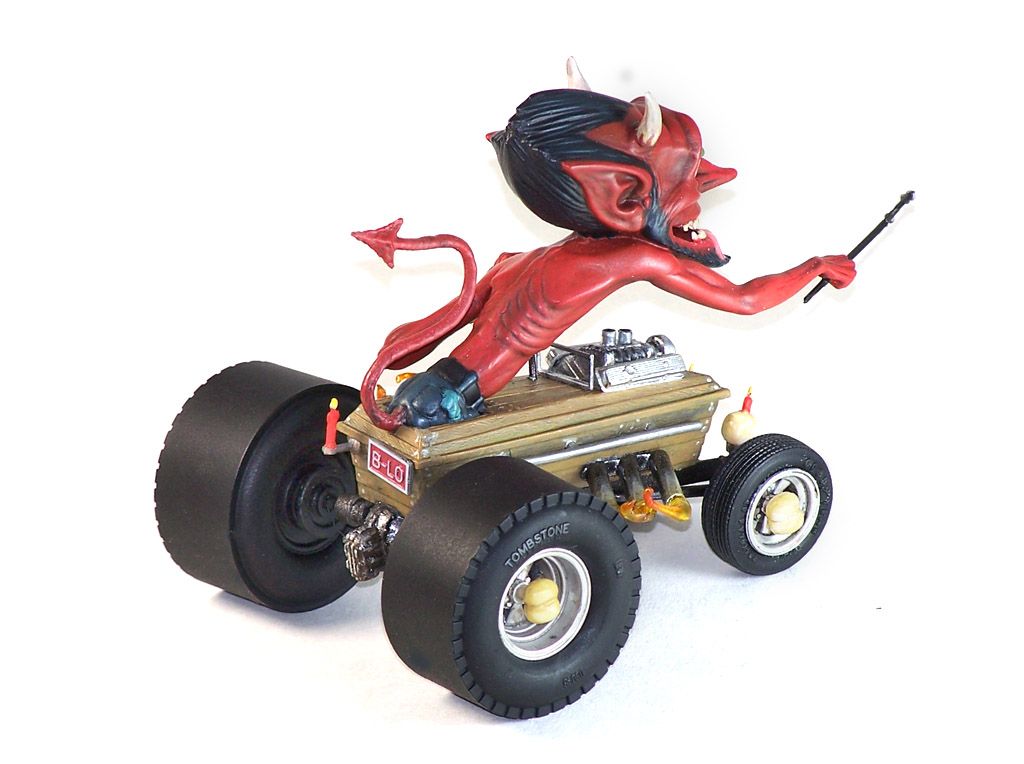 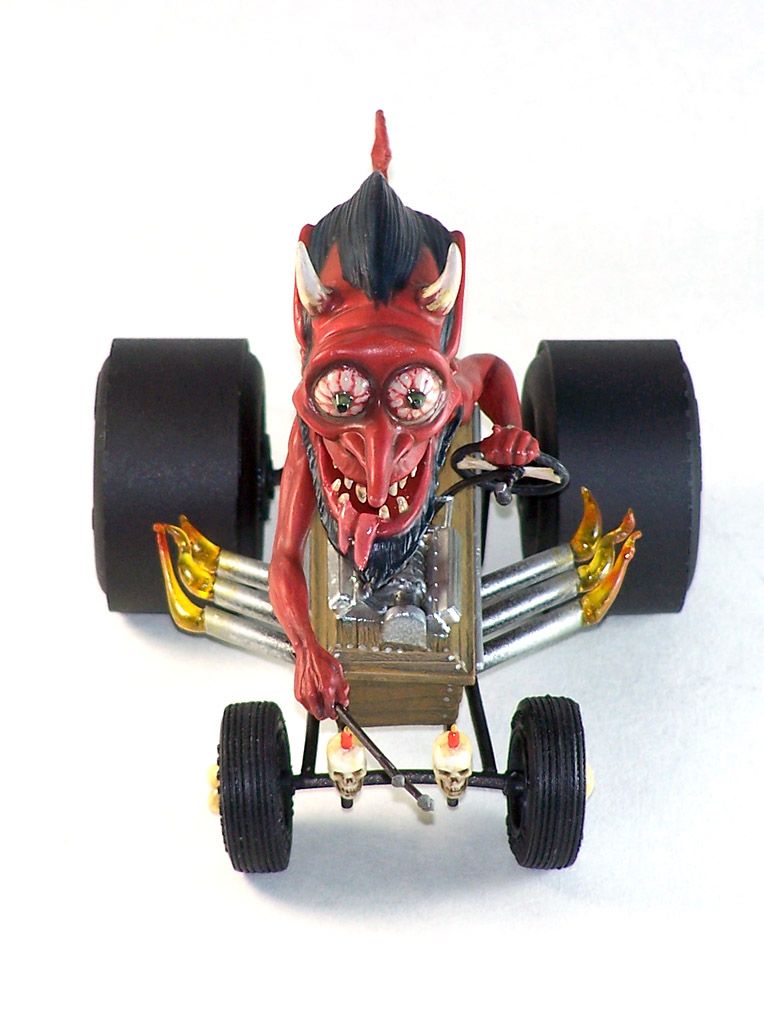
|
|
|
|
Post by hobbybobby on May 23, 2012 11:06:39 GMT -6
Endsville EddieThe "Weird-Oh's" kits were designed by Bill Campbell, and were originally released by Hawk in the sixties. These comical kits featured bug eyed, big toothed monsters, crazed race car drivers, wacky beach bums, and far out rock and rollers. This one is made by LINDBERG from the original HAWK vintage molds. The main body of the car was sprayed with Tamya Spray cans, Mica Red, over a silver base, the rest of the car and Eddie himself were hand painted in enamels and acrylics, and I dry brushed a lot... This was a fun little kit, mostly boxstock, although the nice thing about these kits is the creative freedom, the only thing that's changed is the shifter, added a couple of small refinements, the chain for the anchor comes from a necklace, and some skratchbuilt foot brake parts, and of course the base, an old picture frame, filled with plaster, plus a new wall, handmade from a piece of PVC and a bit of kolor, finally finished, hope, you like it. 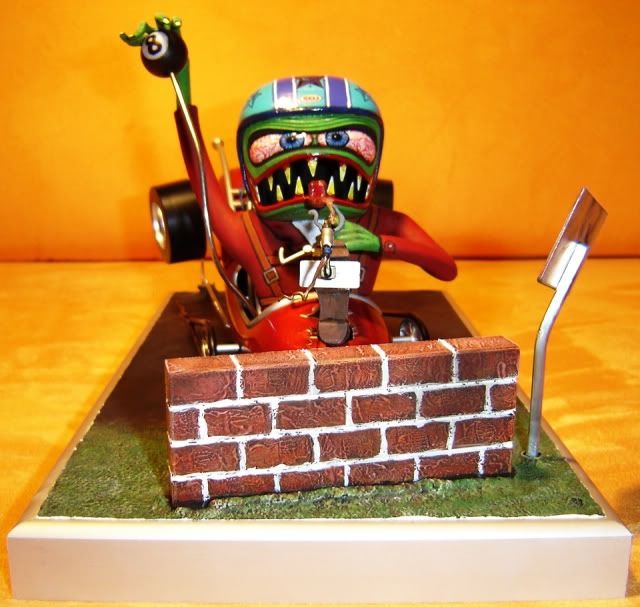 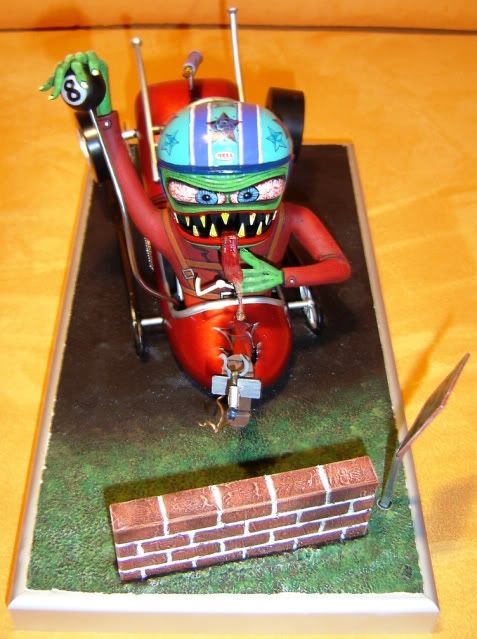 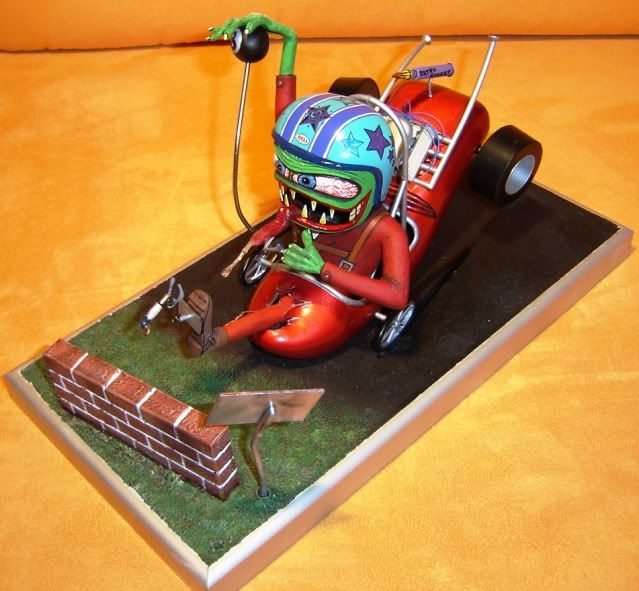 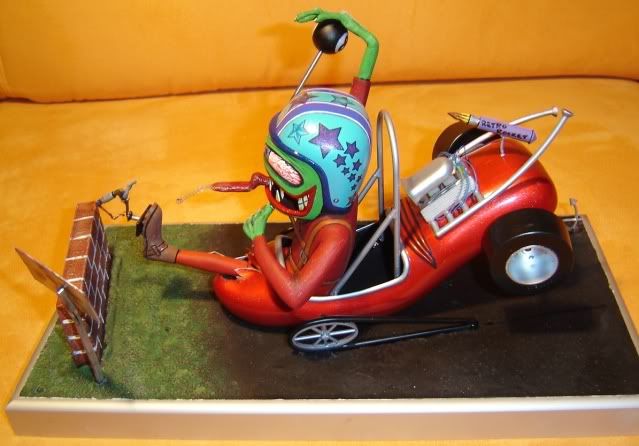 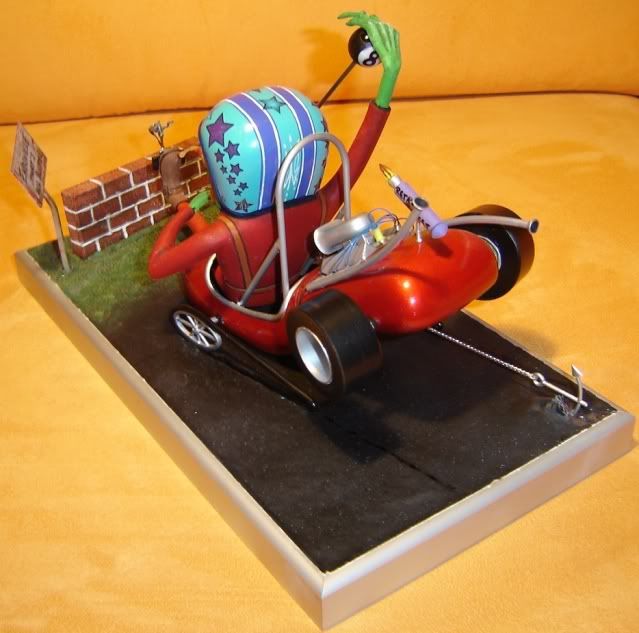 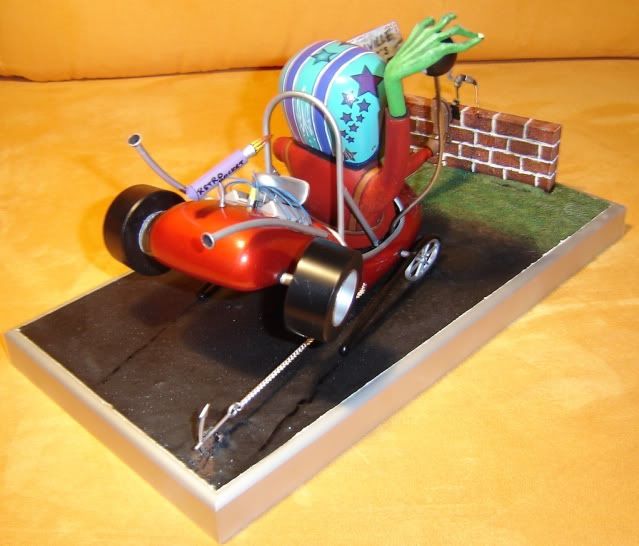 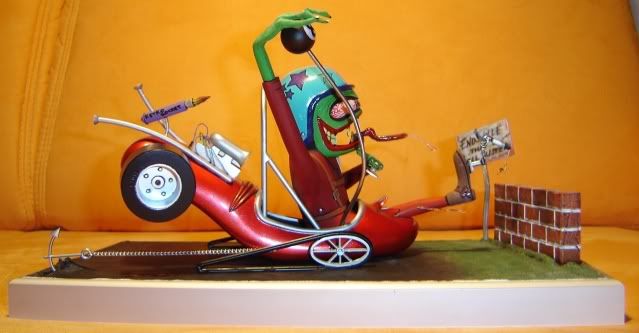 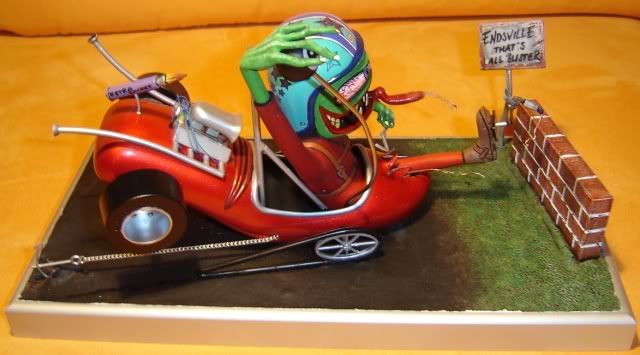 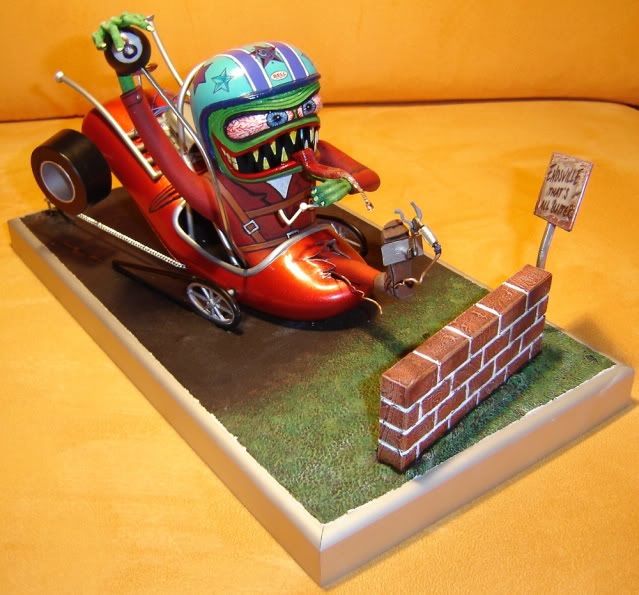
|
|
|
|
Post by 4speed on May 23, 2012 14:42:34 GMT -6
|
|
|
|
Post by redbaron on May 28, 2012 17:05:33 GMT -6
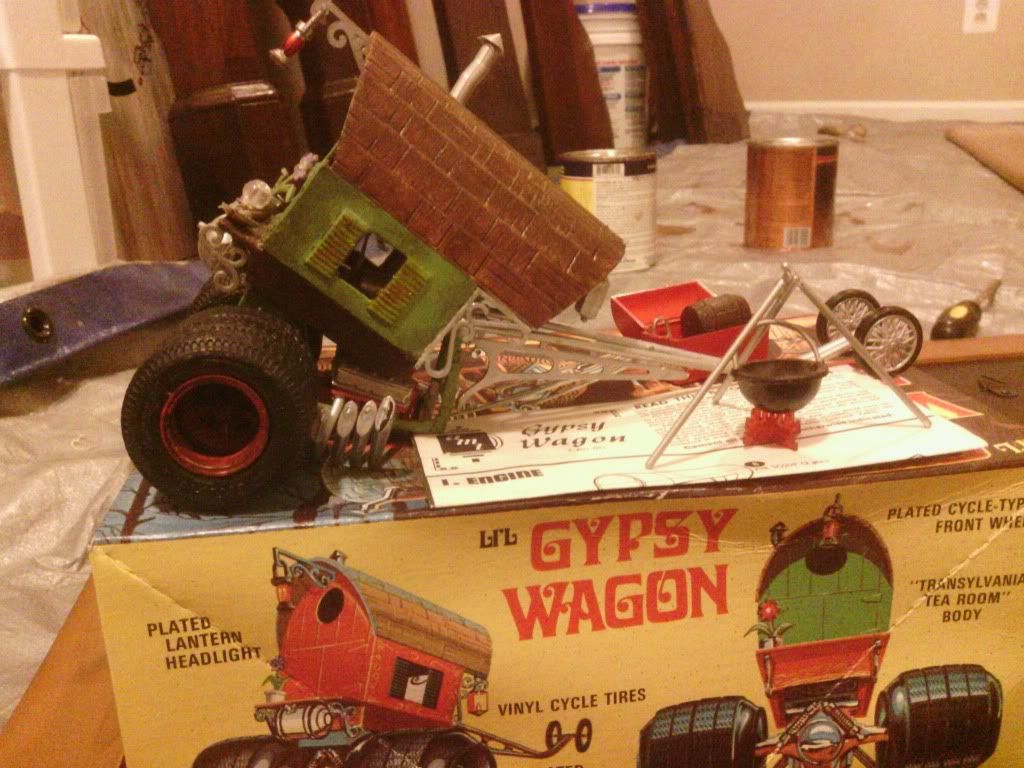 This kit was a odd car that I found on Dave's site after getting into show rods, I was going through the list and found this kit to be unique and fun and of a interesting theme. The only problem was that the kit turns out is very rare and valuable, so after some time of looking I moved on to other show rods, but never forgetting about the gypsy wagon. After a few years and a few auctions, I thought that I would never find my grail. But I continued to look in eBay, one day I was looking for a big drag and came across an auction for a flameout, already having owned a few of these, I didn't really care for the kit, but normally when it comes to sellers if they are selling one kit than they are selling more. So I took a break from my search to look into this seller's stuff, when I clicked on the button to look at the models, the first kit that was listed was a li'l gypsy wagon with a buy it now that was a hundred dollars less than a kit that I had bid on earlier that year. Later that week the kit arrived and I immedietly saw problems with the kit's design. the main problem was the body, when located to the spot it was supposed to be on, didn't fit and the frame had been warped over the years. So I sat down and began to work on this peice of seventies gold, after having mocked up the kit and making some needed changes to the headers, I started the even more problematic task of PAINT  . after a few attempts to use weathering pastels and washes, I stripped the body and brought out the airbrush. I started by painting it with about seven light coats of thinned lime green mixed with a touch of yellow, I used about twenty coats of a thinned varnish on the wood. after all this I found some left over weathering pastel and lightly rubbed it on the roof, for the body I used a black chalk that I lightly rubbed on to get a weathered look. After all this I had to go down to Florida for a week, I made a bad decision of packing the freshly weathered body in its box with the intent of working on it when I got down there. But something went wrong. after unpacking the kit I found that the whole rear end of the body had begun to chip and crack  . there was nothing I could do but put it back in the box and wait till I got back home to fix the problems. when I got home instead of fully stripping the rear end again, I embraced the chips and started to make the whole body look as thought it had been sitting out for years on end. After much repainting and weathering I was able to complete the car and put it on my shelf. |
|
|
|
Post by donculley on May 28, 2012 20:45:21 GMT -6
|
|
|
|
Post by Pat Minarick on May 29, 2012 16:27:10 GMT -6
|
|


 . after a few attempts to use weathering pastels and washes, I stripped the body and brought out the airbrush. I started by painting it with about seven light coats of thinned lime green mixed with a touch of yellow, I used about twenty coats of a thinned varnish on the wood. after all this I found some left over weathering pastel and lightly rubbed it on the roof, for the body I used a black chalk that I lightly rubbed on to get a weathered look.
 . there was nothing I could do but put it back in the box and wait till I got back home to fix the problems. when I got home instead of fully stripping the rear end again, I embraced the chips and started to make the whole body look as thought it had been sitting out for years on end. After much repainting and weathering I was able to complete the car and put it on my shelf.


