

Post by magnum4342 on Oct 2, 2015 14:18:06 GMT -6
If I've placed it in the wrong forum. I would like to hear from some of you who have received your decals, and those of you who are expecting or waiting.
Should I be numbering them? In other words, should I number each decal snd provide a corresponding list? It occurs to me, that I've pored over so many photos for so long that I know the cars fairly intimately, and have found markings that I think few people knew were there to begin with. But you guys might not,
SO, with that said, let's start with- Anyone who doesn't know where a certain decal goes or what time period it was used, please ask here and others can see it too. I have the exact same pictures you can find with an easy google. But I will try and post as many here as will help.
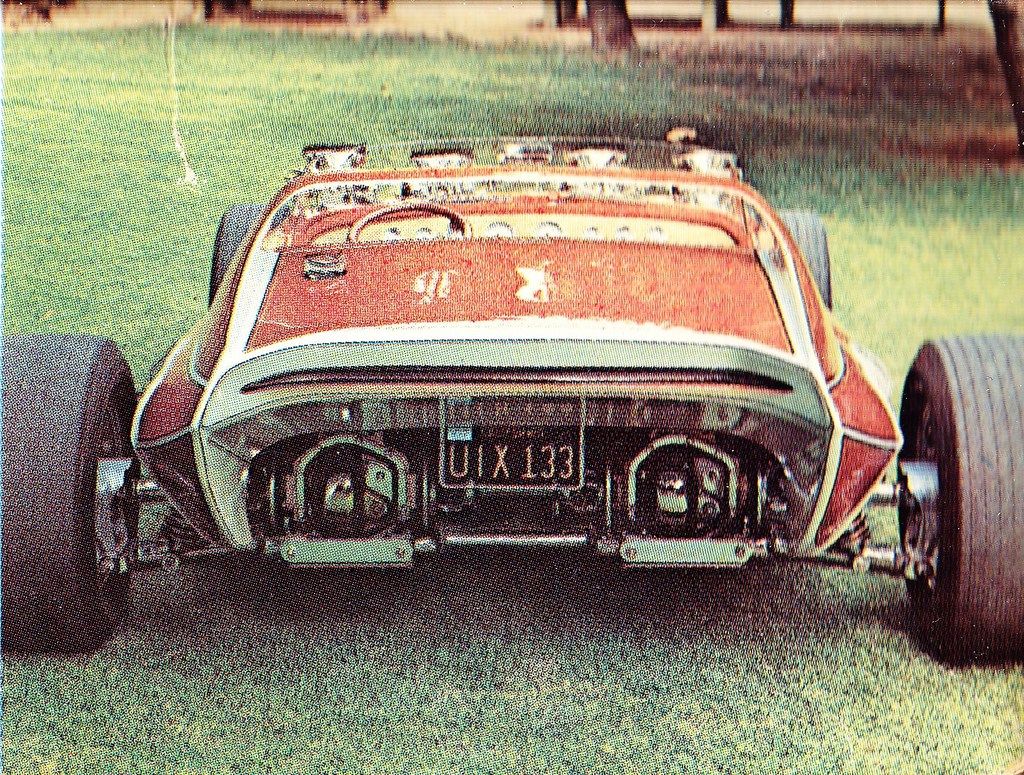
INVADER tip. The large red "dog bone" shaped decal at the rear of the decal sheet is optional. I had designed it to match the rest of the body before finding a good rear view that shows the rear of the car. I scanned these from the Eldon box at 600dpi. The front end stripes go around the outside of the nose with the "goatee" rolling up into the grille. It might be best to use a setting solution on the roll bar to avoid rubbing the decal out of shape.

Sand Daggin tip: There's a small.. I mean REALLY small spear stripe. This goes on the engine surround, so it looks like it trails from the pillar stripes. You might have to work a little to get the side stripes around the front axle. Let that decal dry fully and then cut or poke out the film covering the axle notch. To get this decal straight: Cut it's bottom edge with a steel strait edge and razor. To avoid cutting one'sself with said razor, go and get the band aids, wherever they may be and put them on the bench next to you. You have just avoided a huge gash in your finger. Don't believe me? Leave the bloody things in the garage or bathroom and just you see! Mask the bottom edge of the fuselahe with a nice, clean masking tape. The wider the better because you're going to want it to mask perfectly straight along that fuselage edge. Place your decal, sliding it down the side until its steel straight cut edge meets the masking tape and stop. Move back and forth to adjust from there. Leave the mask until the decal is dry.
Pink Panther tip: The two side decals for thr rear of the car are best applied as one big decal without trimming inside it. There's a black line on the left side decal that gives you a minimum trim guide. The rear roof decal is a booger to cut out so I've provided two. The two weird looking decals on the front go around the scoop openings. I suggest lining them with an extra, thin layer of plastic and sanding smooth before applying these. Let them dry completely over the holes, then gently trim away the insides with a fresh razor. Still got those band aids right? There is a piece of bare metal foil with this set which is inended as a backing for the stereo, tv, tail light, rear panel and dash. The "dash" is the trapezoid outline. Cover the dash plate with the foil. Add your own favorite gage decals, then top with the outline. This will fool the eye into thinking it has dimension. A perfect steering wheel for the kit can be found in the Bad Actor or Street Fighter kits.
Should I be numbering them? In other words, should I number each decal snd provide a corresponding list? It occurs to me, that I've pored over so many photos for so long that I know the cars fairly intimately, and have found markings that I think few people knew were there to begin with. But you guys might not,
SO, with that said, let's start with- Anyone who doesn't know where a certain decal goes or what time period it was used, please ask here and others can see it too. I have the exact same pictures you can find with an easy google. But I will try and post as many here as will help.
INVADER tip. The large red "dog bone" shaped decal at the rear of the decal sheet is optional. I had designed it to match the rest of the body before finding a good rear view that shows the rear of the car. I scanned these from the Eldon box at 600dpi. The front end stripes go around the outside of the nose with the "goatee" rolling up into the grille. It might be best to use a setting solution on the roll bar to avoid rubbing the decal out of shape.


Sand Daggin tip: There's a small.. I mean REALLY small spear stripe. This goes on the engine surround, so it looks like it trails from the pillar stripes. You might have to work a little to get the side stripes around the front axle. Let that decal dry fully and then cut or poke out the film covering the axle notch. To get this decal straight: Cut it's bottom edge with a steel strait edge and razor. To avoid cutting one'sself with said razor, go and get the band aids, wherever they may be and put them on the bench next to you. You have just avoided a huge gash in your finger. Don't believe me? Leave the bloody things in the garage or bathroom and just you see! Mask the bottom edge of the fuselahe with a nice, clean masking tape. The wider the better because you're going to want it to mask perfectly straight along that fuselage edge. Place your decal, sliding it down the side until its steel straight cut edge meets the masking tape and stop. Move back and forth to adjust from there. Leave the mask until the decal is dry.
Pink Panther tip: The two side decals for thr rear of the car are best applied as one big decal without trimming inside it. There's a black line on the left side decal that gives you a minimum trim guide. The rear roof decal is a booger to cut out so I've provided two. The two weird looking decals on the front go around the scoop openings. I suggest lining them with an extra, thin layer of plastic and sanding smooth before applying these. Let them dry completely over the holes, then gently trim away the insides with a fresh razor. Still got those band aids right? There is a piece of bare metal foil with this set which is inended as a backing for the stereo, tv, tail light, rear panel and dash. The "dash" is the trapezoid outline. Cover the dash plate with the foil. Add your own favorite gage decals, then top with the outline. This will fool the eye into thinking it has dimension. A perfect steering wheel for the kit can be found in the Bad Actor or Street Fighter kits.

