|
|
Post by magnum4342 on Jun 13, 2013 0:21:11 GMT -6
I'm getting this project ready to rock. I've been a hooge fan of the California Show Cars series since I was a kid...a lifetime ago it seems. I currently have the Pink Panther, Milk Truck and the Invader is on the way. (Thanks Al) Anyway, I thought I would lay out my plans for the build. For the Dan Woods Truck, I'll be fixing a few of the inaccuracies of the rather simplistic kit. In the cab, there's diamond tufted panels on the back wall, passenger bench and floor. I'll be copy casting the side panels to make the patterns for those. Then I'll add a better looking shifter and the turn signal lever to the column. For the chassis I'll be adding real springs, and some home made decals for the white pinstriping. Some hoses and clear plug wires for the engine, and I'm thinking of adding some parts from the Chevy 283 parts pak engine. I'll be testing out flocking and embossing powder on the diamond tuck, just to see which works best.
For the Tribute Trike, I'll be doing much of the same. Adding diamond tuck to the cab, some minor details and most of another Chevy 283 PP engine. I did think about a Truck, Trike trailer (see what I did there?  ) but after mulling it awhile I decided it was unnecessary. The final touch will be a tire swap. I can't abide by the garbage tires in the Doyusha truck kit, and I don't like slicks on a non-competition bike no matter how many tires it has. So that's it in a nutshell and as soon as Photobucket stops being a jerk I'll add some pictures. ) but after mulling it awhile I decided it was unnecessary. The final touch will be a tire swap. I can't abide by the garbage tires in the Doyusha truck kit, and I don't like slicks on a non-competition bike no matter how many tires it has. So that's it in a nutshell and as soon as Photobucket stops being a jerk I'll add some pictures.  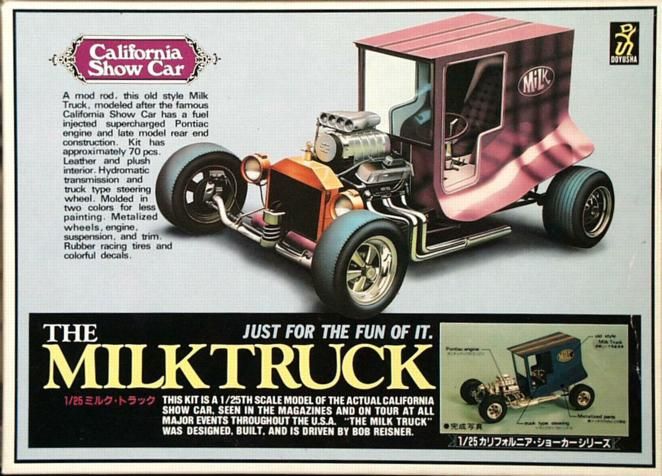 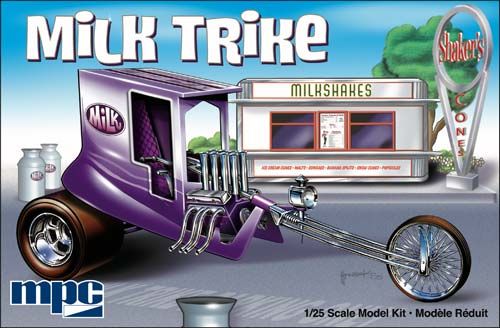
|
|
|
|
Post by magnum4342 on Jun 13, 2013 0:24:38 GMT -6
P.S. Due to family obligations I do build pretty slow, so I appologise in advance for the length of time this will most likely take.  One thing I've been thinking of is the paint jobs. I definitely want the Milk Truck to have a paint job it's been seen in. (there were a few different ones). The Trike on the other hand, could just as easily be painted to match, but to me that would be boring. For me, to be a proper tribute and still stand on it's own, it should have the same colors, but it's own unique design. I really like the design on the box, but I'll be thinking about it as I build the Truck, and may come up with my own. Do you agree? Or do you feel it should have the same design as the Truck? One thing I've been thinking of is the paint jobs. I definitely want the Milk Truck to have a paint job it's been seen in. (there were a few different ones). The Trike on the other hand, could just as easily be painted to match, but to me that would be boring. For me, to be a proper tribute and still stand on it's own, it should have the same colors, but it's own unique design. I really like the design on the box, but I'll be thinking about it as I build the Truck, and may come up with my own. Do you agree? Or do you feel it should have the same design as the Truck?
|
|
|
|
Post by badroadahead on Jun 13, 2013 9:43:03 GMT -6
I think you have a great idea.
As far as the color scheme goes, how about painting the trike in the opposite color pattern? Dark purple with light purple stripes?
Dave
|
|
|
|
Post by magnum4342 on Jun 13, 2013 16:09:24 GMT -6
I have considered that, but a firm decision will have to come AFTER I see if I can pull off the paint job on the truck!  I think you have a great idea. As far as the color scheme goes, how about painting the trike in the opposite color pattern? Dark purple with light purple stripes? Dave
|
|
|
|
Post by mykturk on Jun 13, 2013 18:57:39 GMT -6
If your goal is an accurate version, you'll want to use a Pontiac engine, not a Chevy. At least in the Milk Truck anyway. A Chevy in the trike would make perfect sense though, smaller and lighter than a Poncho motor, a plus in a trike format. If I'm not mistaken, there's a nice 1/25 421 Pontiac available in the Parts Pack line.
|
|
|
|
Post by magnum4342 on Jun 14, 2013 14:30:54 GMT -6
If your goal is an accurate version, you'll want to use a Pontiac engine, not a Chevy. At least in the Milk Truck anyway. A Chevy in the trike would make perfect sense though, smaller and lighter than a Poncho motor, a plus in a trike format. If I'm not mistaken, there's a nice 1/25 421 Pontiac available in the Parts Pack line.
Yeah, I'm just adding some parts from the chev engine because they look similar and better than the kit parts. |
|
|
|
Post by magnum4342 on Jun 25, 2013 21:23:08 GMT -6
Finally getting started here. This is just a quick update. I got the Trike body assembled and the seams smoothed and I am plugging the lantern hole in the side. I'll make the secondary lantern a tail light. As for the truck, I made a mold from the axle parts from the mint kit I have for the re-builder I'm working on. I copycast the diamond tuck interior parts to fill in some missing interior upholstery. On the floor pan, I have removed the body section so I can blend it into the body without seams. I hate seams! I have also removed the out of place shifter, and will move it closer to the steering shaft so it is closer to being over the trans linkage where it should be.  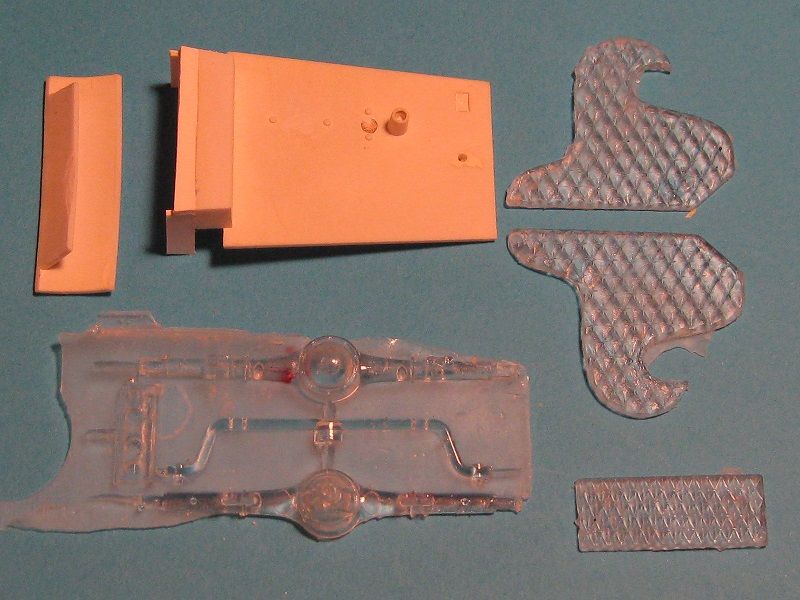
|
|
|
|
Post by magnum4342 on Jun 25, 2013 22:10:29 GMT -6
By the way, I also took the advice and just bought a Parts Pak Pontiac for the Milk Truck Motor. 
|
|
|
|
Post by TooOld on Jun 26, 2013 18:08:13 GMT -6
Lookin' good !
I hate seams too , even if they can't be seen I fill and sand them !
The Parts Pak Pontiac will look great in this , plus it's chrome ( if you like all chrome ).
By the way . . . your resin parts look great ! I'm still in the trial and error stage .
|
|
|
|
Post by magnum4342 on Jun 26, 2013 18:21:32 GMT -6
Thank you for the compliment. As for the all chrome Pontiac engine, I will be painting it just like the real thing in the Truck, but I wanted something with better overall detail than the Eldon/Doyusha kit. The detail is minimal on it and what is there is soft. I also don't relish the challenge of cleaning the seam on the oil pan and trying to Alclad it. With resins it's tricky to get a good cast when you're on a budget. I am lucky enough to have not only a pressure pot but a good brand of self de-gassing silicone. What I have found is, it's all about parts orientation. In other words the way the parts sits when the mold is poured. You have to make sure the part is angled so the resin flows into the areas that have heavy undercuts so positioning is paramount. You can also try dusting the mold with a little baby powder before pouring. This helps break the surface tension of the resin and makes it flow better. A lot of places like Alumilite will tell you to warm the molds. This is so they break down quicker and they sell more silicone. Don't get me wrong, it works, but it's only necessary when casting clear parts like the above. A lot of guys wonder why I cast certain parts in clear. This is because heat cured clears are stronger than typical resins and less succeptible to warpage. If you have a compressor but no pressure pot here's what I suggest. Go to any cheapo tool store like Harbor Frieght and buy a 2.5 gallon paint pot and convert it to a pressure pot. If you use clears or 180 second resins, you'll have plenty of time to pour, close the mold and get it into the pot. Pressurise with 40 pounds psi, until cured or for ten minutes with clears.
|
|
|
|
Post by noredcamaros on Jun 26, 2013 21:18:12 GMT -6
Looking forward to this one. Didn't know you built anything that wasn't a Mopar?Lol
|
|
|
|
Post by magnum4342 on Jun 26, 2013 21:58:53 GMT -6
I don't know where you might have gotten that impression Austin.  Actually, although I truly LOVE mopar's, my interests are wide, varied and constantly changing. My second love after mother mopar though, is wild and radical show rods! They are so imaginative and most can be modified to taste (unless building a replica like this) to make something even wilder! One's own imagination is the only limit so this is the way to let the freak flag fly. Actually, although I truly LOVE mopar's, my interests are wide, varied and constantly changing. My second love after mother mopar though, is wild and radical show rods! They are so imaginative and most can be modified to taste (unless building a replica like this) to make something even wilder! One's own imagination is the only limit so this is the way to let the freak flag fly. 
|
|
|
|
Post by carcrafter on Jun 26, 2013 22:54:08 GMT -6
I hear ya, I am about to put a different twist on the Moonscope show car, I looked at it and decided if I cut out the area where the solar panel goes I can put a small block chevy in it,shorten the wheelbase and add some street rod tires and wheels I can make a pretty radical ride.
|
|
|
|
Post by magnum4342 on Jun 26, 2013 23:01:04 GMT -6
Cool idea but...can that car really have any shorter of a wheelbase???  I hear ya, I am about to put a different twist on the Moonscope show car, I looked at it and decided if I cut out the area where the solar panel goes I can put a small block chevy in it,shorten the wheelbase and add some street rod tires and wheels I can make a pretty radical ride.
|
|
|
|
Post by magnum4342 on Jun 27, 2013 1:13:17 GMT -6
One panel down...five to go. The real trick on the back wall is going to be getting the patterns to line up and look right. Wish me luck...I'm going to need it!   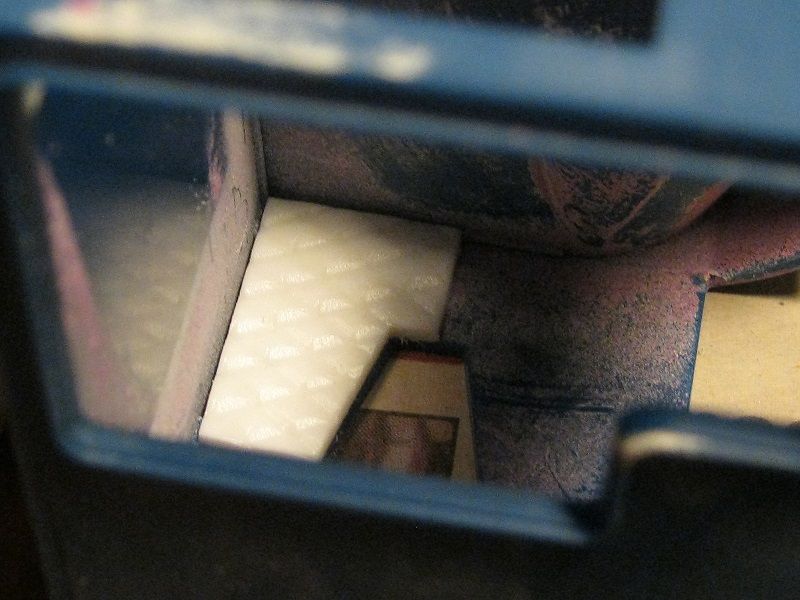
|
|
|
|
Post by magnum4342 on Jun 27, 2013 2:14:41 GMT -6
So far, so good. This is working out easier than I thought it would. 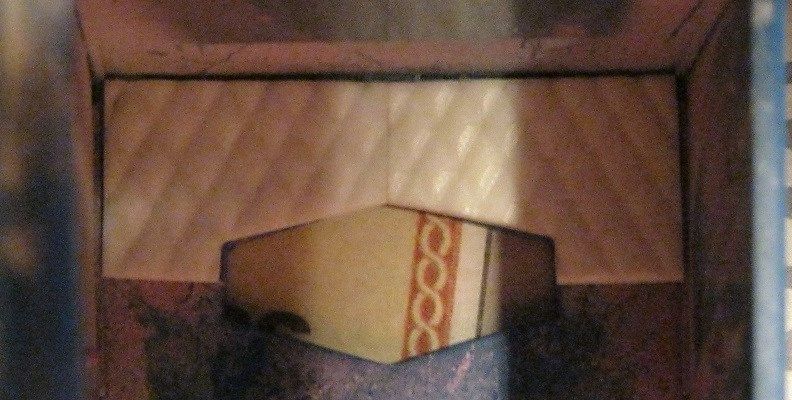
|
|
|
|
Post by noredcamaros on Jun 27, 2013 6:54:37 GMT -6
Yesterday I was helping a good friend of mine move some models across his house. I saw some pretty rare kits,but in there I saw the box for the milk truck and the pink panther. Sadly neither kit were in their box,I asked him and he said he had them some wheres just lying around.  I wish I could find them, I'd love to have my own. Your doing great so far Kevin. If you want to avoid the seam for the diamond pattern you could get a small sheet of a thin colored foam, score it with a pencil, and cut it to size. You could even go as far as putting pinheads in it. |
|
|
|
Post by magnum4342 on Jun 27, 2013 9:52:31 GMT -6
I thought about that Austin, but knowing what I know about that craft foam I really don't trust the method. Besides that, the pattern insert has to be way thin due to space restrictions inside the cab. Someone posted that thread over at MCM and I thought 'no, that foam will go back to it's original shape eventually and that can ruin a great vintage model'. I'll have that seam gone by the time I have the piece ready to mold.
|
|
|
|
Post by "ScratchFever" on Jun 27, 2013 12:13:17 GMT -6
Yeah! Magnum4342 I know what you mean about the momery foam........it has to be thick enough the maintain the pattern, but thin enough to fit
|
|
|
|
Post by carcrafter on Jun 27, 2013 14:22:27 GMT -6
How about prayers, you don't need luck,
|
|
|
|
Post by magnum4342 on Jun 27, 2013 15:13:52 GMT -6
I'm quite the spiritual man, so yes, I'll take all the prayers that are cheerfully offered. Thank you.  Don't take me wrong, I'm certain there's plenty of use for the foam, it's just not for me. I found some at Wally-World that had an adhesive backing and almost bought it for my Pink Panther, but the thought of cutting out all those diamond tipped rectangles kinda frazzled me and I wasn't sure how long the adhesive would last. I probably will try it some time in the near future though just to see. Don't take me wrong, I'm certain there's plenty of use for the foam, it's just not for me. I found some at Wally-World that had an adhesive backing and almost bought it for my Pink Panther, but the thought of cutting out all those diamond tipped rectangles kinda frazzled me and I wasn't sure how long the adhesive would last. I probably will try it some time in the near future though just to see. 
|
|
|
|
Post by magnum4342 on Jun 28, 2013 8:59:45 GMT -6
I'll have another update tonight but I had to stop in and say WOW! I just got my Parts Pak Pontiac engine and I cannot believe I've been overlooking these! Sure the plating isn't what I would call stellar, but the detail is right up there with the other kits in this line. It's going to make a fantastic addition to the model. 
|
|
|
|
Post by magnum4342 on Jun 29, 2013 3:27:20 GMT -6
I've been wrestling with the back of the cab padding and I think I have it right where it wants me! I'm telling you making these four resin pieces behave was no simple feat. On the first three joints I was joining one edge to one edge, no sweat. With the last piece I had to make two sets of edges that matched and meshed and as you'll see I had a pretty sizeable gap for the scale but when I pushed it together the seam lined up. I decided at this point I needed backup and to avoid messing up the last seam with glue I covered the backside of the pattern with super glue, laid it down on some sheet plastic and pushed the last seam together. Next I test fit it and it almost dropped right in. At this point my cats seemed to be showing visible signs of confusion at the level of luck I am having on this. I sincerely expected to have to start over by now with the upholstery but everything has worked! After sitting back and resting my sanding thumbs I realized the cats were NOT astounded at my lucky scratchbuild tonight, they were just hungry. So I fed the cats and did some more sanding to refine the window area. At this point though, the panel is nearly 3mm thick. So the next thing I'm going to try is to make a face mold of it. Then when I have a solid resin casting I just sand it down to the thickness I want. 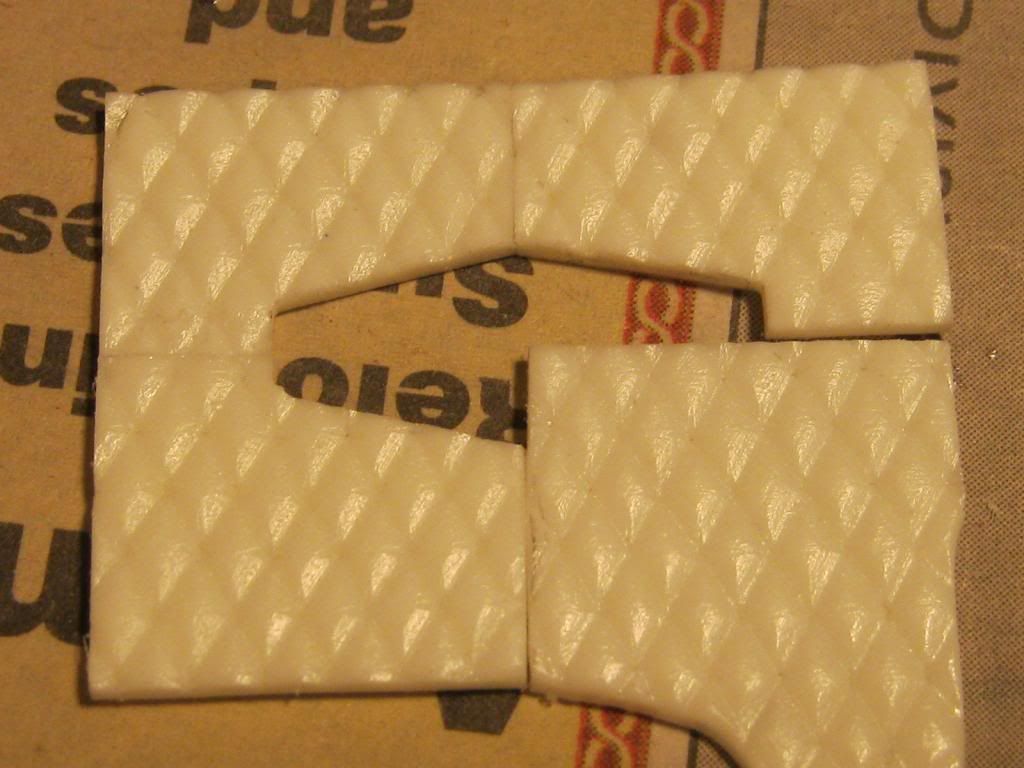  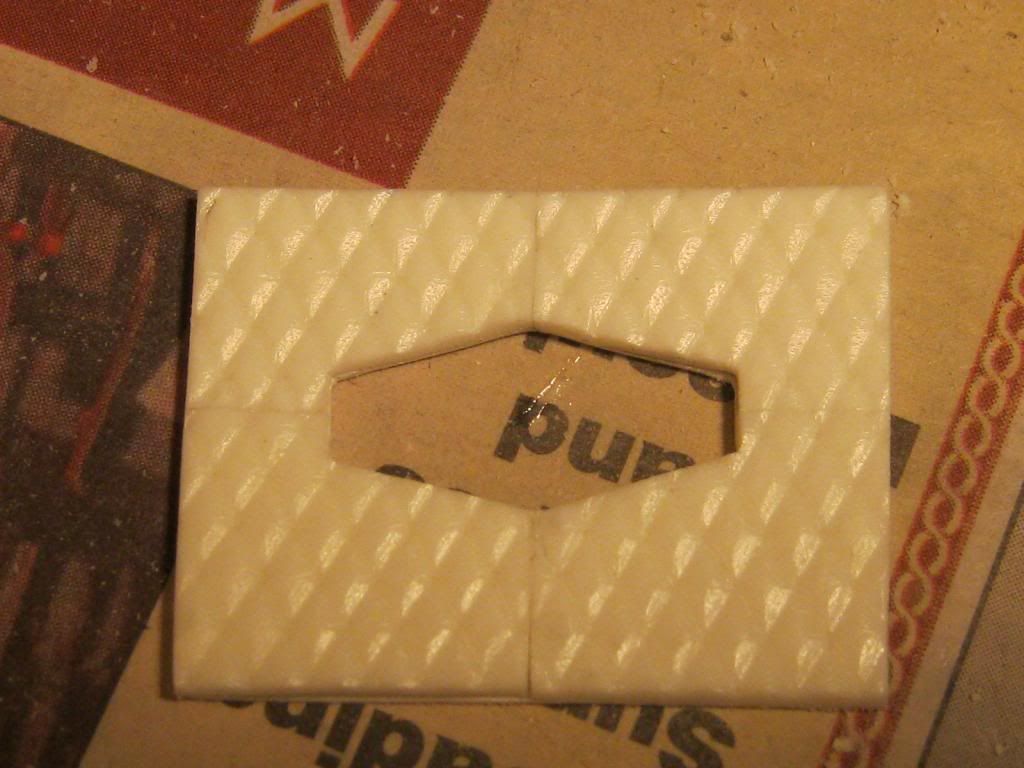 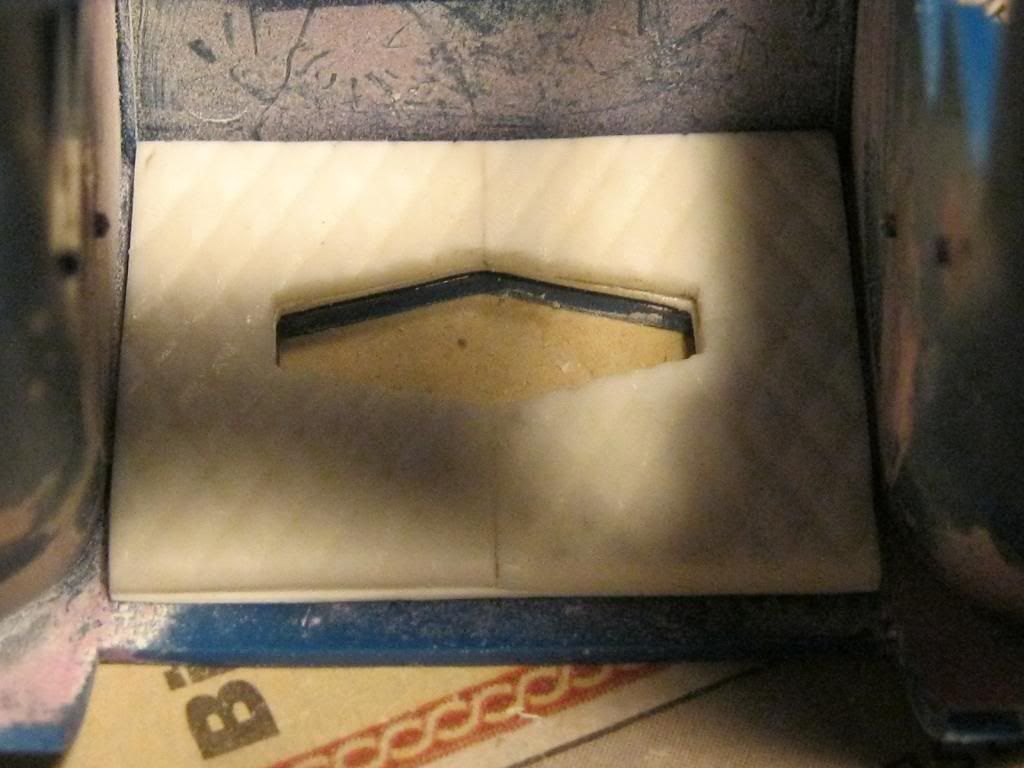 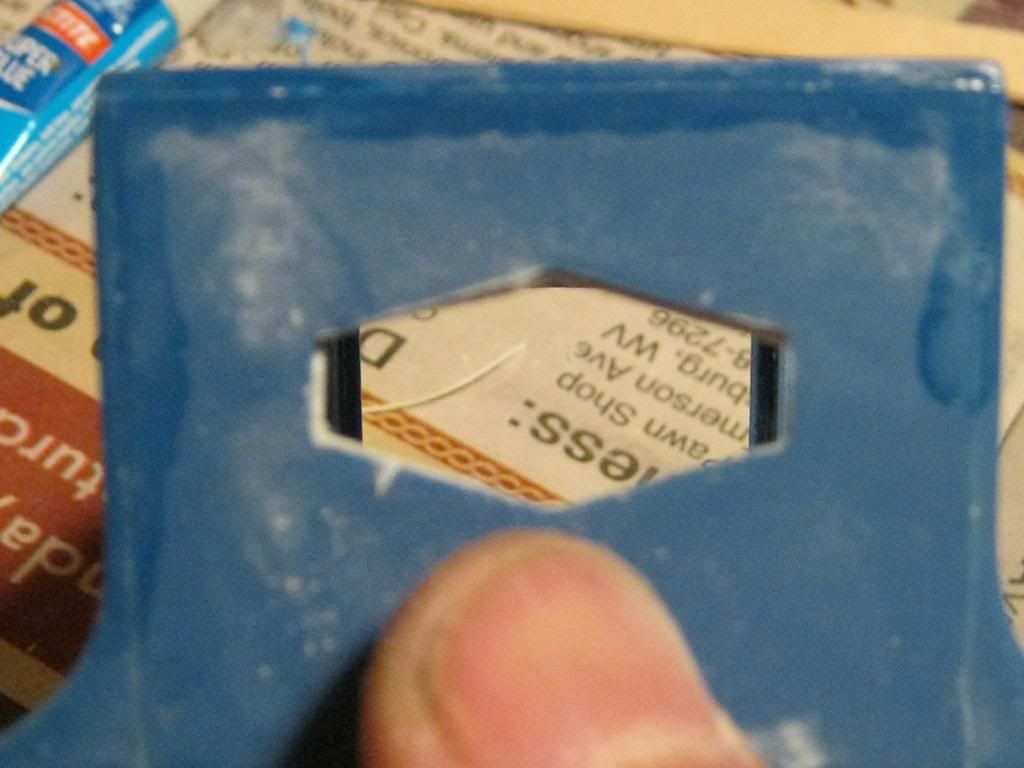
|
|
|
|
Post by magnum4342 on Sept 15, 2013 14:57:50 GMT -6
Sometimes all it takes is a small event. Not only have I recently added a couple more "California Show Cars" to the collection, but a recent conversation with Bill got the motor running again. I got some house cleaning to do...because my sister won't! Soon as that's done I'm clearin the bench and getting back to this project. The Milkman rides again! 
|
|
|
|
Post by koffinbuilder64 on Sept 16, 2013 21:23:46 GMT -6
GO KEVIN GO!!!!!
|
|
|
|
Post by magnum4342 on Sept 20, 2013 0:38:02 GMT -6
Alrighty! It's a small update, but an update nonetheless. I did not realize I had left so much cleanup to do on this kit! I started by cleaning the old glue and paint off the frame, then shooting it and the cab with a coat of white primer to see where I'm at with them. While the cab needs some seams filled, the frame looks like it's good to go. Next up I tossed the front and rear axles in the freezer to get the brakes off of them. As the front right spindle was already destroyed, I held little hope that the left would fare any better. Ultimately the front axle was completely destroyed in the process. Fortunately I have a mint example of this kit on hand and also the foresight to make molds of any parts I thought might not survive dismantling. I couldn't use the mint parts because the kit is promised to a good friend and fellow member here because it's one of his grails. Next up I tossed the front and rear axles in the freezer to get the brakes off of them. As the front right spindle was already destroyed, I held little hope that the left would fare any better. Ultimately the front axle was completely destroyed in the process. Fortunately I have a mint example of this kit on hand and also the foresight to make molds of any parts I thought might not survive dismantling. I couldn't use the mint parts because the kit is promised to a good friend and fellow member here because it's one of his grails.  I did think I was going to need the rear axle as well so molds were made of both front and rear. As it turns out though, the rear axle from the gluebomb is salvageable and will be used. The front axle...not so much. So I now have this. I did think I was going to need the rear axle as well so molds were made of both front and rear. As it turns out though, the rear axle from the gluebomb is salvageable and will be used. The front axle...not so much. So I now have this.  Now I know what you're thinking right now. Why bother to cast them in clear? Well there's always a madness to my method. (just look at my avatar right?) So I want you all to remember you heard this here first, because to date I am the only caster to do this. All thin or easily bent parts I cast (hoods, axles, antennas) are done in clear. Clear resin is heat cured in an oven at around 150 to 200 degrees. This not only cures the resin but hardens it to the point that it will NOT warp. Standard resins have a tendency to do so when it get's too warm. There's nothing worse than walking into the hobby room and seeing the model resting on it's oil pan because the resin axle warped in the heat. So if my air conditioning goes out I need not fear for my resin models or parts. Savvy? Now I know what you're thinking right now. Why bother to cast them in clear? Well there's always a madness to my method. (just look at my avatar right?) So I want you all to remember you heard this here first, because to date I am the only caster to do this. All thin or easily bent parts I cast (hoods, axles, antennas) are done in clear. Clear resin is heat cured in an oven at around 150 to 200 degrees. This not only cures the resin but hardens it to the point that it will NOT warp. Standard resins have a tendency to do so when it get's too warm. There's nothing worse than walking into the hobby room and seeing the model resting on it's oil pan because the resin axle warped in the heat. So if my air conditioning goes out I need not fear for my resin models or parts. Savvy? 
|
|
|
|
Post by Paul B. Canney on Sept 20, 2013 5:15:28 GMT -6
I could use a front axle
|
|
|
|
Post by magnum4342 on Sept 20, 2013 11:21:42 GMT -6
I sent you a P.M. Funnybug. Guys, sorry about the grainy pictures, I have been diagnosed with "Pixlexia". 
|
|
|
|
Post by AL on Sept 20, 2013 14:23:14 GMT -6
........ that's KooL how you make parts like this Kevin, .....................
-AL
|
|
|
|
Post by magnum4342 on Sept 20, 2013 15:19:46 GMT -6
Thank you Al. I don't mean to go all "Spock" on you but it only seems logical, that if you can make parts that won't warp, you should, right? The cost difference to clear resin over standard is mere pennies per part and I prefer to provide the best parts possible. I'm thinking right now about adding some street/show rod parts to my catalog. I can see a dozen uses for the Milk Truck's frame. 
|
|

