|
|
Post by rocketeer on Jul 22, 2016 0:15:45 GMT -6
I had so much fun building the Stoned, Hoods, & Crooks Willys that I decided to get out the Eye Gone Wild I'd fiddled with and then put away. One of the big disappointments for me about the EGW was that the hot rod was pretty much realistic; i would have far preferred something more cartoony. So, like any good car modeller, I got out the saw. My goal was to "bend" the body upward to make it have sort of an arched look. A couple pie cuts through the door area, and I was part way there; unfortunately, I couldn't figure out any way to "bend" the roof, so I had to build it up with putty, and then reshape the windows so they arched, too. And in the process, most of the body trim disappeared--but what the heck, that just adds to the challenge, right?  While I was at it, I shortened the trunk a bit, too. Here's an in-progress shot of the body "bending": 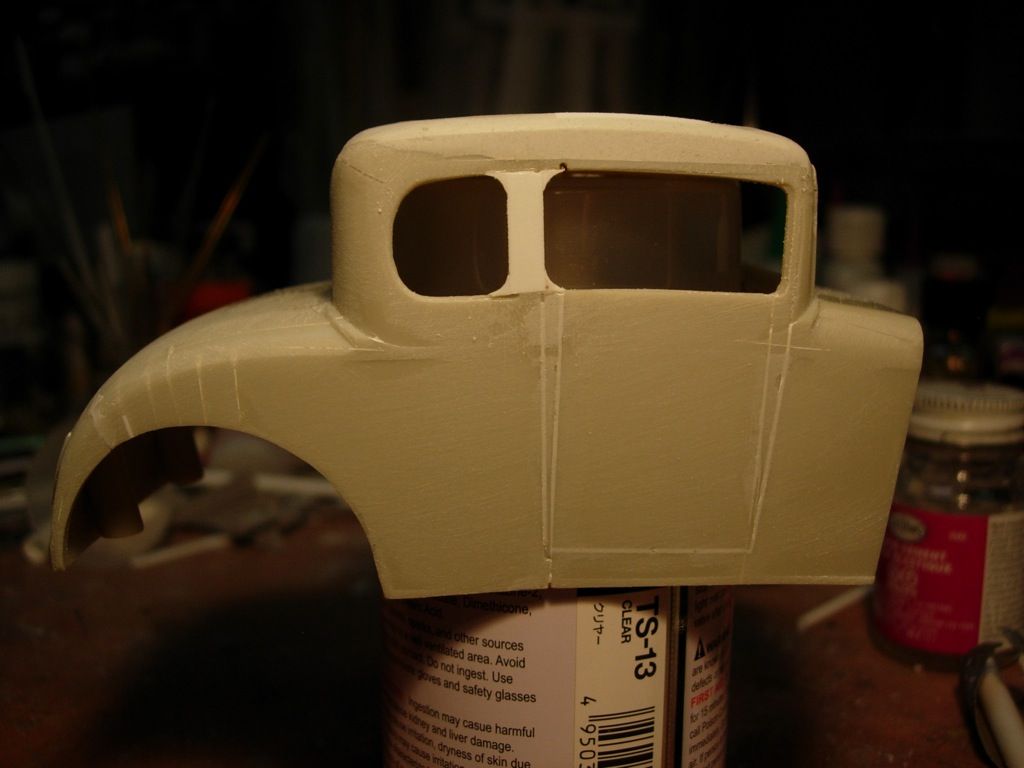 ...and here it is this evening, after restoring the body trim using styrene strip and lead foil for the ragged roof bits: 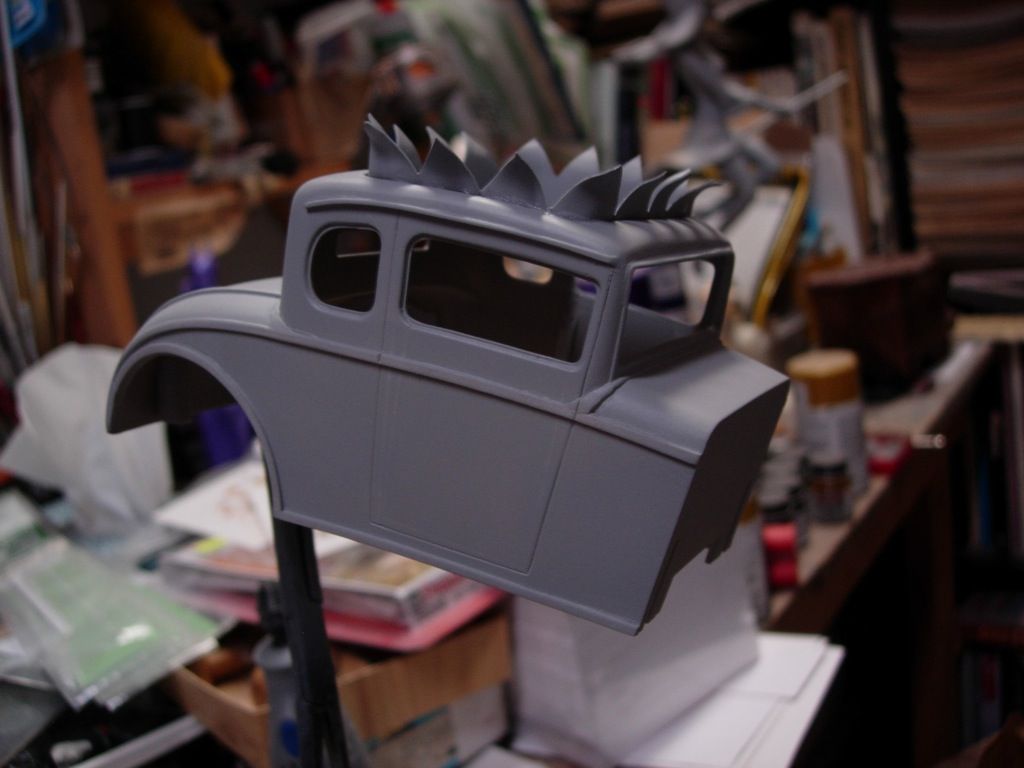 I also decided to jazz up the engine a bit by increasing the size of the carb scoops and adding more carbs (I love the old 6-carb setups). So I modified one of the kit carbs, made a rubber mold, and poured six copies. The I built a simple log manifold to mount them: 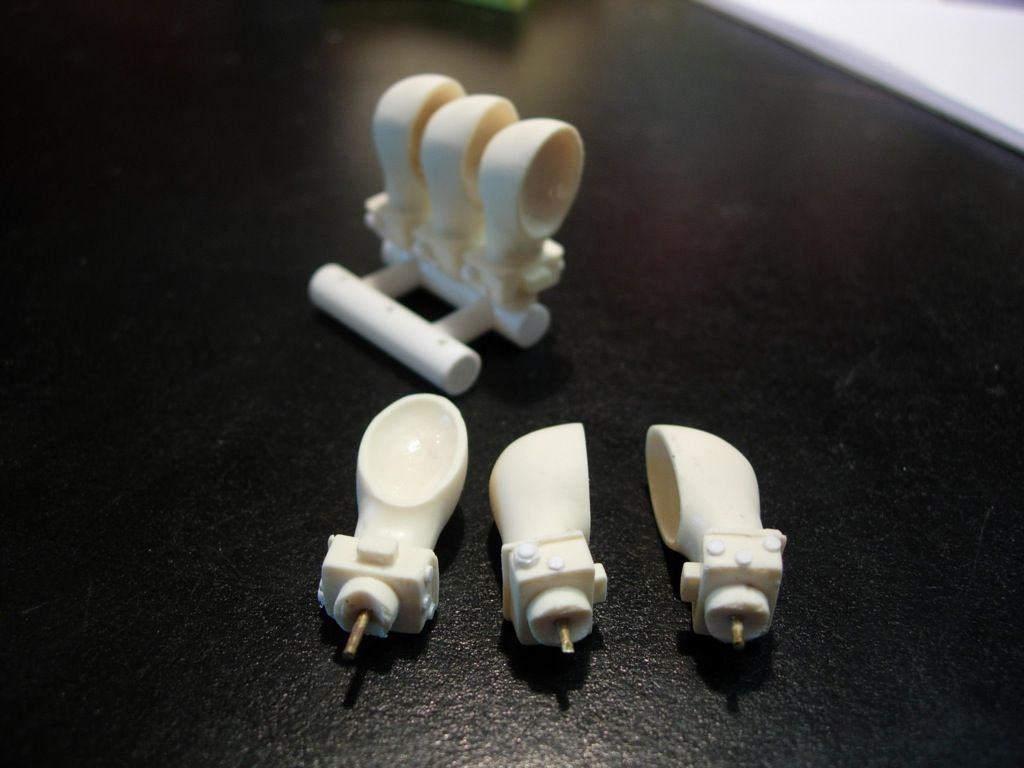 Next job is to modify the chassis, and then I think I might try to add lighted flames to the exhausts. How hard could it be, eh?  |
|
|
|
Post by TooOld on Jul 22, 2016 5:46:45 GMT -6
Excellent work "Tooning" up the body , especially adding the body trim back afterwards ! Love the new carbs !  |
|
|
|
Post by showrodjohn on Jul 25, 2016 3:20:44 GMT -6
Fantastic looking forward to see it finished
|
|
|
|
Post by Bert on Jul 26, 2016 6:20:26 GMT -6
I pulled my EGW kit down to work on. Now that you are tackling it, I'm going to eat popcorn and watch this build up first. Keep us posted. Looking great so far.
|
|
|
|
Post by rocketeer on Jul 26, 2016 16:44:31 GMT -6
Thanks for the comments, guys! A quick update: The chassis is pretty much done; here are views from the bottom and the top. I added chassis rails to improve the side view; I like my highboys to have the chassis showing underneath, especially if the chassis has the lovely '32 rails. The thing that looks like a peg sticking up in the center is actually a socket; a piece of clear rod will fit into it to provide that all-important "poppin' a wheelie" attitude  The lower engine half is from a wrecked Beer Wagon, and is just set (crookedly) in place for now. The rear axle is from the Drag Hag. 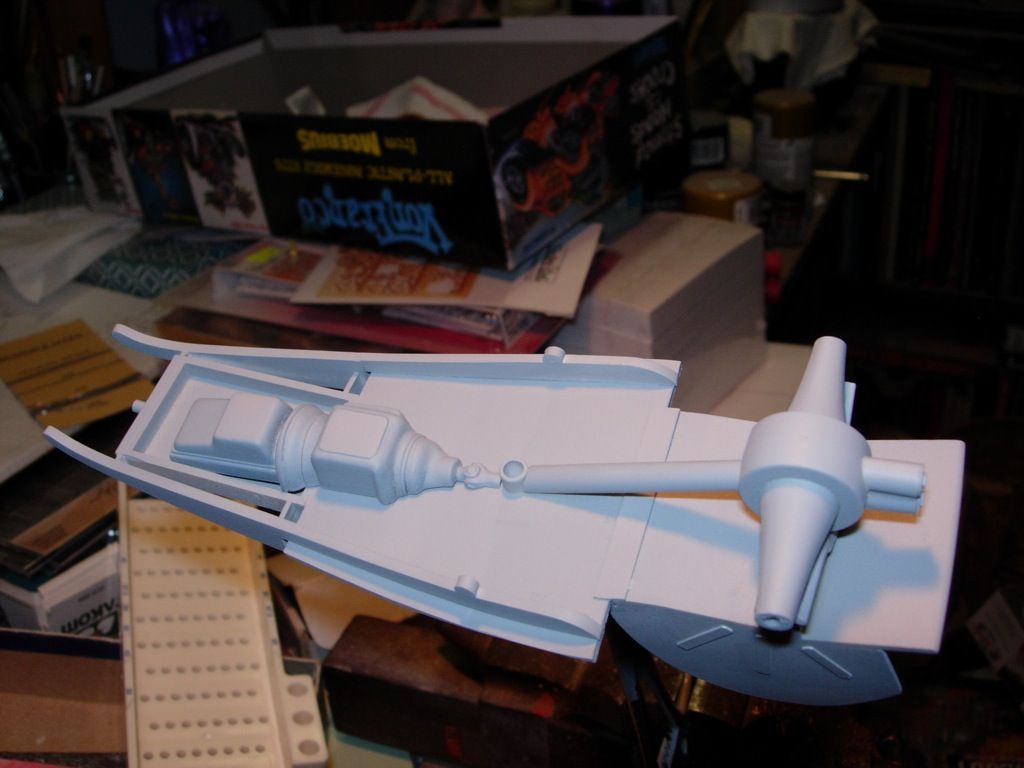 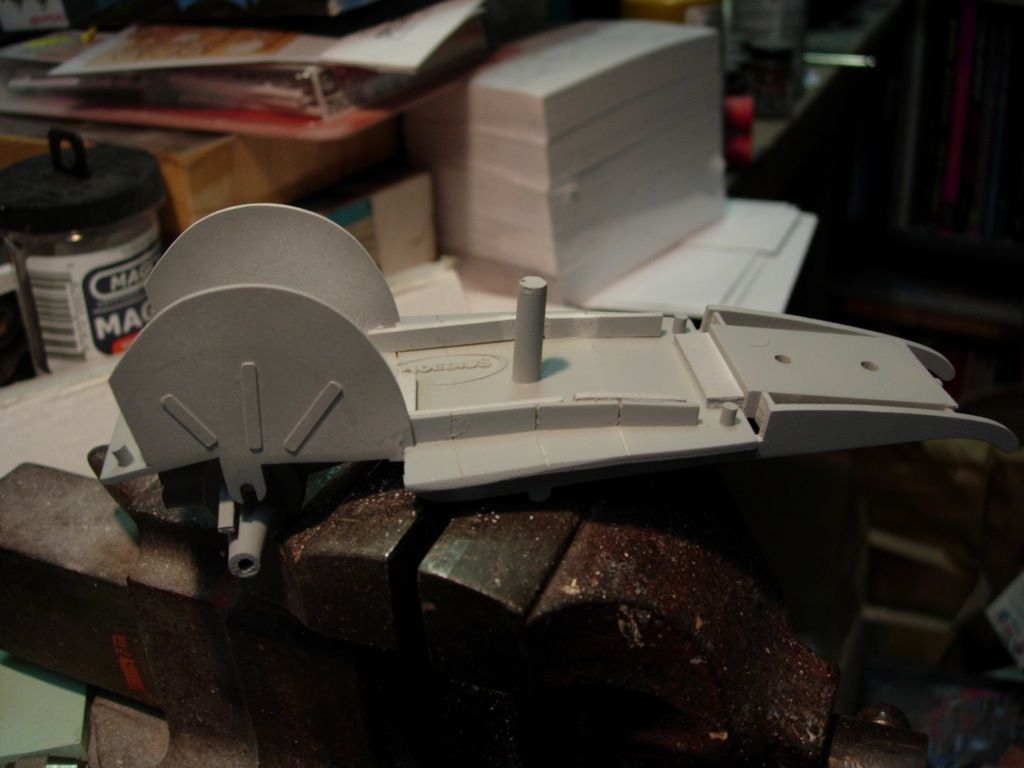 And here are some suspension bits and pieces; an important part of the highboy "look" is the visible suspension bits, and I was disappointed that the EGW kit didn't have any: Ladder bars for the back, hairpin radius rods for the front, and the front axle with its new tie rod. (oooooh, aaaaaaaah) 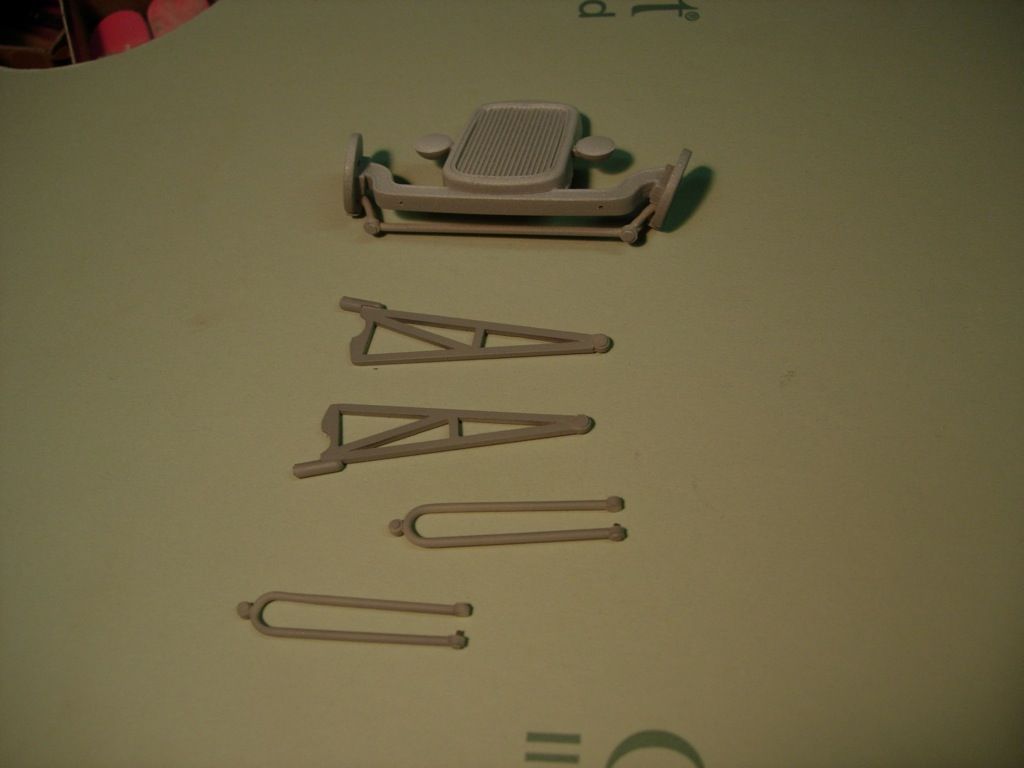 Haven't quite decided on a color yet, but it'll either be metallic (Batgirl) purple or metalflake lime green. I'm also dithering on whether to add lighted flames to the headers. |
|
|
|
Post by rocketeer on Jul 30, 2016 8:43:19 GMT -6
I've been doing some casting. I built a flame shape out of Aves, then poured a rubber mold using TAP Plastics silicon mold compound. for the flames, I'm using Pebeo Gedeo crystal clear epoxy resin. Here's one flame, and the other in the mold: 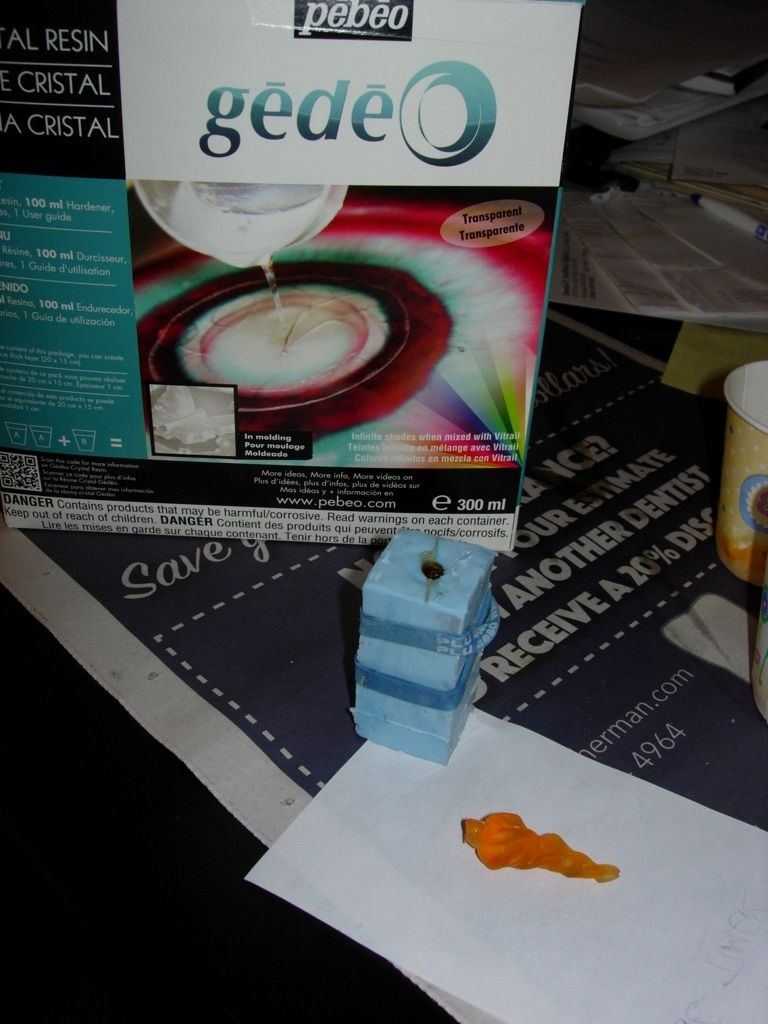 One thing I've found out: The epoxy is really sensitive to temperature. I poured the first flame in my basement workroom, which is maybe 65F. It didn't want to get hard, so I brought it outside (85F today) and it seems to have finally set up nice and hard. Before pouring the second flame, I brought all the materials upstairs to our dining room (76F) and let them acclimate a while, and I think everything will set up fine. We'll see! I also worked on wire routing; but after carefully routing the wires down inside the exhaust cones, and out into a super-glue-filled groove on the bottom of the header pipe, I tested them, and one LED didn't flicker at all. Curses! So I ripped it out and I have another couple flickerers on order from Evans Designs. This time I'll test before installing  I also ordered a couple spares  The body will be detachable so that the battery can be replaced. I built a couple brackets to hold two small super magnets inside the body; they clamp onto steel plates on the chassis to hold the chassis & body together nice and firm. The battery is held in place by another super magnet. The battery & the backside of the switch are going to be clearly visible through the open windows, so I guess I'm going to have to add some tinted glass or build some kind of cover to disguise the battery & switch. Hmmmm.. |
|
|
|
Post by RatRod on Jul 31, 2016 15:55:22 GMT -6
Looks great so far Steve!!! Great to see back again!!!
|
|
|
|
Post by rocketeer on Aug 4, 2016 12:27:13 GMT -6
An update: Well, it's green now!  I used Createx Wicked Colors pearlescent Lime Green at first, but it was a bit too yellow for my taste and not intense enough; so I mixed in a little Createx pearlescent green and gave it a couple more coats, and now I'm very happy with the color. After I get the decals on I'll give it a couple coats of clear to increase the gloss, and it should look fine. 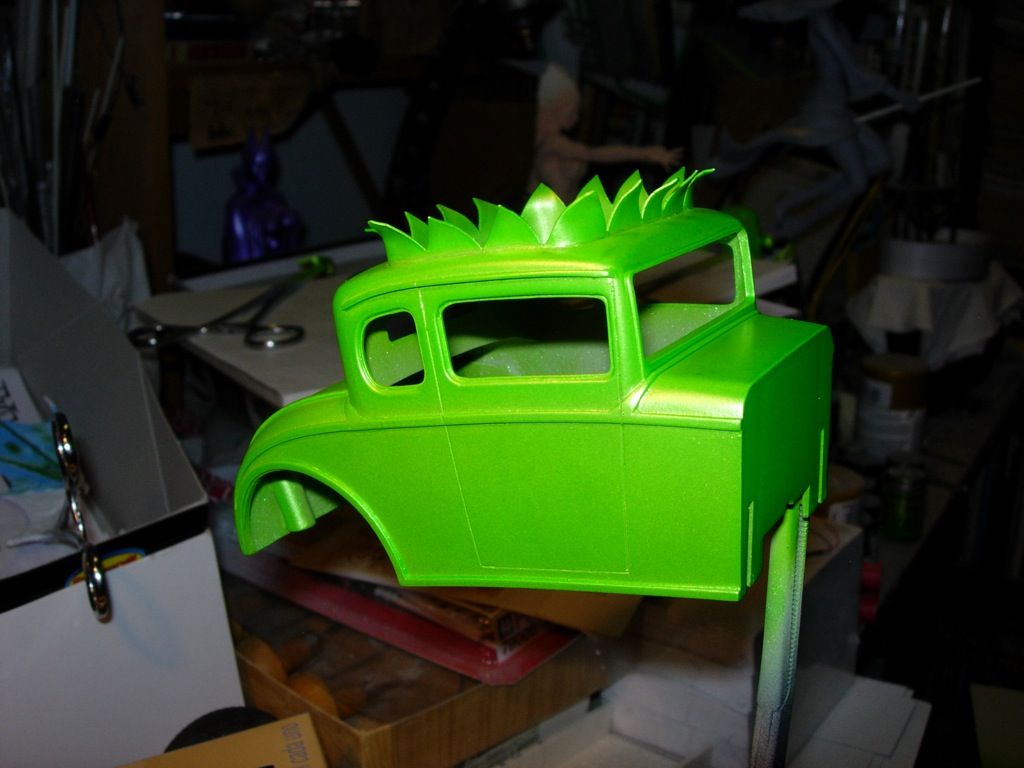 And the engine is well on its way; here is the six-carb induction setup, with the engine block in the background: 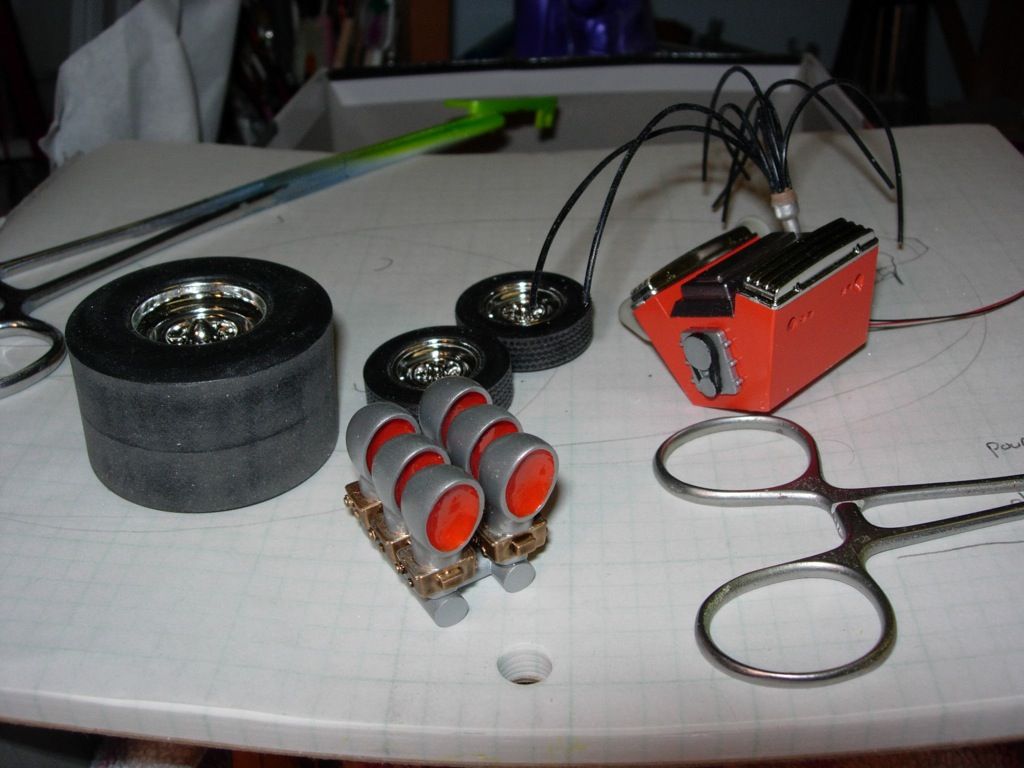 Now I guess I'm going to have to get cracking on the Eye himself. Haven't decided what color to paint the wings, but I saw one fellow who had painted them in a bronzey brown and they looked nice, so that's probably what I'll do. |
|
|
|
Post by rocketeer on Aug 13, 2016 12:46:32 GMT -6
Update: The Eye's hot rod is done, and here are pics. The Eye himself is hanging up in a warm place while the oil paints dry, so it'll be a week or so until the model is complete, but the car is finished! The underside. The Big Red Button turns on the exhaust lights, and the socket below it is for the clear support rod: 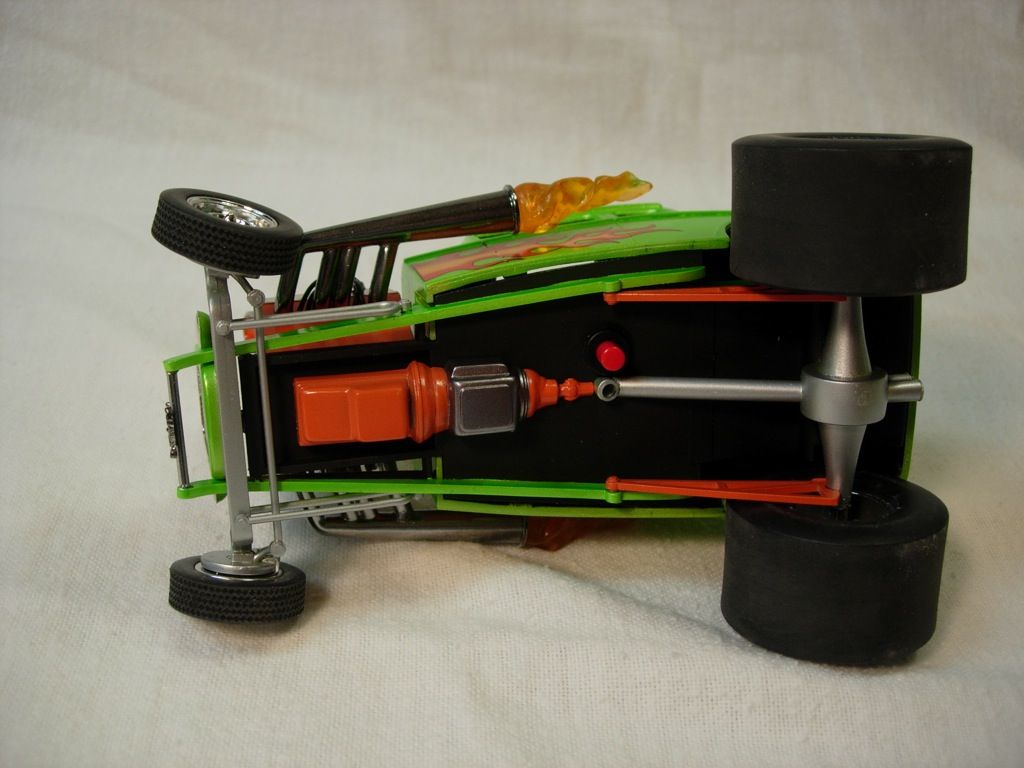 A side view, showing the deformed body to best advantage. The flame decals are in the kit: 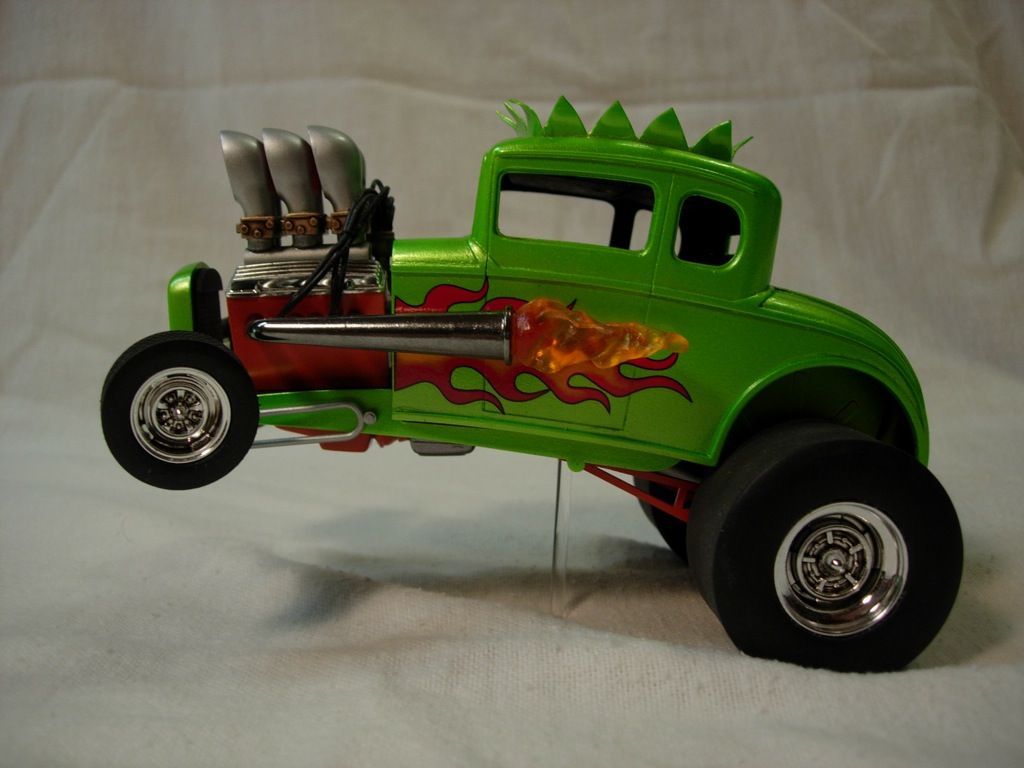 Front view. I built the frame spreader bar, complete with Games Workshop orc-skull plaque: 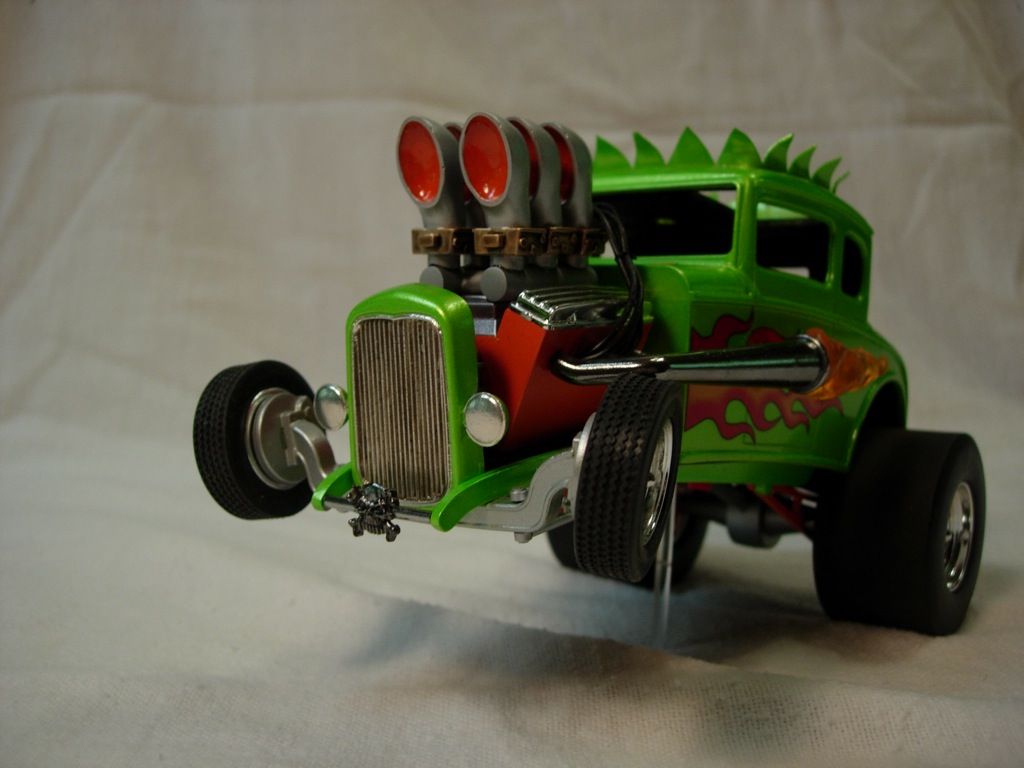 Rear view: 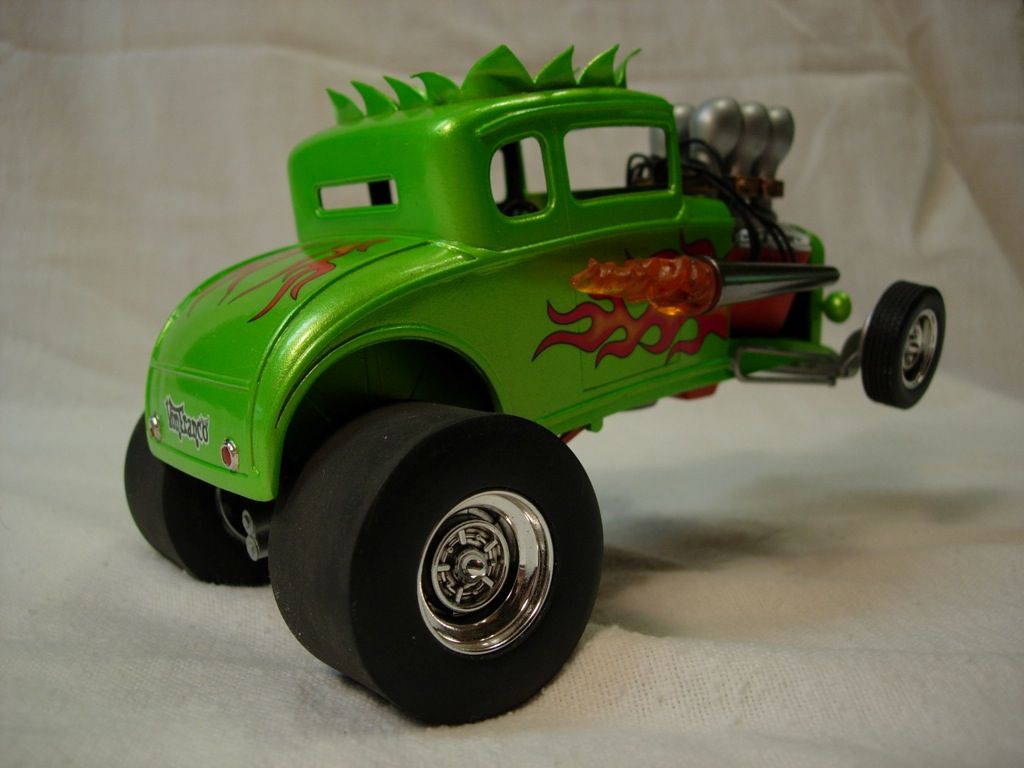 And the flames lit up. I redid both exhausts to use orange flickering LEDs, and they're really dramatic against the green paint (kindly disregard the bodywork fail just below the trim molding  ) : 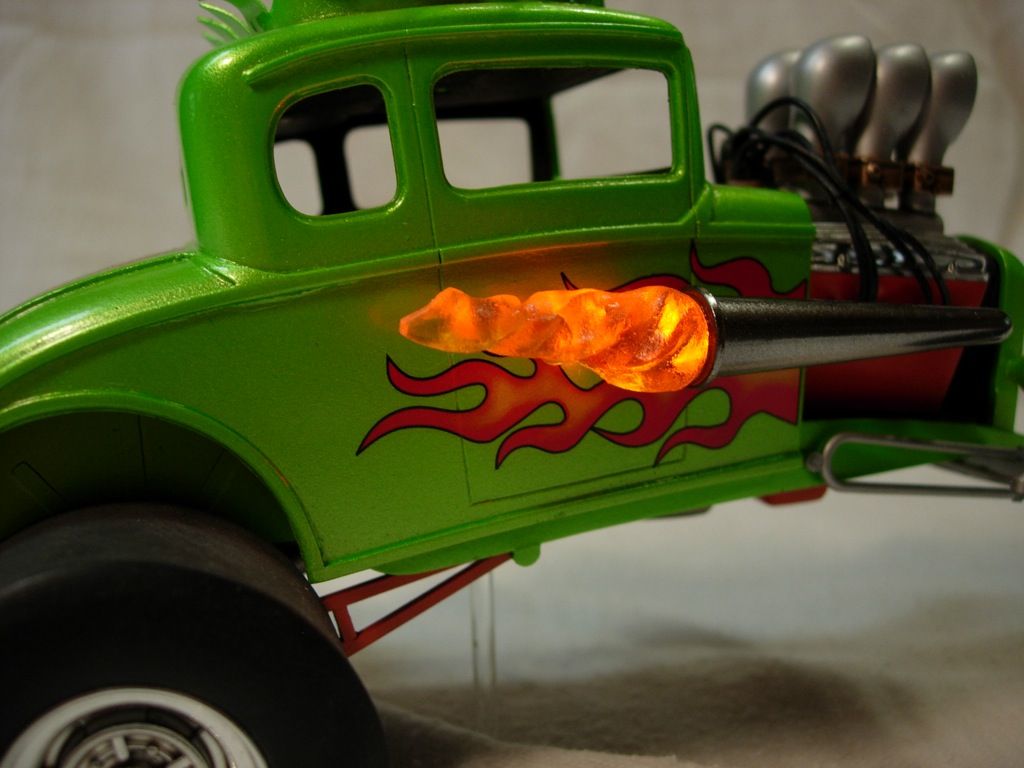 I'll add another update when the Eye is installed. |
|
|
|
Post by Steve-o on Aug 14, 2016 13:40:32 GMT -6
Beautiful job man !!!
Everything looks great ... 
|
|
|
|
Post by DVS on Aug 14, 2016 14:40:18 GMT -6
That's looking good, Love the flames, I bet that it looks hot in dim light when lit up.
|
|
|
|
Post by Bert on Aug 14, 2016 14:49:44 GMT -6
Friggin' Awsome! All changes done are spot on and not over done. The factory kit should have gone this route.
|
|
|
|
Post by "ScratchFever" on Aug 15, 2016 6:11:57 GMT -6
Whoa!! Fantastic pure fantastic...!!
|
|
|
|
Post by rocketeer on Aug 16, 2016 15:26:43 GMT -6
|
|
|
|
Post by Bert on Aug 18, 2016 19:12:52 GMT -6
It's Perfect!
|
|
|
|
Post by 41chevy on Aug 19, 2016 9:35:19 GMT -6
Fantastic!!
|
|
|
|
Post by rocketeer on Aug 19, 2016 10:18:53 GMT -6
Thanks, guys!  |
|
|
|
Post by TooOld on Aug 19, 2016 17:43:49 GMT -6
Can't think of a better word to describe it !  |
|
|
|
Post by flounder on Aug 20, 2016 9:04:54 GMT -6
Wow. Now that's done right!
|
|
|
|
Post by erwin on Aug 20, 2016 19:43:58 GMT -6
Wow! That is jaw-droppingly cool!
|
|
|
|
Post by rocketeer on Aug 21, 2016 11:54:25 GMT -6
|
|
|
|
Post by kabdriver on Oct 9, 2017 16:11:41 GMT -6
Oh wow, this is GREAT Rocket! Amazing build! Thanks for posting a link to it! Those flames look AMAZING! Definitely a technique I want to try!
|
|
|
|
Post by scratchbuilt on Oct 16, 2017 19:36:16 GMT -6
That looks f@&king awesome maate.
|
|
|
|
Post by patw on Oct 17, 2017 10:12:23 GMT -6
Just superb!
|
|
|
|
Post by rocketeer on Oct 18, 2017 10:37:41 GMT -6
Thanks, guys! I finished the Eye about this time last year; since then, I've done mostly fantasy and sci-fi stuff. But I did complete Mama B & Baby and a Flameout, and of course, the Saturn Weekender I posted about just recently. |
|
|
|
Post by stevielewis on Mar 30, 2018 4:07:14 GMT -6
I just saw this thread and I have to agree with everyone else who posted to it....it's AWESOME!
|
|
|
|
Post by rocketeer on Jan 27, 2020 14:05:51 GMT -6
|
|

