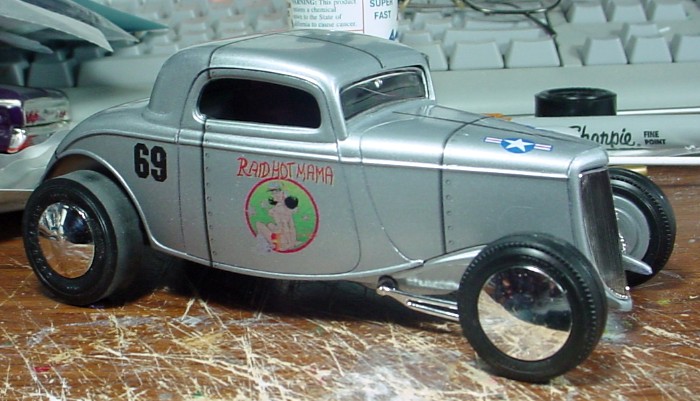
Post by hobbybobby on Jul 26, 2010 16:11:20 GMT -6
Rivets
There are many methods to represent Rivets for the look.
There are some pliers, expensive tools and presses.
But these are only of limited use in the plastic model-building, for our purposes.
I'll show you some methods, that are more or less simple and not so expensive.
I always look for simple stuff lying around somewhere.
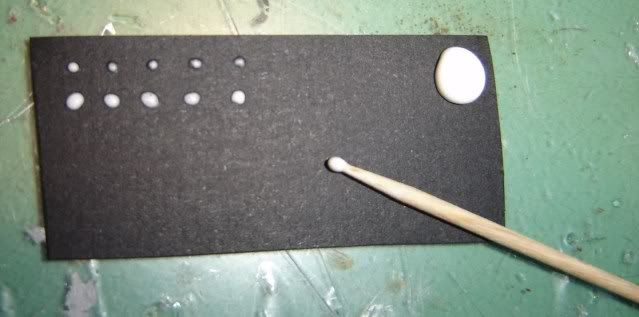
The simplest, the white glue method.
All we need is white glue and a toothpick.
We make a big drip onto a piece of cardboard, or something, and dip the toothpick into it.
Then we set at the desired places a small drop.
The white glue becomes transparent after drying and is very good paintable compounds.
Simple, but an inaccurate method, requires concentration, difficult dosing, and adherence to the shape and size.
********************************************************************************************
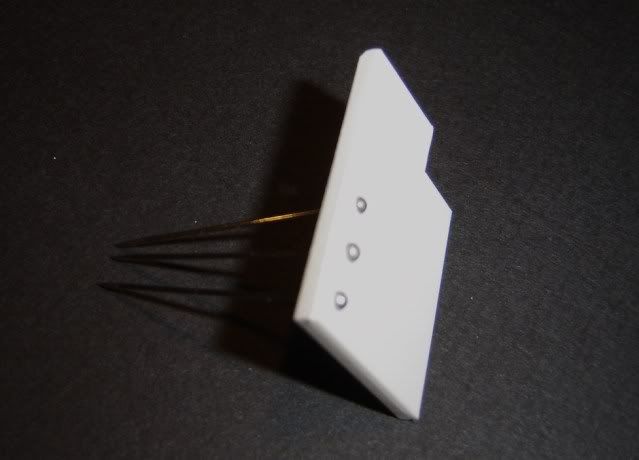
The plug-needle method
There are pins in various sizes, with flat, half round and round heads.
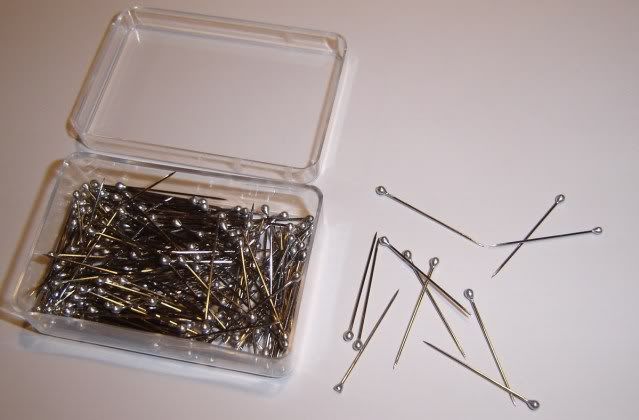
Depending on the head form, the holes are drilled, and the needle pushed through.
They are glued on the other side.
To that extent, that's even possible.
Now comes the tricky part.
If it does not matter, the needles remain indoors (if you do not see them etc).
Otherwise you have to cut the needles.
That is pretty stupid, because we may get no more in some places.
They may also be cut off before, but we needs a very good pliers, because the needles are hardened.
********************************************************************************************
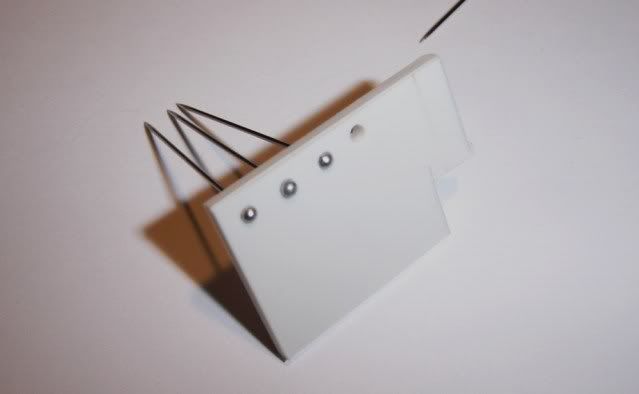
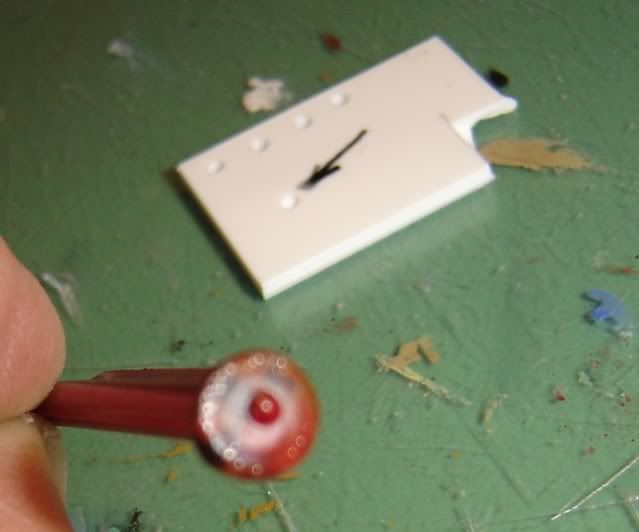
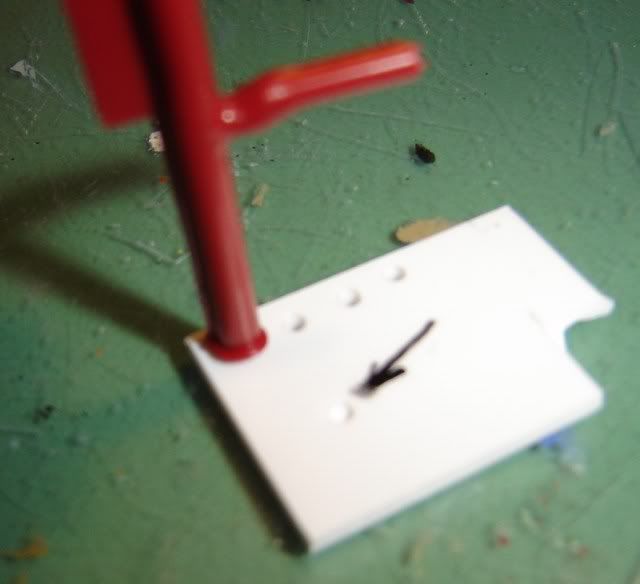
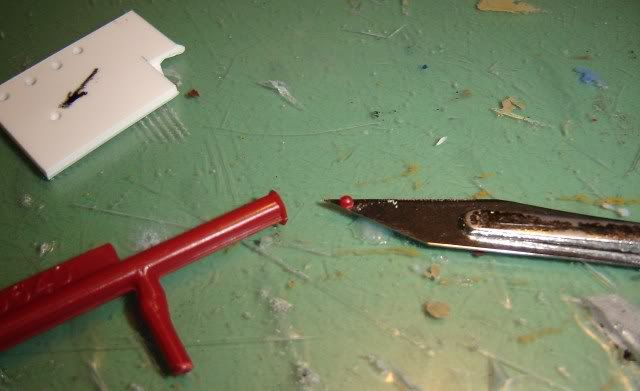
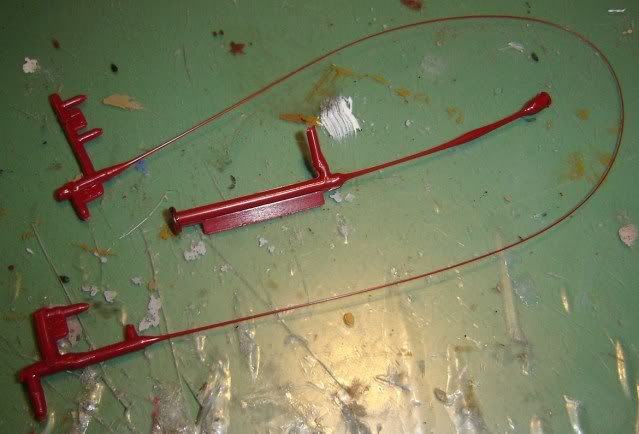
The heat the sprue method.
I make some holes of the various dimensions and a blind hole that we need, for the rivets we need.
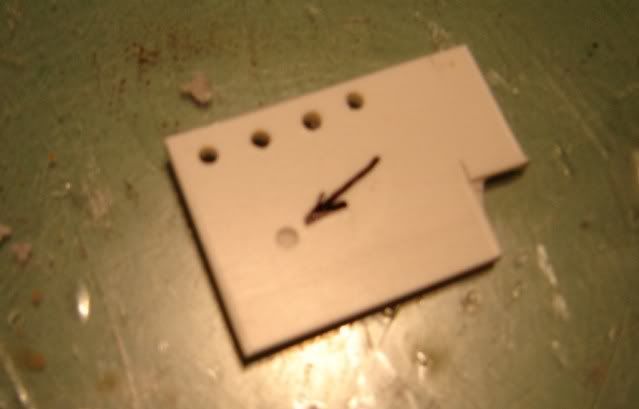
Now we could heat up a piece of sprue (tha chassis that takes togheter all the parts of the model to be build) amd move quickly near tho the hole of the dimension needed.
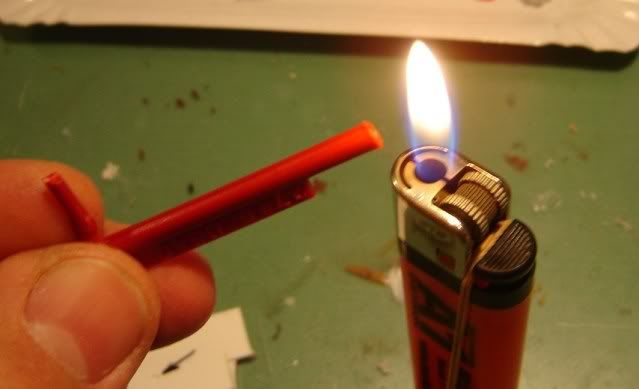
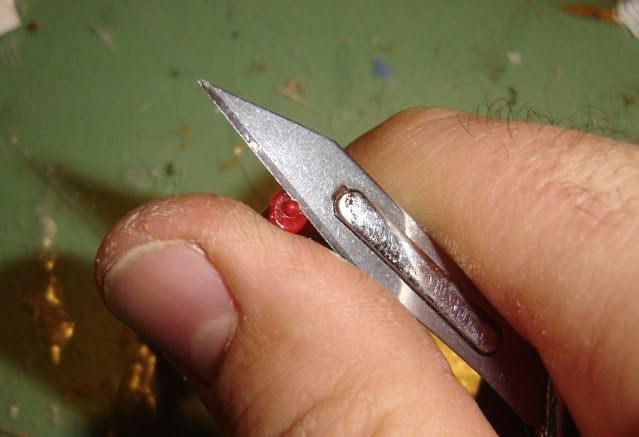
Here push until the fused plastic comes out the other part of the holes .
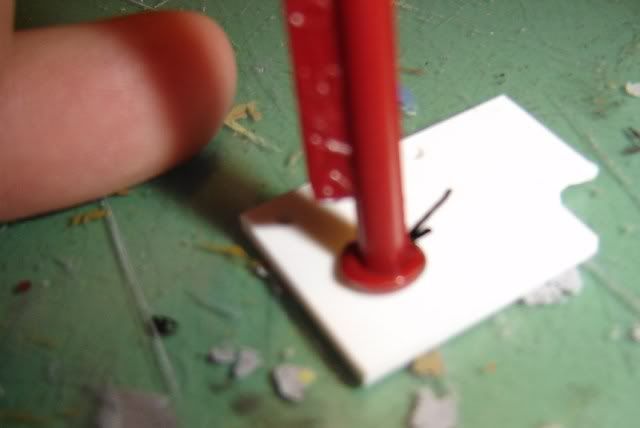
We should have obtained the rivets as shown on the photo.
Again.
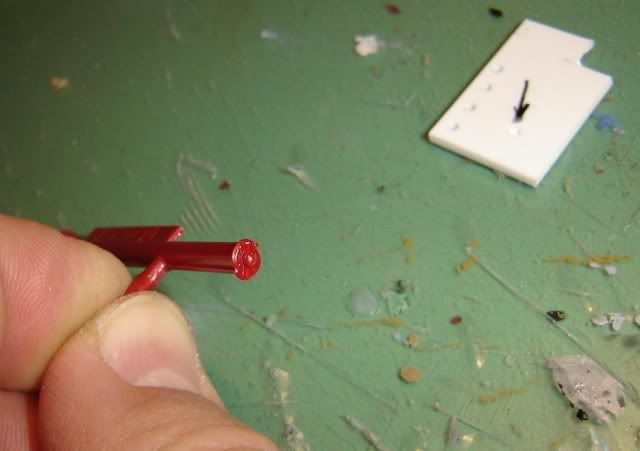
At this time we need only to cut away the rivets paying attention to not cut ourselves .
You could put a little drop of liquid glue ont point you want the rivet to stay.
Well, this method is really only for the enthusiasts among us...
********************************************************************************************
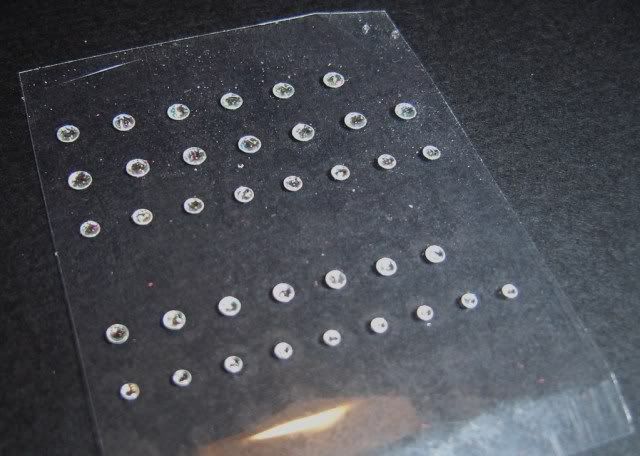
This is the easiest method.
These are little stones for the nose, a fake nose piercing.
Or for fingernails.
These are available in various sizes and versions.
Self-adhesive, but not so tight.
But after the painting they keep determined.
********************************************************************************************
The Stretched Styrene Method
Another approach to creating rivets is to form them from thin plastic rod.
Cut a section of straight sprue and hold it one hand on each end just above the flame of a candle.
Rotate the sprue slowly and move it side to side over the flame.
Soon the solid plastic will start to soften and liquify.
The trick is to heat a section as evenly as possible.
Remove the spure from above the flame a gently pull the ends away from one another.
The plastic will be drawn into a thin thread.
Most will be uneven of rupture during the drawing out.
But with care a practice, one can draw out any number of plastic rods in a variety of thicknesses.
Now you start cutting the tiniest little pieces: they will all be perfectly round.
Before you know it, you have hundreds of them...

Then stick them on.
Well, another method, its really only for the enthusiasts among us...
********************************************************************************************
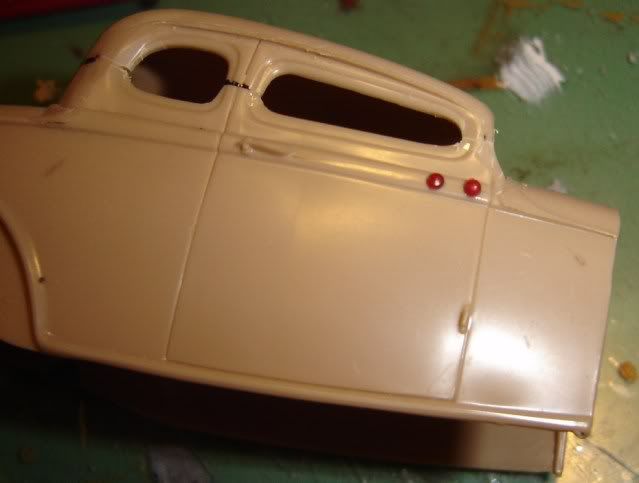
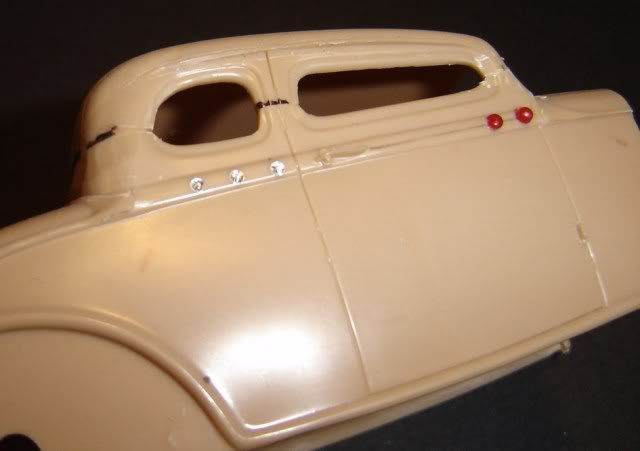
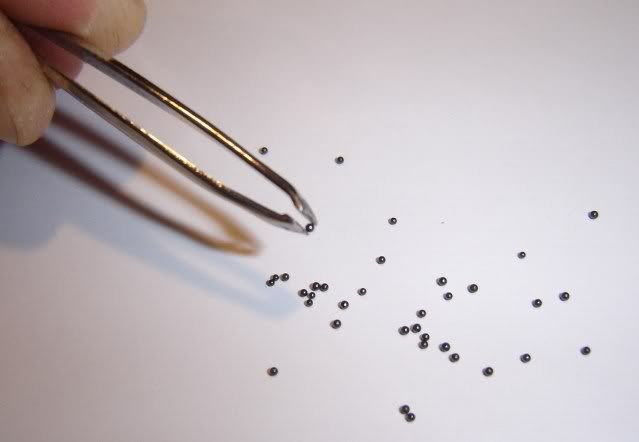
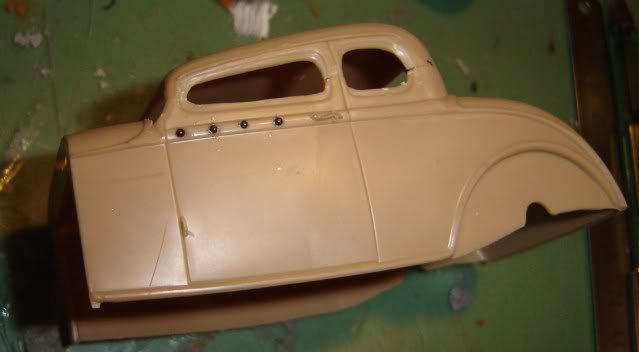
The ball in the crater method.
This is my favorite method to make rivets for the look.
It initially requires precise preparation, but the execution is much faster, and the result is the best.
Here are the required "stuff".
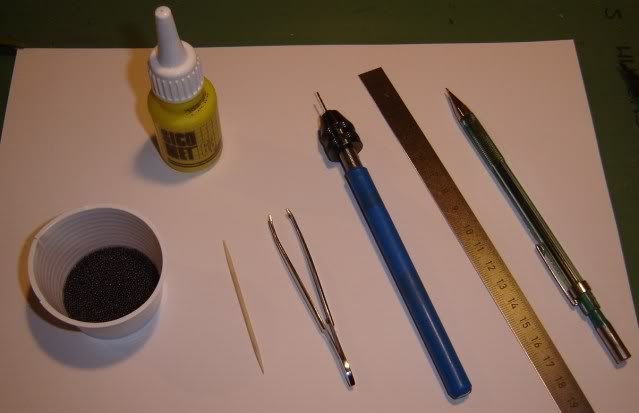
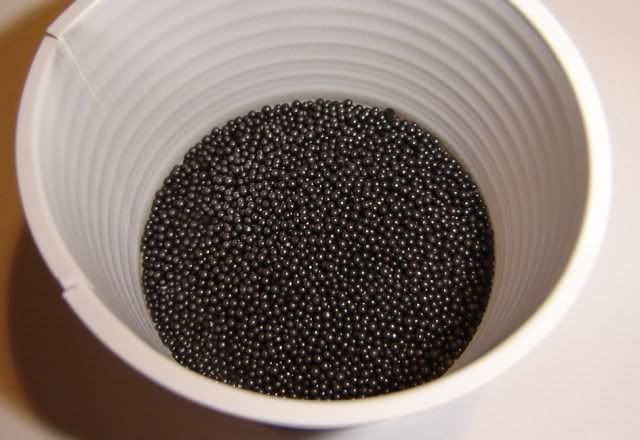
Little lead balls, 1mm in diameter.
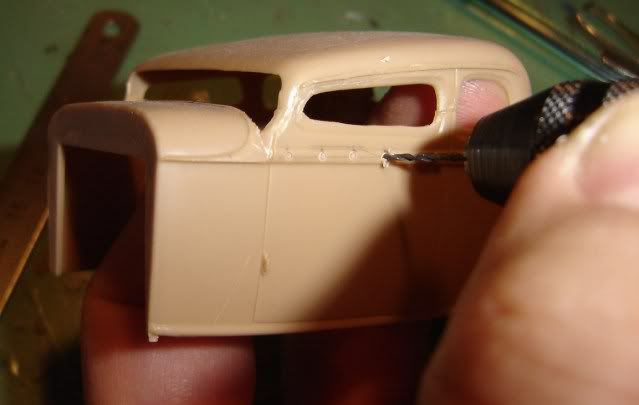
To create the rivet “crater” you don’t want to press down on the pin vice so much as let the weight of the vice itself press into the plastic.
You do not want to create an actual pin tunnel, you just want a hemisphere that the little lead ball will sit into about halfway.

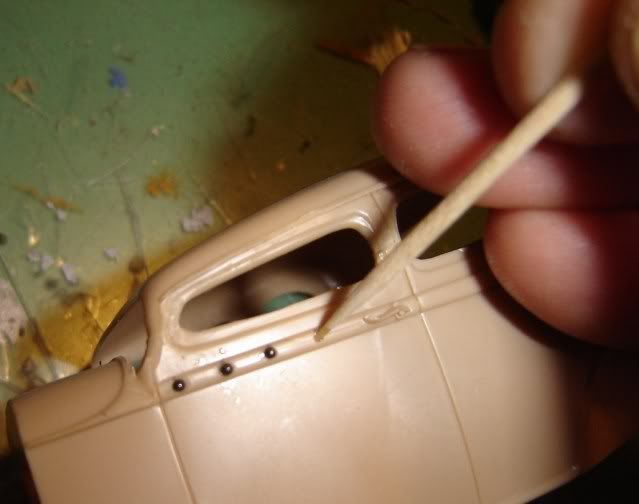
Once you have all your rivet “craters”, you want to take some super glue, squirt it somewhere useful like on a spare piece of plastic, and keep it handy.
You then want to use a pin, needle or tothstick to transfer a tiny bit of super glue from your glue puddle to the rivet “crater”.
Personally, I use a industrial superglue for this, because it flows very easily into the rivet craters and doesn’t dry too quickly.
Once the glue is in place grab your tweezers and pick up a little lead ball.
Place this in the super glue (the capillary action will draw the bead in) and then quickly wipe down your tweezers.
If you dont wipe down your tweezers very quickly they will become a gluey mess!
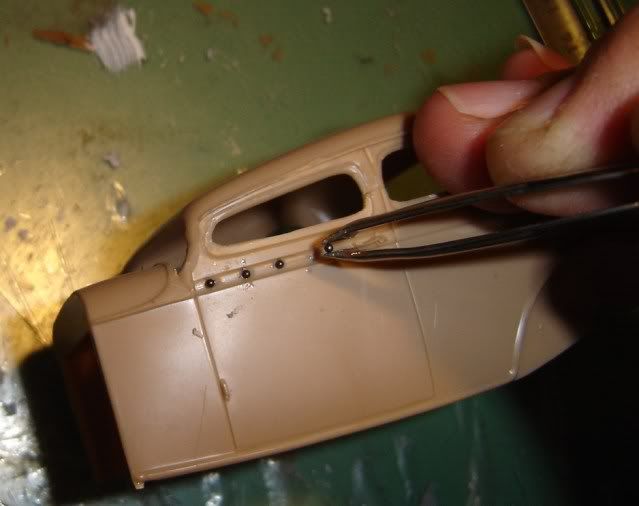
Here is what you will have at the end of this stage:
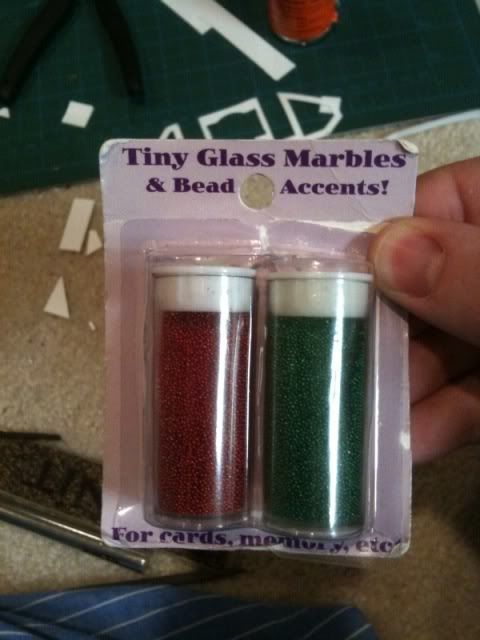
I’m unsure if you have the little lead balls, but I'm sure, elsewhere around the world, a large craft store would have something similar.
Glass beads:
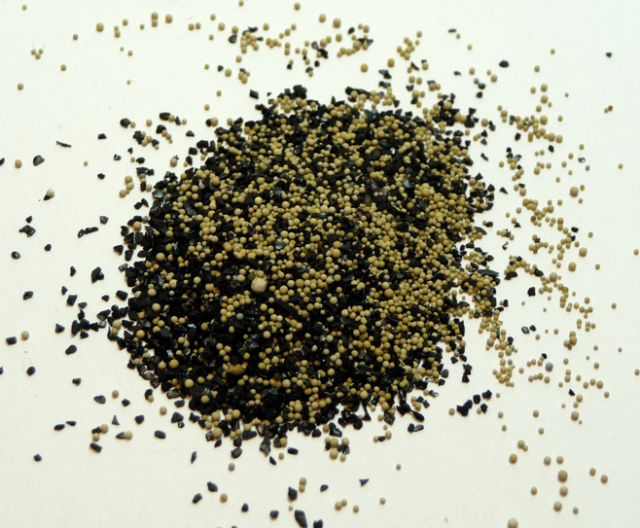
The next Tip is the contents of a Brita Classic Water Filter Cartridge.
Water filters are essentially made up of small plastic balls and small shards of charcoal.
Simply get hold of a water filter and carefully cut the top off it (I used a small razor saw).
Empty the contents in to a suitable container and you have a supply of rivets that should last a long time!
Here is a closer photo of the plastic balls that are inside the filter.
It is these that we are interested in
********************************************************************************************
I hope it's a little more helpful for someone, someday and keep the eyes open...
There are many methods to represent Rivets for the look.
There are some pliers, expensive tools and presses.
But these are only of limited use in the plastic model-building, for our purposes.
I'll show you some methods, that are more or less simple and not so expensive.
I always look for simple stuff lying around somewhere.
The simplest, the white glue method.
All we need is white glue and a toothpick.
We make a big drip onto a piece of cardboard, or something, and dip the toothpick into it.
Then we set at the desired places a small drop.
The white glue becomes transparent after drying and is very good paintable compounds.
Simple, but an inaccurate method, requires concentration, difficult dosing, and adherence to the shape and size.
********************************************************************************************
The plug-needle method
There are pins in various sizes, with flat, half round and round heads.
Depending on the head form, the holes are drilled, and the needle pushed through.
They are glued on the other side.
To that extent, that's even possible.

Now comes the tricky part.
If it does not matter, the needles remain indoors (if you do not see them etc).
Otherwise you have to cut the needles.
That is pretty stupid, because we may get no more in some places.
They may also be cut off before, but we needs a very good pliers, because the needles are hardened.
********************************************************************************************
The heat the sprue method.
I make some holes of the various dimensions and a blind hole that we need, for the rivets we need.
Now we could heat up a piece of sprue (tha chassis that takes togheter all the parts of the model to be build) amd move quickly near tho the hole of the dimension needed.
Here push until the fused plastic comes out the other part of the holes .
We should have obtained the rivets as shown on the photo.
Again.
At this time we need only to cut away the rivets paying attention to not cut ourselves .
You could put a little drop of liquid glue ont point you want the rivet to stay.
Well, this method is really only for the enthusiasts among us...
********************************************************************************************
This is the easiest method.
These are little stones for the nose, a fake nose piercing.
Or for fingernails.
These are available in various sizes and versions.
Self-adhesive, but not so tight.
But after the painting they keep determined.
********************************************************************************************
The Stretched Styrene Method
Another approach to creating rivets is to form them from thin plastic rod.
Cut a section of straight sprue and hold it one hand on each end just above the flame of a candle.
Rotate the sprue slowly and move it side to side over the flame.
Soon the solid plastic will start to soften and liquify.
The trick is to heat a section as evenly as possible.
Remove the spure from above the flame a gently pull the ends away from one another.
The plastic will be drawn into a thin thread.
Most will be uneven of rupture during the drawing out.
But with care a practice, one can draw out any number of plastic rods in a variety of thicknesses.
Now you start cutting the tiniest little pieces: they will all be perfectly round.
Before you know it, you have hundreds of them...
Then stick them on.
Well, another method, its really only for the enthusiasts among us...
********************************************************************************************
The ball in the crater method.
This is my favorite method to make rivets for the look.
It initially requires precise preparation, but the execution is much faster, and the result is the best.
Here are the required "stuff".
Little lead balls, 1mm in diameter.
To create the rivet “crater” you don’t want to press down on the pin vice so much as let the weight of the vice itself press into the plastic.
You do not want to create an actual pin tunnel, you just want a hemisphere that the little lead ball will sit into about halfway.
Once you have all your rivet “craters”, you want to take some super glue, squirt it somewhere useful like on a spare piece of plastic, and keep it handy.
You then want to use a pin, needle or tothstick to transfer a tiny bit of super glue from your glue puddle to the rivet “crater”.
Personally, I use a industrial superglue for this, because it flows very easily into the rivet craters and doesn’t dry too quickly.
Once the glue is in place grab your tweezers and pick up a little lead ball.
Place this in the super glue (the capillary action will draw the bead in) and then quickly wipe down your tweezers.
If you dont wipe down your tweezers very quickly they will become a gluey mess!
Here is what you will have at the end of this stage:
I’m unsure if you have the little lead balls, but I'm sure, elsewhere around the world, a large craft store would have something similar.
Glass beads:
The next Tip is the contents of a Brita Classic Water Filter Cartridge.
Water filters are essentially made up of small plastic balls and small shards of charcoal.
Simply get hold of a water filter and carefully cut the top off it (I used a small razor saw).
Empty the contents in to a suitable container and you have a supply of rivets that should last a long time!
Here is a closer photo of the plastic balls that are inside the filter.
It is these that we are interested in
********************************************************************************************
I hope it's a little more helpful for someone, someday and keep the eyes open...