Deleted
Deleted Member
Posts: 0
|
Post by Deleted on Jul 27, 2010 8:02:15 GMT -6
Here is a very simple way to make more realistic license plates- Much better than the thick plastic that normally comes in your typical model kit. Take an aluminum can of your favorite beverage and empty its contents in an appropriate manner  . Then, taking a pair of scissors, poke a hole in the side and cut out a section of the thin aluminum VERY CAREFULLY- It's razor sharp! Once you've cut out the piece of aluminum, Using the edge of the table, work the piece of metal with both hands- trying to get it to be as flat as possible (use the same technique as getting a curled-up piece of paper flat again). Once the aluminum sheet piece is fairly flat, take a license plate decal of your choice, and apply it to the silver side of the aluminum (you can remove the beverage logo/paint from the opposite side , if you want, with fine steel wool). Let the decal dry completely, then take a sharp scissors and cut out the license plate as close to the edge of the decal as possible. Walla- You now have a thin, realistic license plate! Below is a pic of some that I made for my Revell '32 Ford 3-window coupe, and my Monogram '70 Dodge T/A Challenger. Hope this helps! John  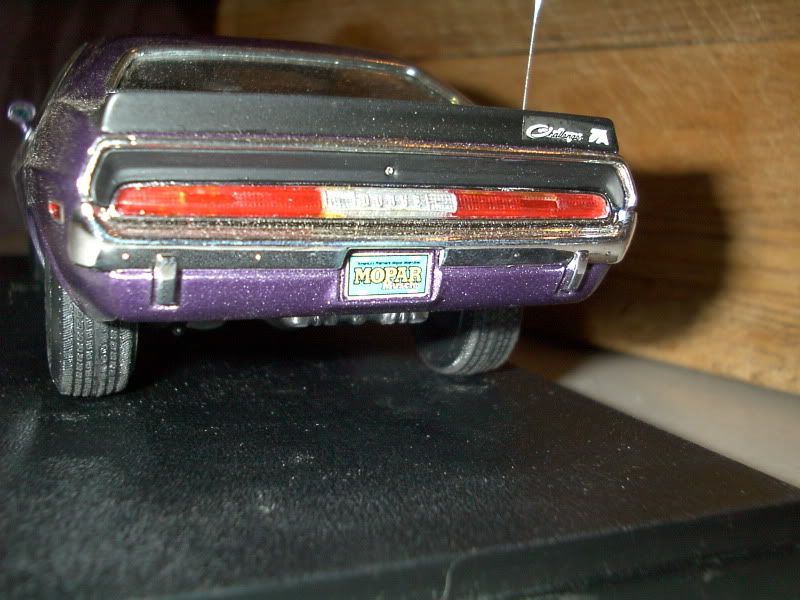 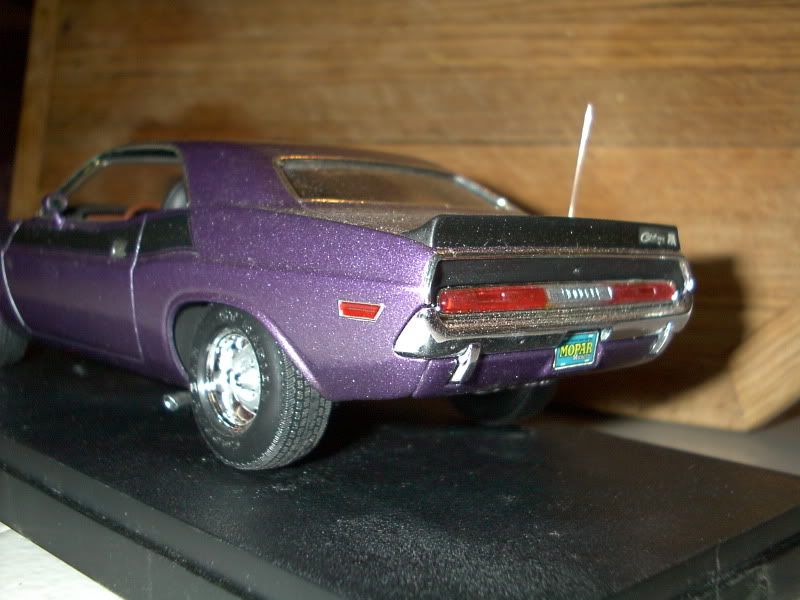 |
|
|
|
Post by eddiehooper on Jul 27, 2010 18:00:20 GMT -6
Nice job on the Plates.
I've used Strips of Aluminum or Brass, the Strips are just a bit more Rigid.
Amazing how a Picture can magnify dust.
|
|
|
|
Post by Wardster on Jul 30, 2010 19:59:41 GMT -6
One other thing that some folks might want to experiment with is hardening paper. What I mean is: I've used index cards in the past, as add-on "plating" (as in armor, not chrome) and such, on various models. Because it's paper, you can fairly easily add raised detailing just by applying pressure to the paper -- usually from the back side, but "panel lines" can be added from the front. Rivets along the edges work out pretty nicely, with some practice; so I can't see why (a lot of!) practice would not also make something like a license plate's lettering look "gently raised" -- although I'll admit that I haven't actually tried that, on a homemade license plate, as yet.
All it takes to permanently harden the paper is to let some of the really thin-viscosity super glues soak into it. I generally apply one small drop at a time, using a worn-out round-style ("general purpose") X-acto blade. Let one drop soak in, and just wait. It will set on its own, due to the chemistry of the paper versus the super glue. I've even glued paper detailing to a model, by simply holding the paper over the part I'm adding the detail to; and applying glue to the top surface of the paper. Assuming you've added enough, the glue will soak through to the bottom layer of the paper; will get itself into contact with the parts underneath; and in a few seconds, the (base?) chemistry of the paper will make the very-thin super glue harden.
|
|
|
|
Post by plastimatic on Dec 26, 2010 0:06:06 GMT -6
Something I've done, similar to the thin card version: if you have access to a color laser printer, print your license and then overcoat it with clear spray. The paper will absorb the paint and stiffen, while the paint will sit on top of the areas printed ( i.e., the numbers) and make them appear raised. Of course, it work in reverse for dark plates with white type.
|
|
 . Then, taking a pair of scissors, poke a hole in the side and cut out a section of the thin aluminum VERY CAREFULLY- It's razor sharp!


