|
|
Post by plastimatic on Apr 23, 2011 15:04:50 GMT -6
I was inspired by Fred's post of his build of the resin kit, so I needed to do some bashing to produce a version to go with the rest of my monster driven cars. Grabbing the last reissue of the Creature, a Huey's Hut for the motor, pipes and rear wheels, and a Mattel (Lovin Family? eww) bathtub, I was off! Honestly, the Creature was the easy part. Some bending and angling, dry brushing, and setting him on a sheet styrene insert in the tub, surrounded by icky green epoxy. A Vette tranny, hand cut board, parts bin front end, a spigot from a Lil Gasser, and a diver's helmet from a McFarlane's Monsters set. I dangled the creature hand bones from the kit on the board, instead of a crab. 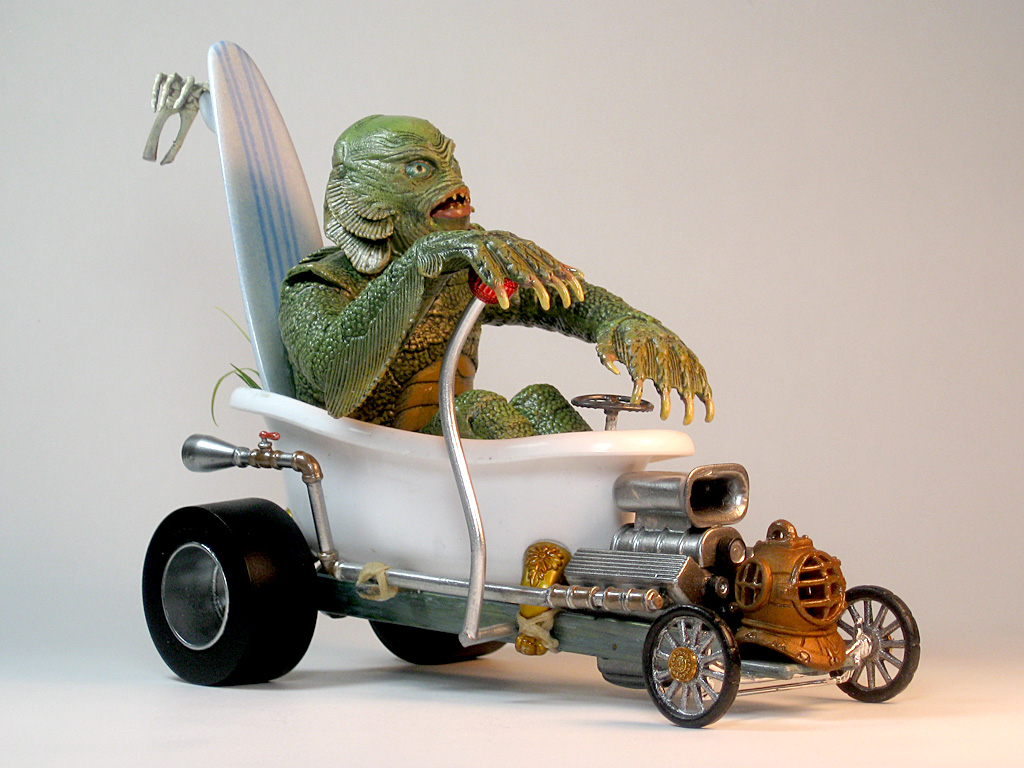 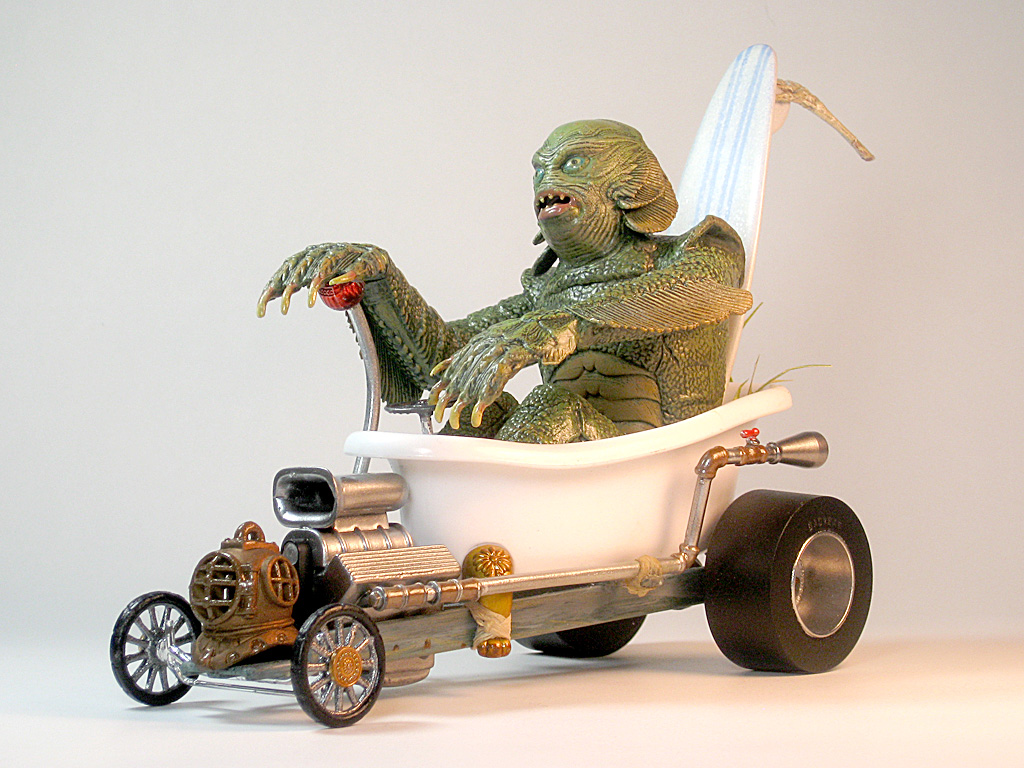 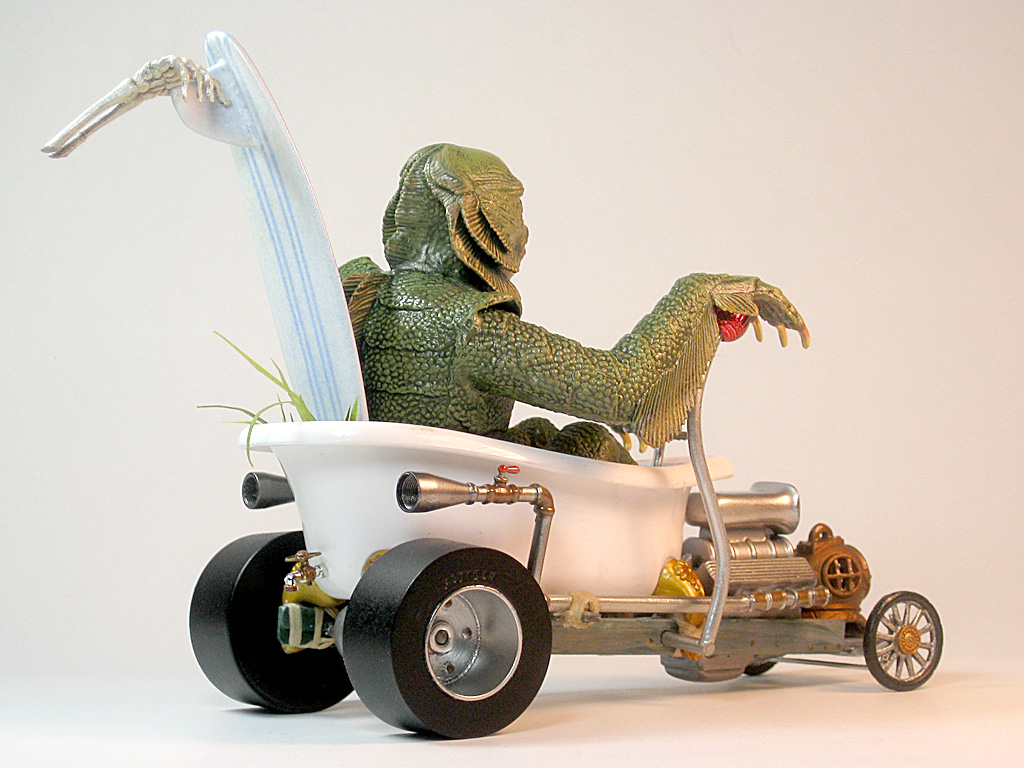 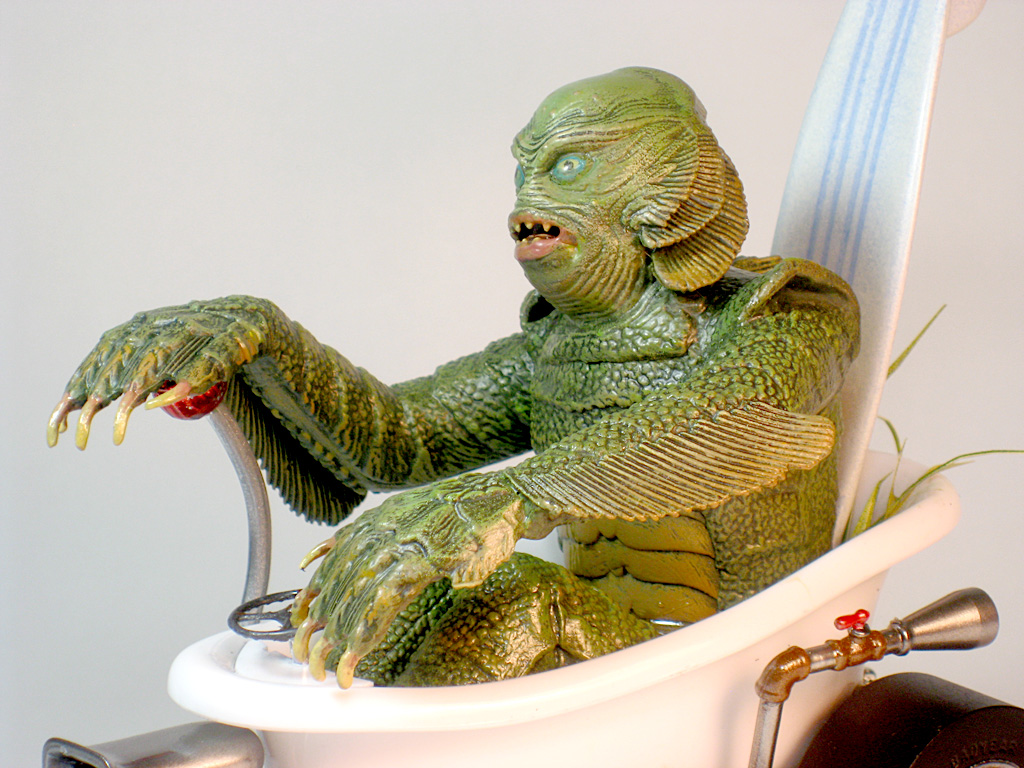 and a pic of what he's sittin' in 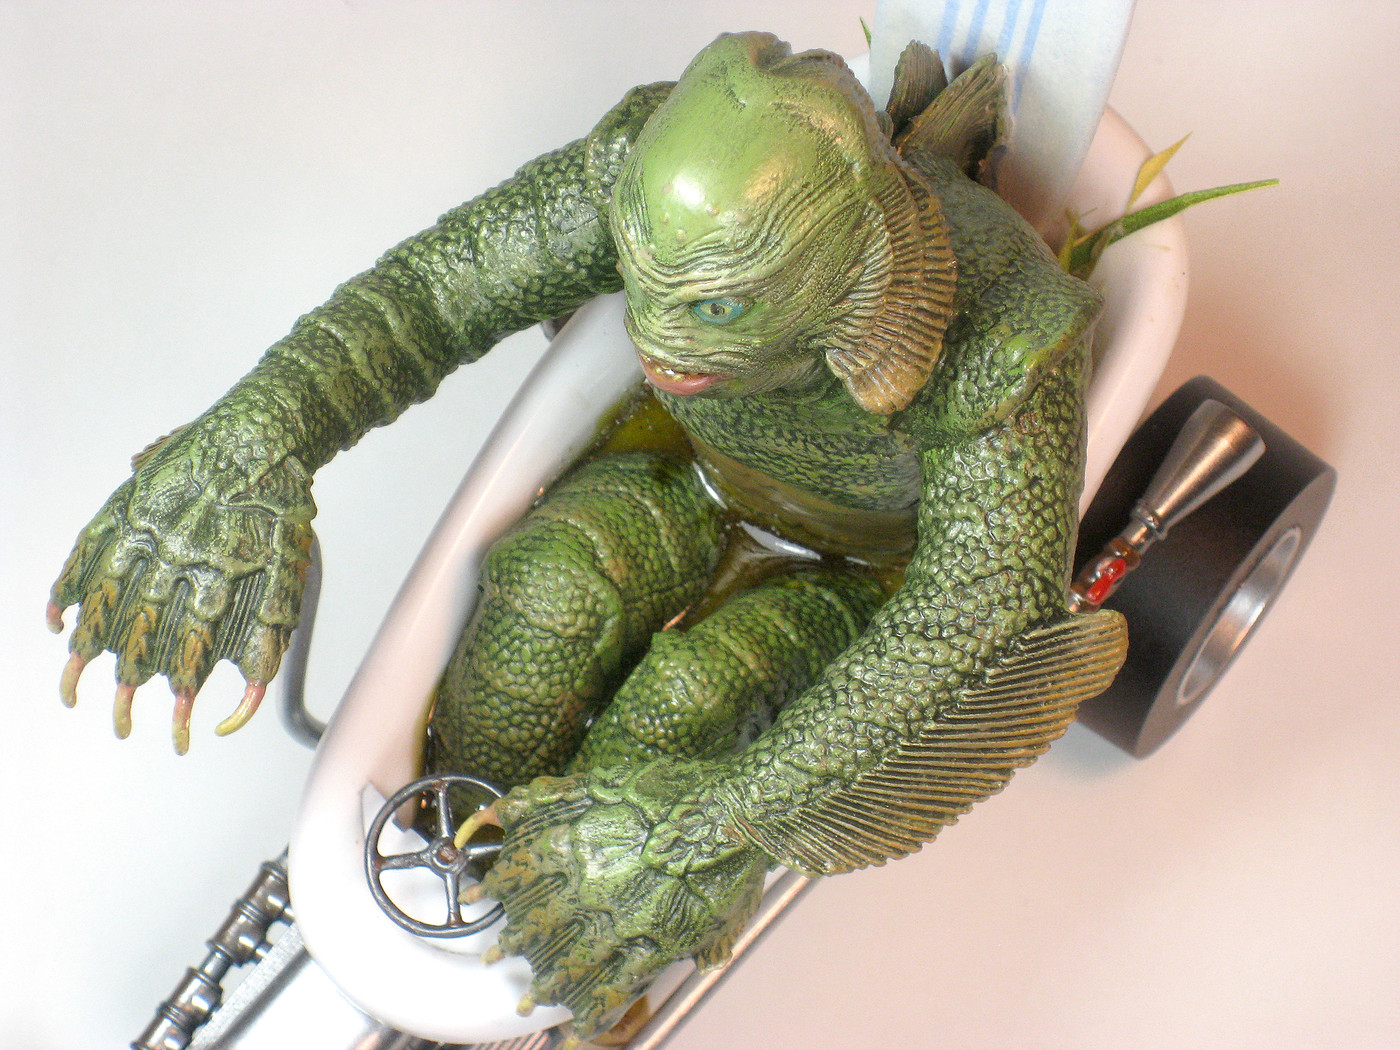 |
|
|
|
Post by ZINGER on Apr 23, 2011 16:33:44 GMT -6
KOOL, REALLY NICE BUILD.
|
|
Deleted
Deleted Member
Posts: 0
|
Post by Deleted on Apr 23, 2011 16:36:58 GMT -6
TOO KOOL!!!! I want to build in 1/25 scale.....have a tub and most other parts....need the creature!
|
|
|
|
Post by 4speed on Apr 23, 2011 16:52:48 GMT -6
This is just Fantastic!!! You did a great Job!!!  I had an idea to build something like this awhile back!!! Everything looks great scale wise!!! Nice choice of parts...Well done and Very Cool!! ...I like it!!!   |
|
|
|
Post by plastimatic on Apr 23, 2011 17:54:22 GMT -6
Those kits were all over the place as far as scale goes. 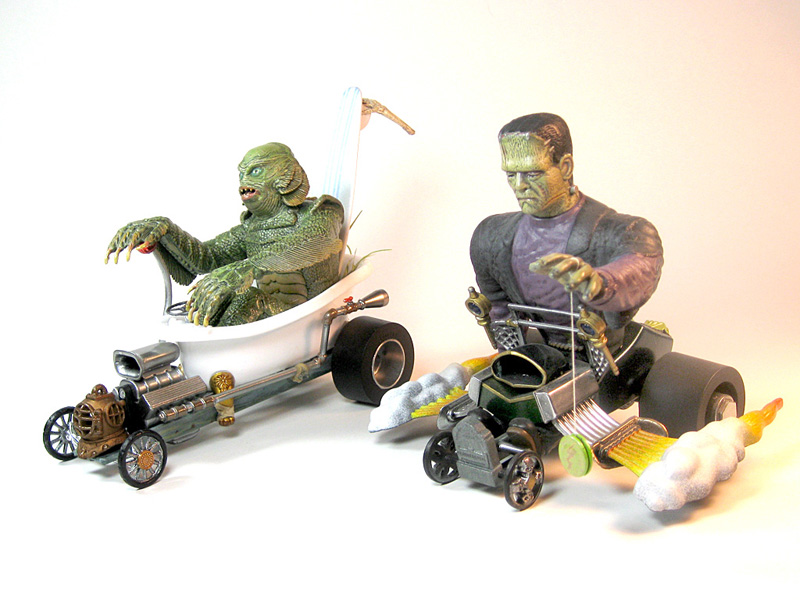 He fits right in there with Frank. What he lacks in smoke and fire (might get around to that), he'll more than make up by just steppin' out of the tub! Looks like Frank had some short legs grafted on this go-round! |
|
|
|
Post by Tim Nolan on Apr 23, 2011 19:43:00 GMT -6
Awesome kitbash! I love old movie monsters, and Franky and the Creature are my very favorites!! I really am diggin' them both! Fantastic paintwork too!
|
|
|
|
Post by Bud Tugly on Apr 24, 2011 8:46:33 GMT -6
|
|
|
|
Post by TheMadModeler on Apr 24, 2011 9:56:59 GMT -6
That looks Great.. Very Well Done..
BiLL..
|
|
|
|
Post by dpaintbizer on Apr 24, 2011 14:15:13 GMT -6
WOW  !! Like this one !!! I did notice the "Grass" in the back of the tub...Nice touch !!! "Seaweed " pinstrip's come to thought !! Just on the side's of the Tub......somehow........fron underneath the lip of the tub ! (imo). Excellent!! ~ Dpaintbizer ~ |
|
|
|
Post by 70elcamino on Apr 24, 2011 14:23:43 GMT -6
That is outstanding.
Russell
|
|
|
|
Post by atenzapower on Apr 24, 2011 15:26:13 GMT -6
Jou did an great job.
|
|
|
|
Post by plastimatic on Apr 24, 2011 20:47:37 GMT -6
"Seaweed " pinstrip's come to thought !! Just on the side's of the Tub......somehow........fron underneath the lip of the tub ! ~ Dpaintbizer ~ I like that idea! I did want to create some interest on that plain white tub. The other kits didn't do decals, so I hadn't considered it. Maybe I'll update the post after I get around to that and some exhaust flames. Thanks! |
|
|
|
Post by ironheadchopper on Apr 25, 2011 4:51:30 GMT -6
Awesome job! How would some bubbles look coming from the exhaust?
|
|
|
|
Post by barten on Apr 25, 2011 9:32:59 GMT -6
YEa. . . . GREAT JOB ! and IDEA! ! ! ! very nice!
|
|
|
|
Post by noodles on Apr 26, 2011 10:59:24 GMT -6
Excellent! Love this build, great job!
|
|
|
|
Post by redbaron on Apr 26, 2011 14:26:48 GMT -6
great build you know you can buy the kit from python kits resin for $100.
|
|
|
|
Post by plastimatic on Apr 26, 2011 17:38:53 GMT -6
True, but all the parts for this were about $35, plus I got to wield what my daughter refers to as the "bone saw"! ;D
|
|
Deleted
Deleted Member
Posts: 0
|
Post by Deleted on Apr 26, 2011 21:04:17 GMT -6
Awesome job!
|
|
|
|
Post by plastimatic on Jul 9, 2011 14:51:07 GMT -6
Okay, so I'm finally getting around to updating this post/build, incorporating some suggestions from the Clowns! 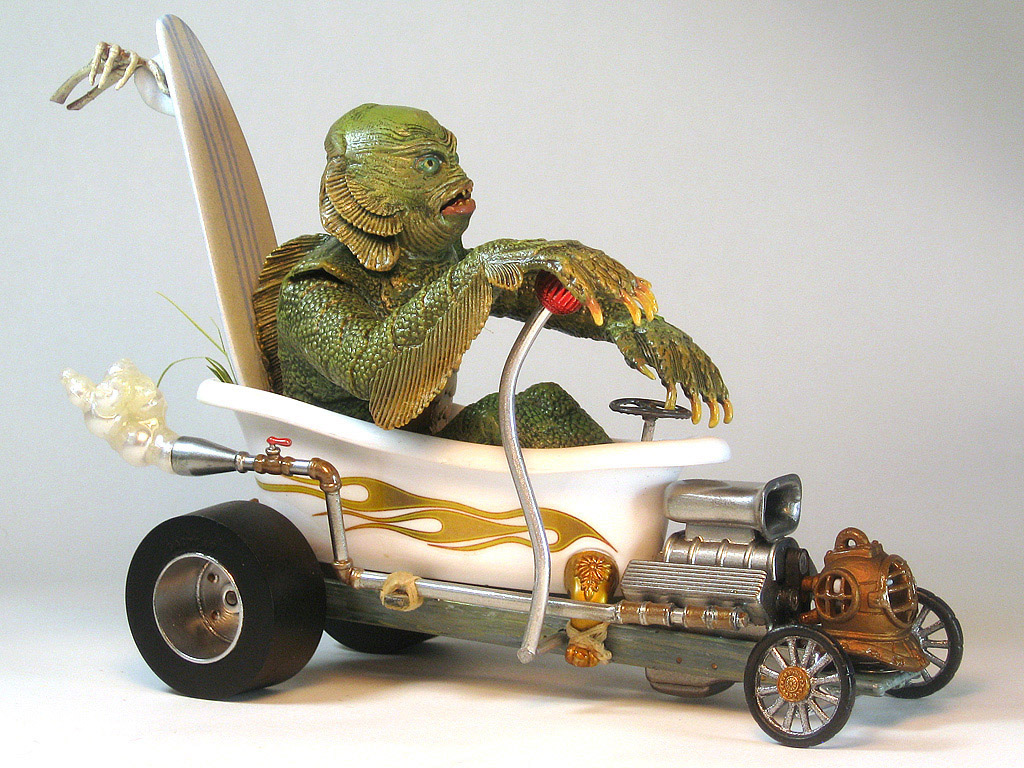 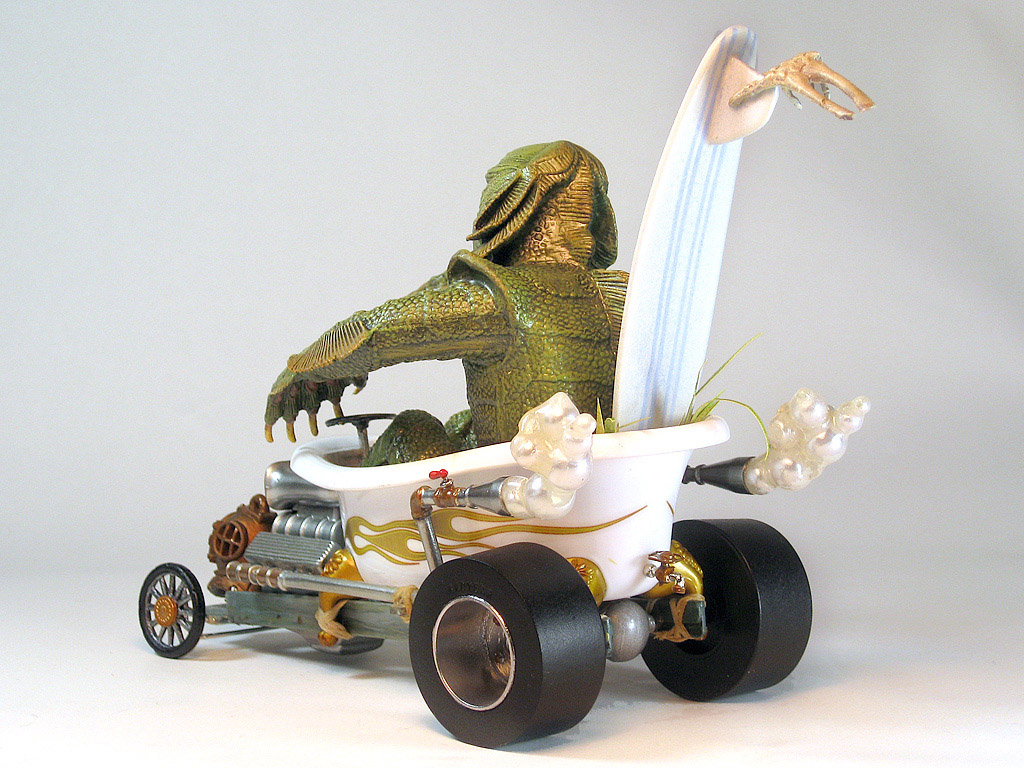 I liked the idea of dressing up the tub with some seaweed art (swamp colored), and the exhaust bubbles made some kind of twisted sense. It's dang hard to find bubblish looking beads (except glass, which I thought would be heavy), so I went with craft pearls under clear epoxy. I've also put a single LED with battery inside the diver helmet... still working on how to get it stay lit without holding it down or adding an eyesore switch. Thanks for lookin! |
|
|
|
Post by rocketeer on Jul 9, 2011 17:38:17 GMT -6
Have two contacts on the bottom of the helmet which touch a strip of brass on the car. Set the helmet onto the car, the brass completes the circuit, lights on. If you want to display the helmet in place but don't want it lit, put a bit of tape over the brass strip.
What kind of battery did you use that fit into the helmet? I have a similar problem, and need a (very) small 9V battery.
Incidentally,love the bubble exhaust!
|
|

