Post by rocketeer on Dec 10, 2016 20:18:14 GMT -6
I've been fiddling around with a Hawk "Mama B and Baby" kit lately, inspired by ade's thread here on the Coffin Corner way back in October 2010. Ade's pictures are long gone, but here's one I saved:
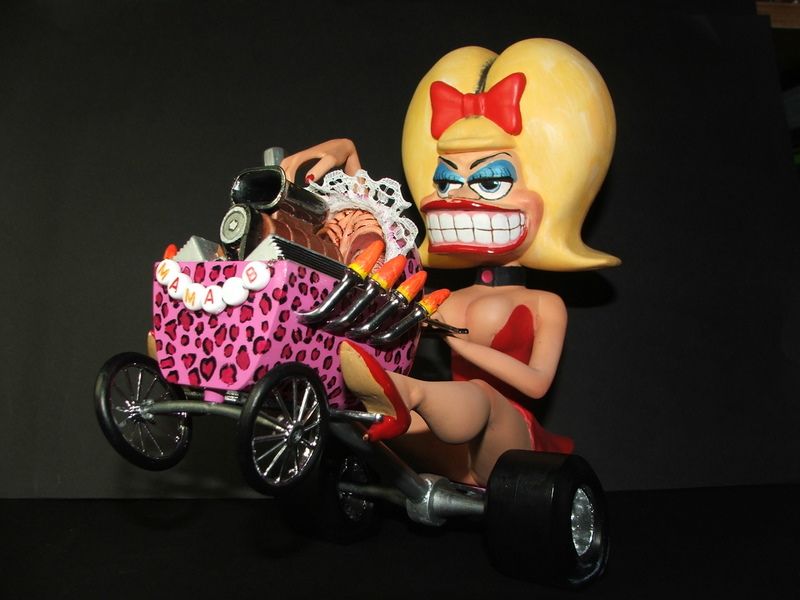
Looks pretty good, eh? I hope mine turns out to have the same pizzazz. I'm stealing some ideas from him, while trying to put my own (slightly vulgar) spin on stuff.
One thing I wanted to do was add caricature rear tires; the kit has dull circular tires. I found a nice set in a Polar Lights Willys snap kit, but they were too small, and, being one piece, had hollow backs. I fixed the "too small" by building up the outside with strip and sheet styrene:
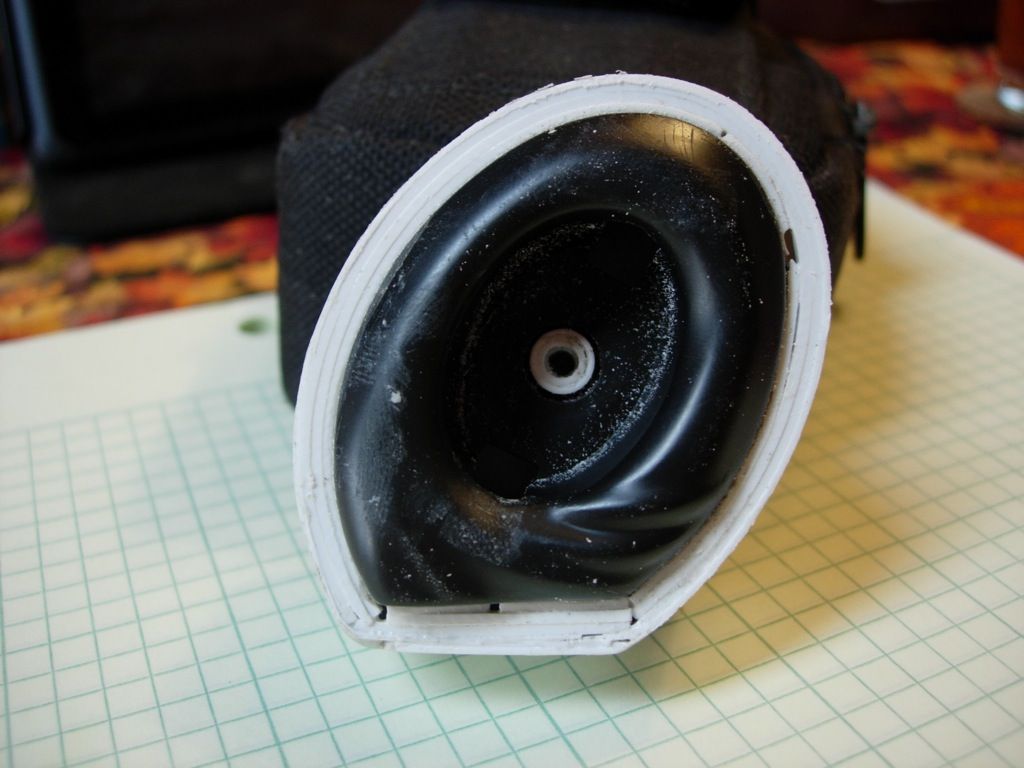
...and then puttying the front to hide my crude hackwork until all was well again:
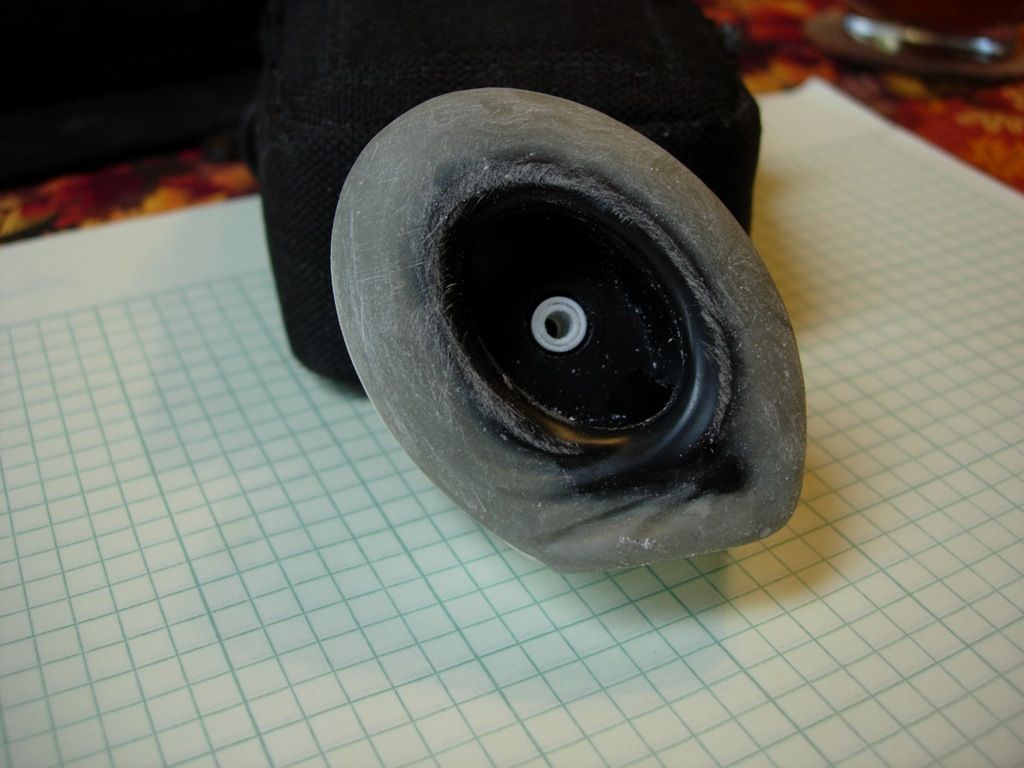
The hollow backs were a bit more of a problem. It was easy enough to glue a sheet of styrene across the back, but then the back was just flat; I wanted to have some tire detail and some representation of the back of the wheel, since it's fairly easy to see if you look down into Mama's lap. Wait, I could build up a sidewall bulge using putty, just like on the fronts.
So I built this little tool, sort of a low-tech punch:
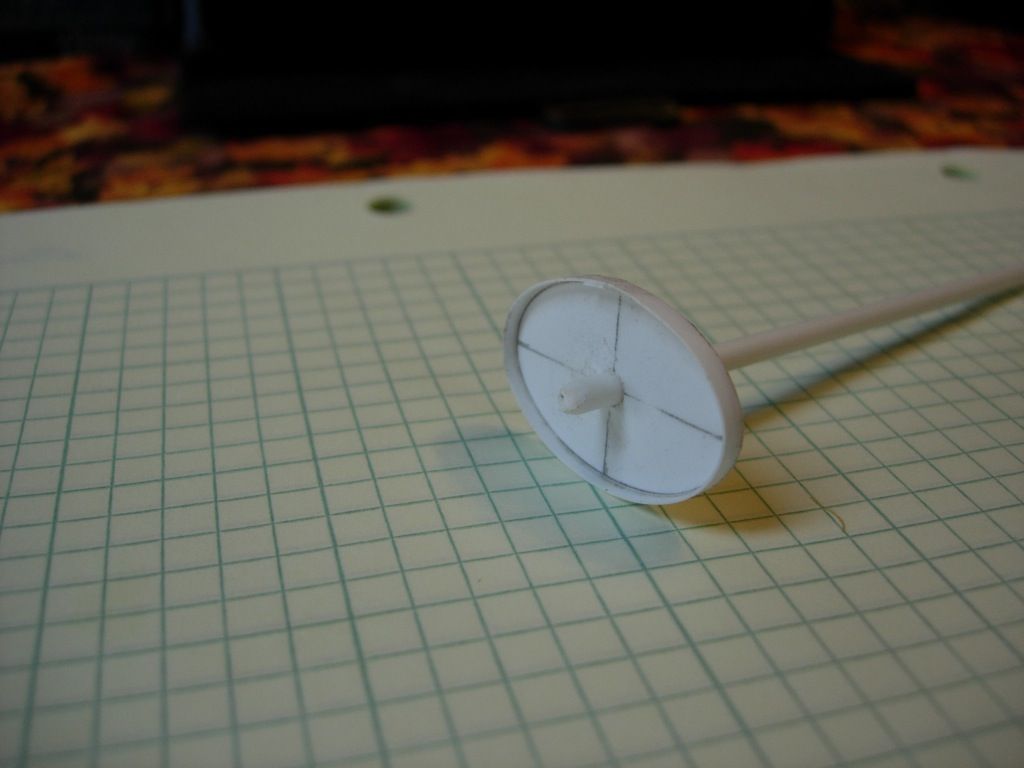
..and covered the back with Aves. Then I slid my tool's central pilot into the tire's central hole and pressed down. It left a nice oval indent in the putty. I peeled away all the putty inside the oval, and here's what I got:
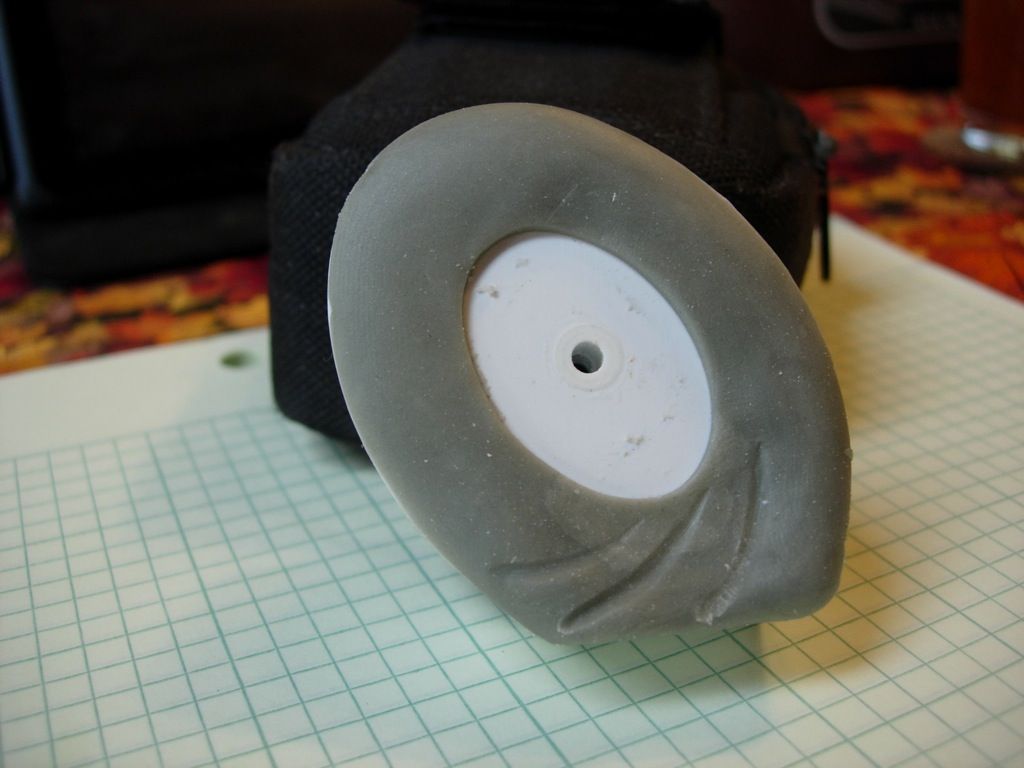
...which I think looks pretty darned good. Sure beat trying to cut the oval by hand, or trace around a template.
I have some of those tiny styrene letters, so I may add some raised lettering to the sidewall, "GoodBoot" or some such.
 If I was smart, I'd pour a mold to cast copies of these, instead of doing all this work again the next time I decide to mess around with a car-toon model.
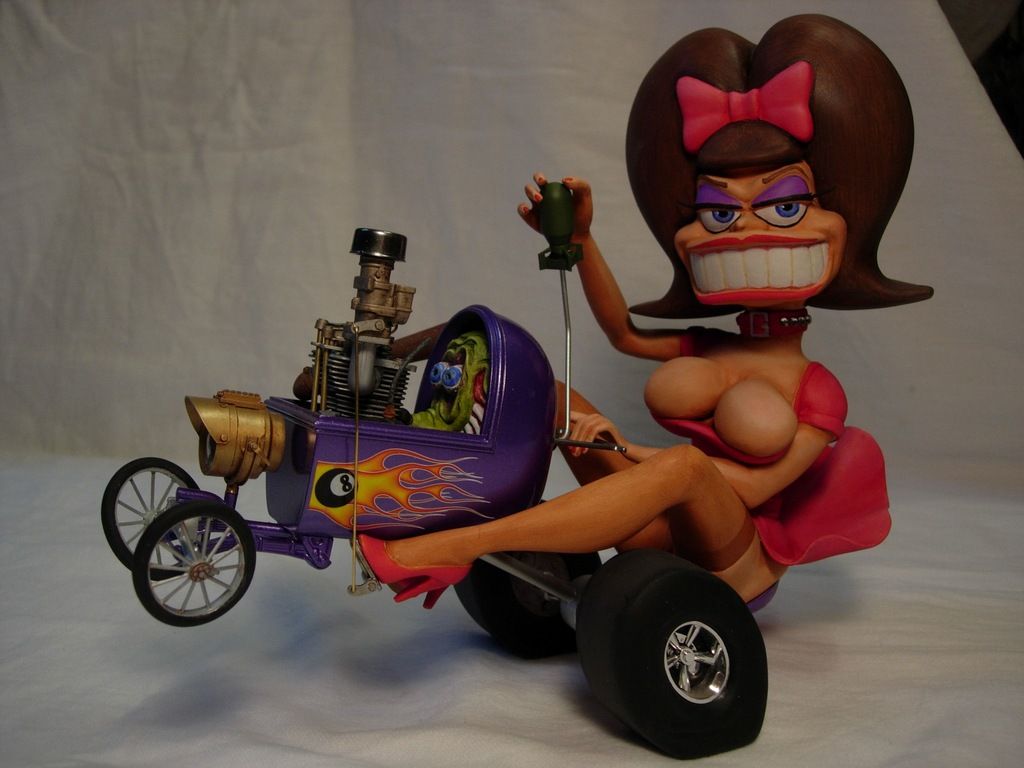
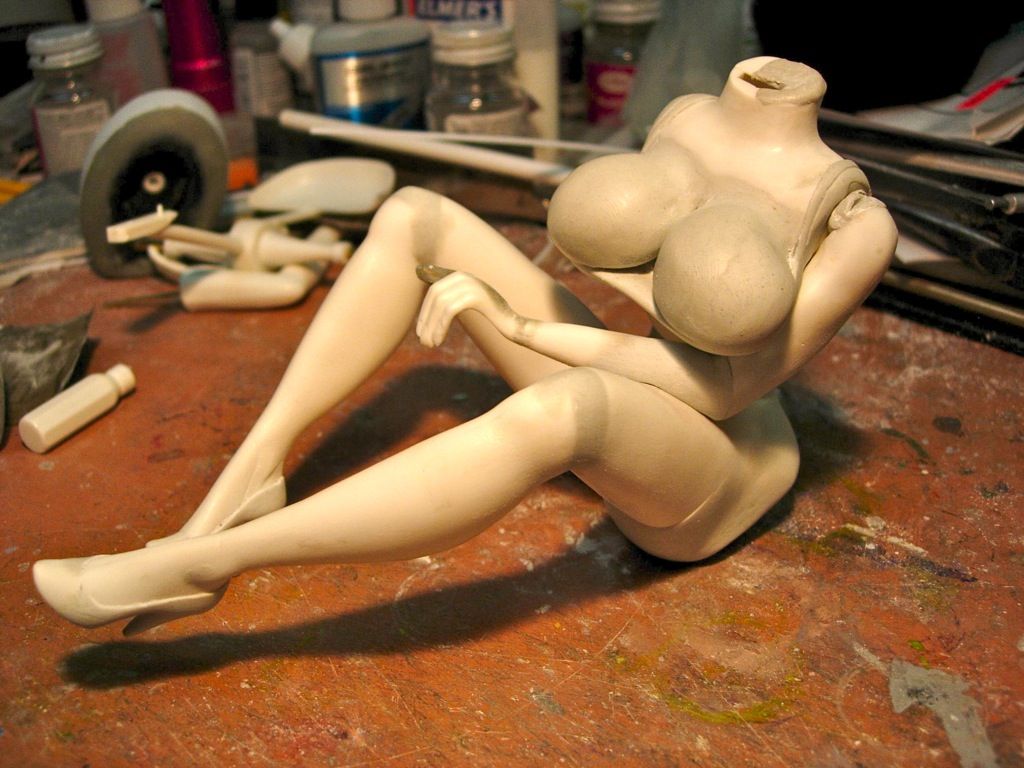
And I've been working on Mama B. I'm trying to make her pose more interesting and her figure more extreme; here's a shot of how she looks after several days of cutting, reposing, and puttying:
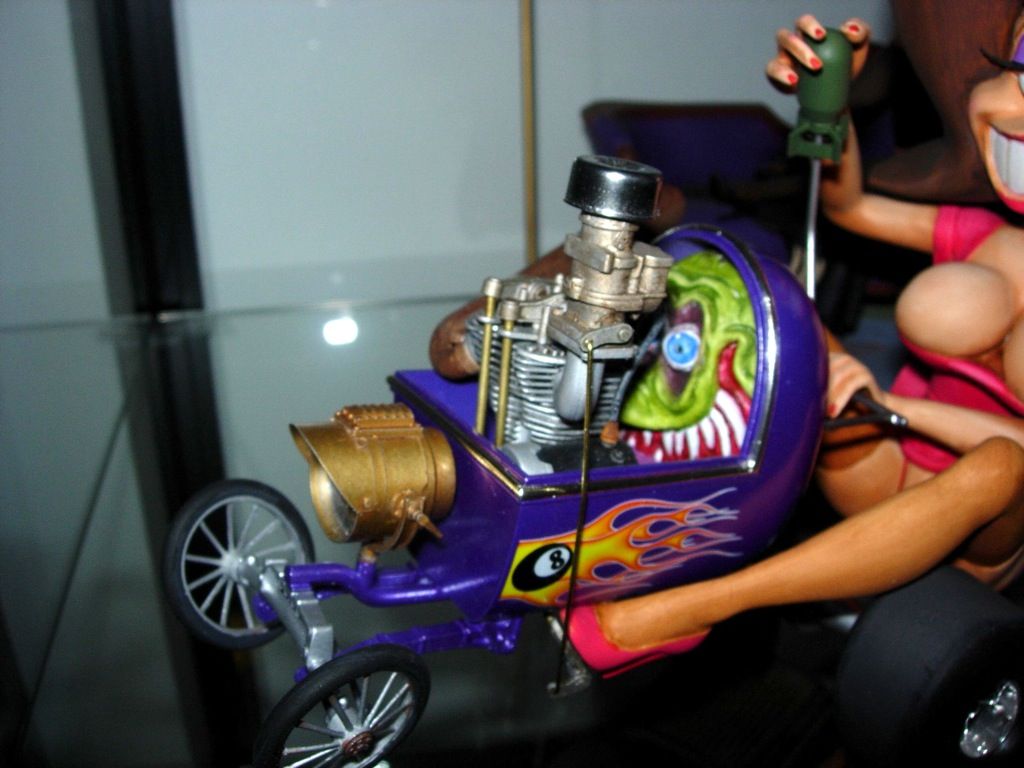
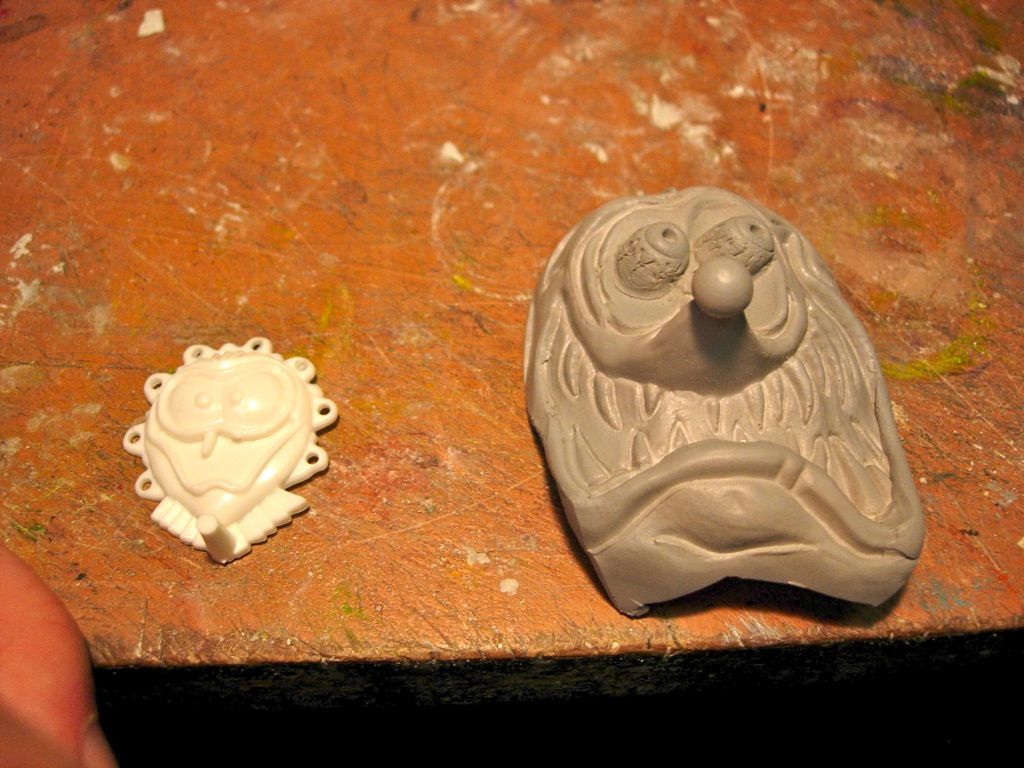
Baby got uglier, too, courtesy of a Rat Fink kit I had lying around; I redid Ratty's eyes so he was looking the same direction as Mama B:
When I finally got around to checking the fit of the front wheels, one wheel interfered with her foot! Curses! But my mother always told me that when life deals you lemons, you should walk on the sunny side of the street and it'll be a penny earned; so I decided to extend the wheelbase a bit.
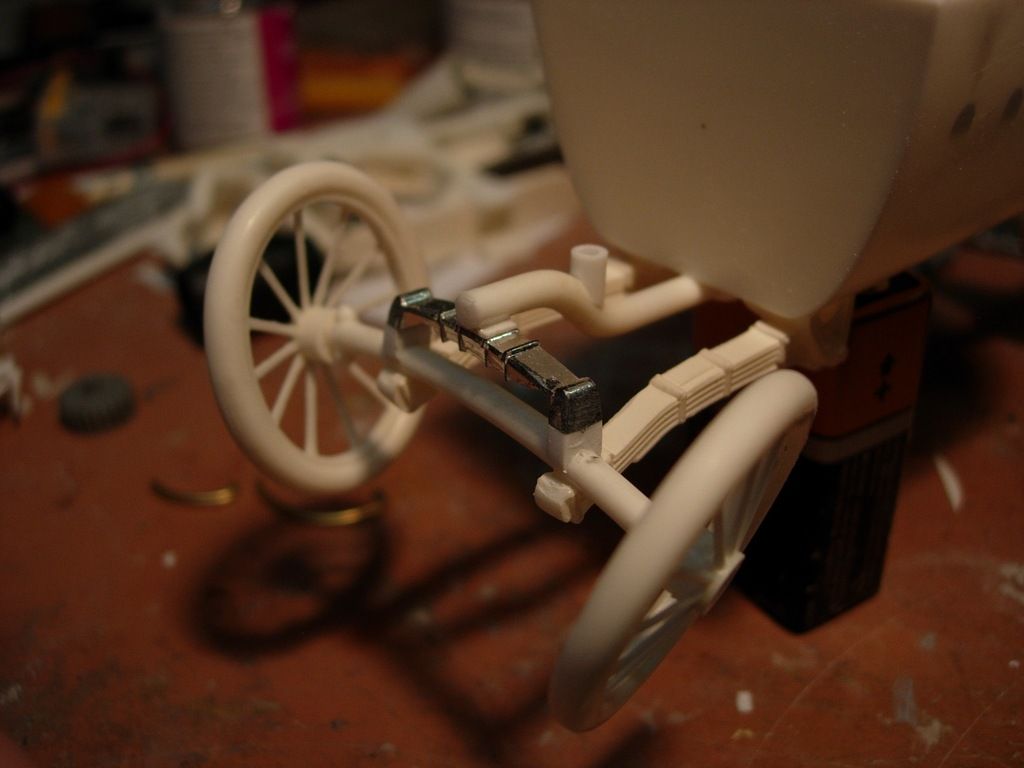
So I whipped up this odd-looking front suspension/frame extension:
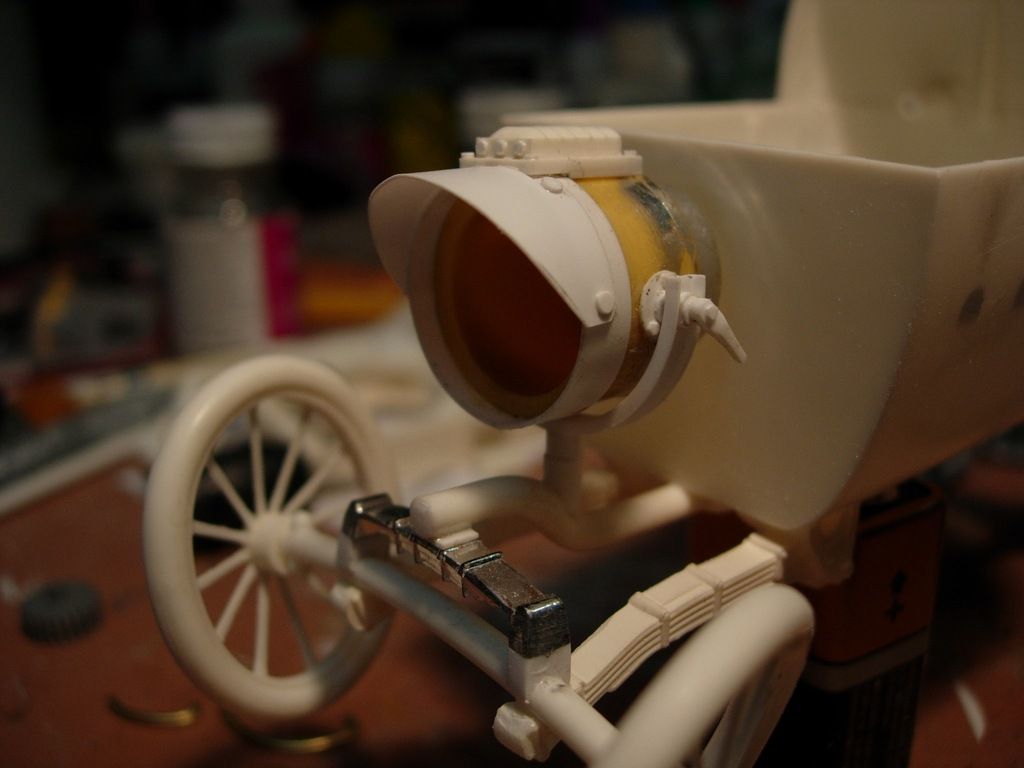
But it looked a little bare up there; I needed something to make the area a bit more interesting. So I built this headlight out of an old gas tank (I had to go to the craft store to buy some google eyes, so I could use one as a lens; I have a whole mess of google eyes around (don't ask), but of course none of the right size )
)
...and just to show you how it all comes together, here's a side view:
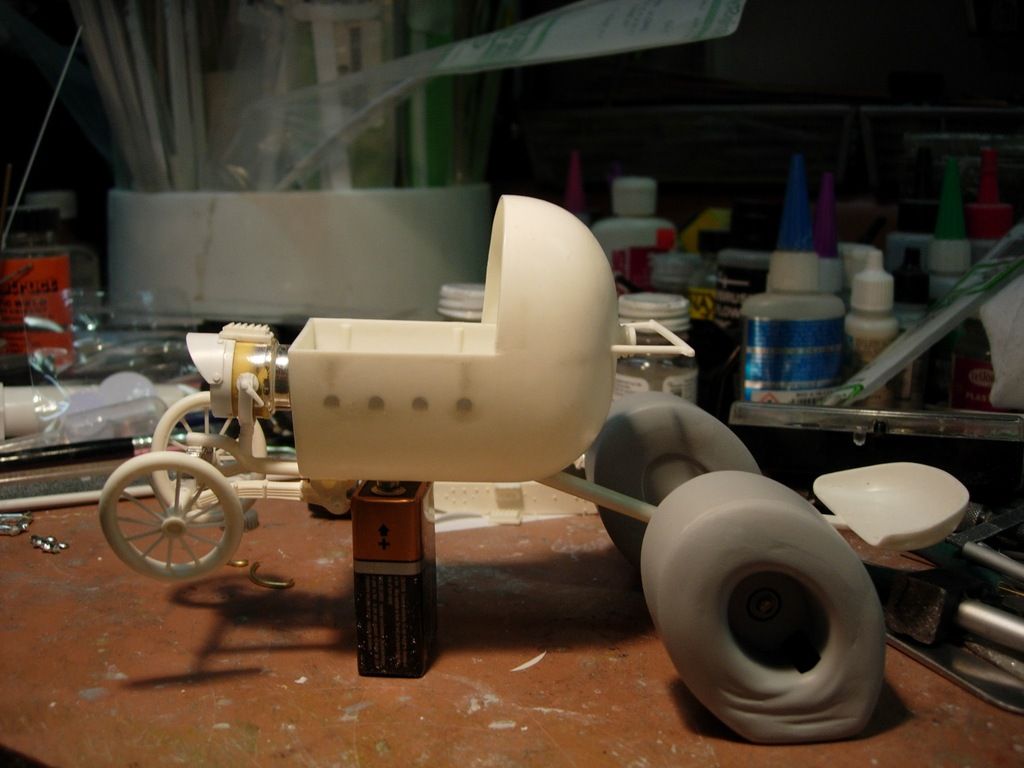
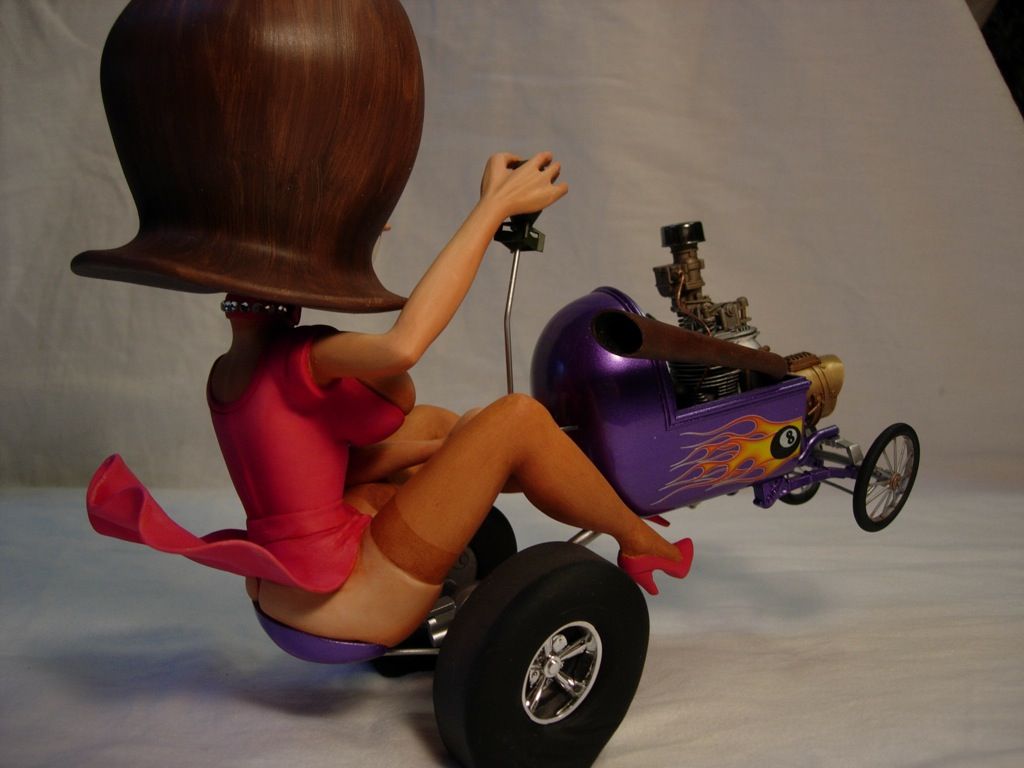
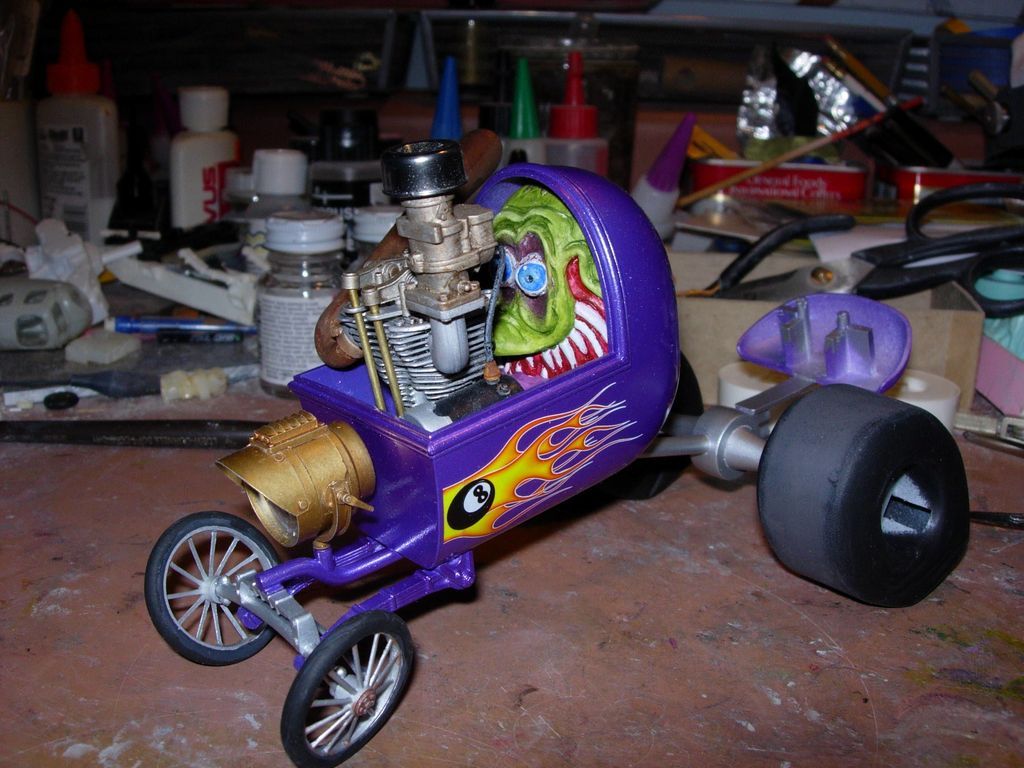
What with Rat Fink occupying the buggy, there's no room for the kit engine. But I ordered a slew of junk motorcycle parts off eBay, and now Mama's ride has a one-lunger based on a Harley Shovelhead. At first I was going to use the Shovelhead valve cover, but then I decided that the engine really needed exposed valve gear, so I scratchbuilt a couple rocker arm assemblies (on the ground in front of the engine). I made the valve springs by wrapping styrene rod around a piece of brass rod and then holding that in boiling water until it softened.
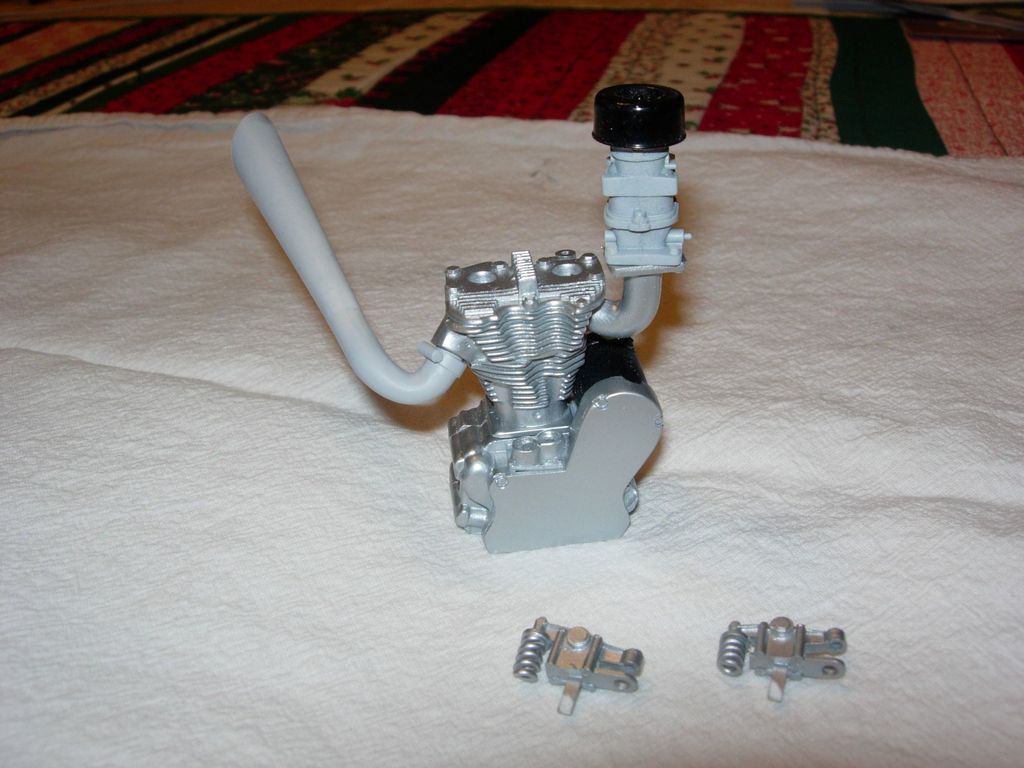
The exhaust megaphone I made by gluing sections of telescoping styrene tubing together and then filing it to a conical shape, a method which I do not recommend for the impatient
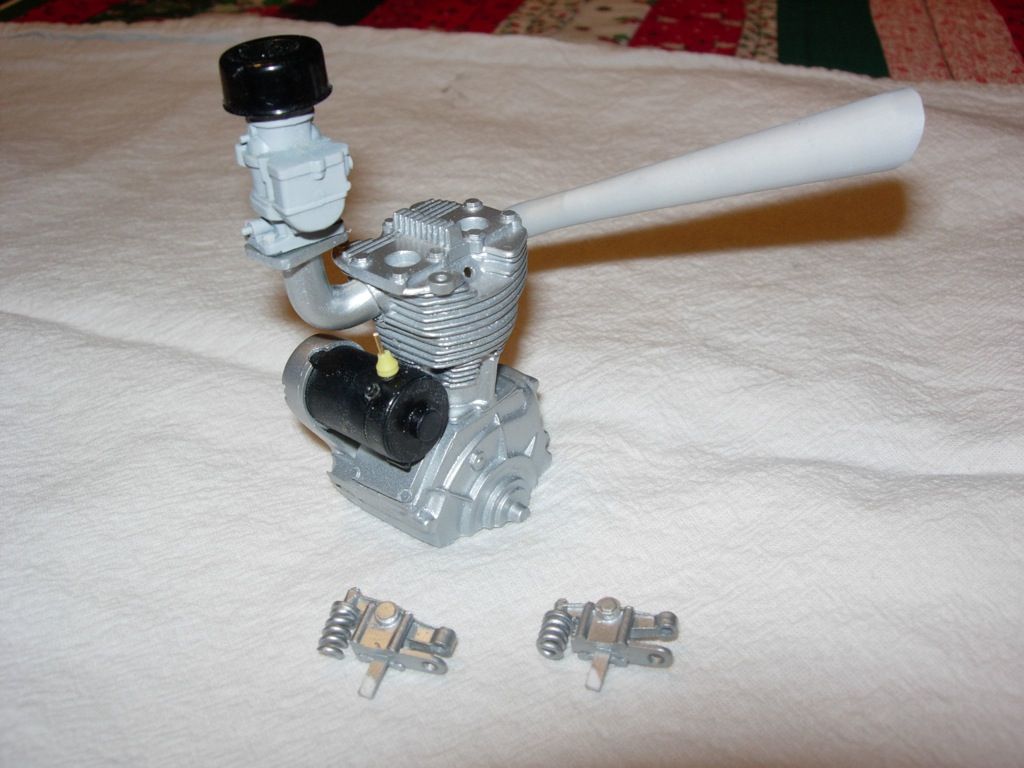
This is just the first stab at paint.

Looks pretty good, eh? I hope mine turns out to have the same pizzazz. I'm stealing some ideas from him, while trying to put my own (slightly vulgar) spin on stuff.
One thing I wanted to do was add caricature rear tires; the kit has dull circular tires. I found a nice set in a Polar Lights Willys snap kit, but they were too small, and, being one piece, had hollow backs. I fixed the "too small" by building up the outside with strip and sheet styrene:

...and then puttying the front to hide my crude hackwork until all was well again:

The hollow backs were a bit more of a problem. It was easy enough to glue a sheet of styrene across the back, but then the back was just flat; I wanted to have some tire detail and some representation of the back of the wheel, since it's fairly easy to see if you look down into Mama's lap. Wait, I could build up a sidewall bulge using putty, just like on the fronts.
So I built this little tool, sort of a low-tech punch:

..and covered the back with Aves. Then I slid my tool's central pilot into the tire's central hole and pressed down. It left a nice oval indent in the putty. I peeled away all the putty inside the oval, and here's what I got:

...which I think looks pretty darned good. Sure beat trying to cut the oval by hand, or trace around a template.
I have some of those tiny styrene letters, so I may add some raised lettering to the sidewall, "GoodBoot" or some such.
 If I was smart, I'd pour a mold to cast copies of these, instead of doing all this work again the next time I decide to mess around with a car-toon model.
And I've been working on Mama B. I'm trying to make her pose more interesting and her figure more extreme; here's a shot of how she looks after several days of cutting, reposing, and puttying:

Baby got uglier, too, courtesy of a Rat Fink kit I had lying around; I redid Ratty's eyes so he was looking the same direction as Mama B:

When I finally got around to checking the fit of the front wheels, one wheel interfered with her foot! Curses! But my mother always told me that when life deals you lemons, you should walk on the sunny side of the street and it'll be a penny earned; so I decided to extend the wheelbase a bit.
So I whipped up this odd-looking front suspension/frame extension:

But it looked a little bare up there; I needed something to make the area a bit more interesting. So I built this headlight out of an old gas tank (I had to go to the craft store to buy some google eyes, so I could use one as a lens; I have a whole mess of google eyes around (don't ask), but of course none of the right size
 )
)
...and just to show you how it all comes together, here's a side view:

What with Rat Fink occupying the buggy, there's no room for the kit engine. But I ordered a slew of junk motorcycle parts off eBay, and now Mama's ride has a one-lunger based on a Harley Shovelhead. At first I was going to use the Shovelhead valve cover, but then I decided that the engine really needed exposed valve gear, so I scratchbuilt a couple rocker arm assemblies (on the ground in front of the engine). I made the valve springs by wrapping styrene rod around a piece of brass rod and then holding that in boiling water until it softened.

The exhaust megaphone I made by gluing sections of telescoping styrene tubing together and then filing it to a conical shape, a method which I do not recommend for the impatient


This is just the first stab at paint.


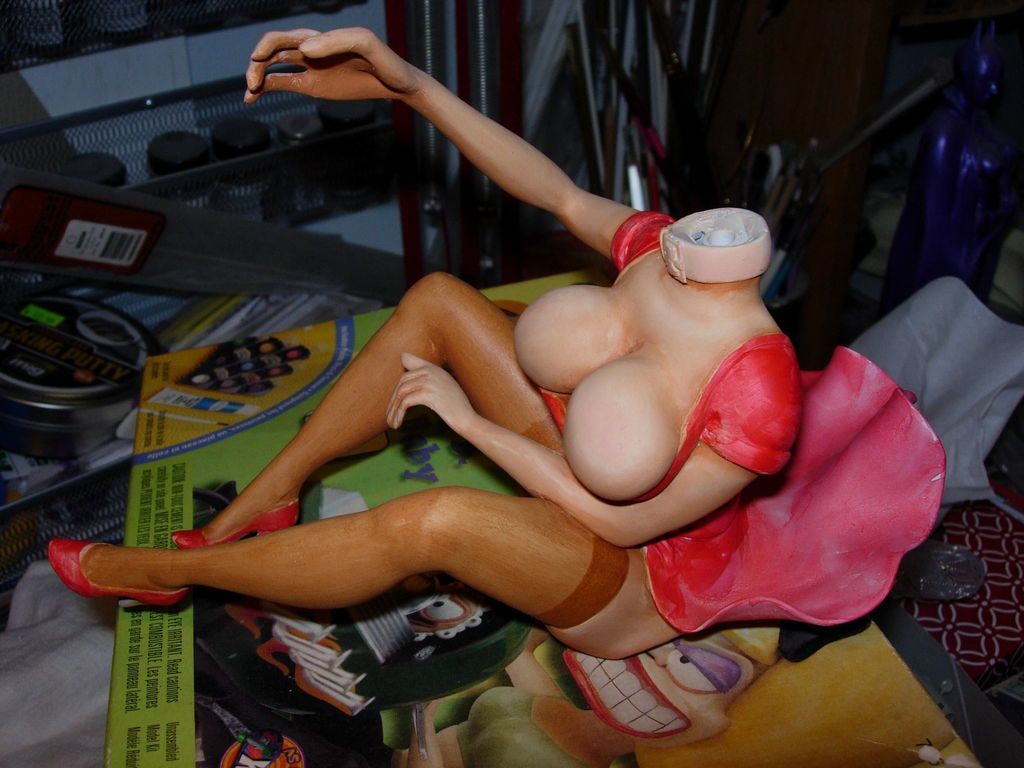

 Luckily, i have a load of other projects I can work on in the meantime