|
|
Post by rocketeer on Jun 17, 2008 20:45:56 GMT -6
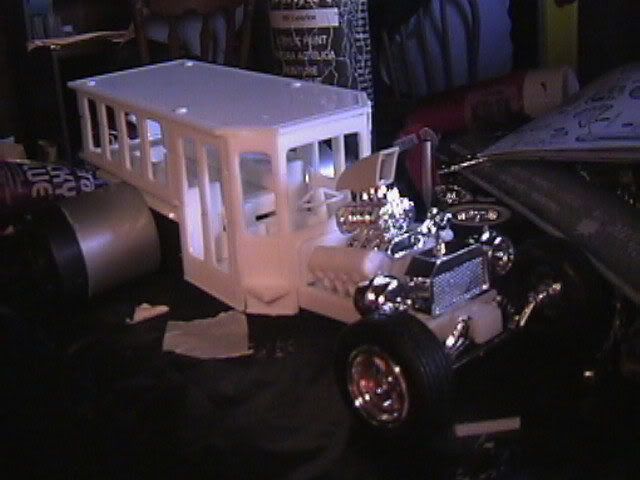
I was idly meandering up and down the aisles at the local Hobbytown, and I spotted one of old and awful Lindberg Auburn Speedster kits--and suddenly a light went on in enormous neon letters: Aircar! So here's the project:   The roof is from the old misproportioned Revell Buttera '34 Ford coupe kit (I have a bunch of leftover bodies). The lower half is all one piece, whacked together from sheet styrene and lots of Milliput:  My plan is to paint the two halves separately, then wire the bottom half (the round holes in the wheelwell areas will get a shiny flashing light effect), glue the windows and interior into the top half, then close 'er up for good. It's going pretty well just now; the trick will be to keep my enthusiasm from evaporating during the infinite prime-putty-sand cycles to come. ;D |
|
|
|
Post by dbash2006 on Jun 17, 2008 20:56:52 GMT -6
really good!!.... I, at first first thought of the "leauge of extrordinary gentilmen" ... but I see where your going and it looks like a great project!
|
|
|
|
Post by barten on Jun 18, 2008 6:26:55 GMT -6
A TON OF WORK. . .but well worth it. . .I might rethink the back of the roof to match the back of the body a little more. . .
Too Cool! And TOTAL SHOWROD! ! ! ! ! ! !
|
|
|
|
Post by Paul B. Canney on Jun 18, 2008 7:05:34 GMT -6
pretty sure that auburn tooling goes all the way back to "Pyro" (a direct competitor of Palmer).
I like the idea though
|
|
|
|
Post by barten on Jun 18, 2008 9:34:09 GMT -6
Maybe point the windsheild too? ? ? ? ? ?
|
|
|
|
Post by rocketeer on Jun 18, 2008 11:23:23 GMT -6
Altho it's not very obvious in the pics I posted, the windshield is slightly vee'd to match the original Auburn windshield shape; that's what most of the putty on the roof is about. I'm not entirely happy with the "gravitator whatchamacallits" I have planned for the circular openings--they're based on the '34s wheels and they stick out a bit. I may go with some kind of flush round windows instead, with the flashing lights behind the windows. Which would be a lot of trouble to do. The sacrifices we make for our Art  |
|
|
|
Post by jondutch46 on Jun 18, 2008 12:10:54 GMT -6
I agree with Dan... something about the shape of the roof doesn't match the '30s-futuristic idea of the rest of the car. Not sure what it needs but it just ain't right. As for the circles... do you have any turbine-style rims you could back them with? Glue them to the openings with some tinted clear plastic behind them for your lights to flash through.
|
|
|
|
Post by bronzegiant on Jun 18, 2008 15:07:57 GMT -6
I want my flying car......Popular Mechanics and Science and Mechanics magazines promised me a flying car in the 50's. It was supposed to be available by the year 2000....WHERE"S MY FLYING CAR???!!! ;D ;D ;D
|
|
|
|
Post by Phil Patterson on Jun 18, 2008 15:41:52 GMT -6
Wow, that's really swoopy looking! Just be sure to keep speeds under Warp 10, genetic and temporal anomalies can crop up if not properly shielded!
|
|
|
|
Post by Tim Nolan on Jun 18, 2008 19:07:09 GMT -6
I'm not so sure that duece roof is workin' either......Maybe a laid down 34' roof instead? It' so swoopy, and the boxed roofline is like hitting a brick wall with your design. I like the whole concept though. What about an Aluma Coupe roof? That might be kool!
|
|
|
|
Post by Phil Patterson on Jun 19, 2008 7:00:18 GMT -6
I dunno, that roof gives it a lil bit of a Lindberg Kustom Koffin vibe, though I don't know if that's what you're goin for or not. I think I'll like it either way.
|
|
|
|
Post by rocketeer on Jun 19, 2008 7:44:38 GMT -6
"...I might rethink the back of the roof to match the back of the body a little more..."
"...the boxed roofline is like hitting a brick wall..."
"...something about the shape of the roof... just ain't right..."
Oh, you guys! You've just gotta have faith! ;D
|
|
|
|
Post by vwcamperman on Jun 19, 2008 8:09:07 GMT -6
haha, nice comeback! I've got the split roof of a 63 vette if you think that would help  |
|
|
|
Post by jondutch46 on Jun 19, 2008 12:30:40 GMT -6
haha, nice comeback! I've got the split roof of a 63 vette if you think that would help Hey, there's a concept ya might wanna think about. |
|
|
|
Post by chromecop on Jun 19, 2008 12:41:34 GMT -6
Me likes alot!!!
|
|
|
|
Post by hobbybobby on Jun 20, 2008 8:48:48 GMT -6
I like it very well, only the roof bothers me a little ... I took me 10 minutes time at work ... Something I would venture into the following direction:  Generous expiring lines must be ... I find that the `32 roof looks like a box ... Of course, it's just my opinion ... |
|
|
|
Post by keith on Jun 20, 2008 19:08:45 GMT -6
I think Bobby's on to something - the '32 top seemed a little small to me.Again only my opinion
But I have to say - great save of one crappy kit!This thing is beautiful!Thank's Keith
|
|
|
|
Post by Smilie™ (madmodifier) on Jun 21, 2008 12:32:25 GMT -6
cool idea
|
|
|
|
Post by rocketeer on Jun 21, 2008 13:40:35 GMT -6
"...the roof bothers me a little ..." "...the '32 top seemed a little small..." La la la la la, I can't heeeeeeeaaaar you; la la la la [fingers in ears] ;D You guys all have ideas, and they seem to be good ones--is it time for an Auburn Speedster Challenge?  This morning I built rocket engines. Was going to cast copies of the flaming exhaust from the old Hawk Atomic Bomber kit, but my mold box leaked and so right now I'm waiting for my second attempt at pouring a mold to harden. Plus my clear resin hardened in the can  so now I've got to buy more. And I came up with a nice way to taper plastic strip to make side moldings. I'll make a sketch and post it here sometime. |
|
|
|
Post by rocketeer on Jul 4, 2008 15:42:18 GMT -6
A small update: I've been doing the infinite prime-putty-sand cycle lately, and building a bunch of small details. As of this morning, the body and underpan are in final primer, and the underside of the hood and inside of the engine compartment are painted the final color, a pale yellow (I wanted a color that said "Thirties"). I've also built a few details. This first blurry picture purports to show the seat and the driver.  I had to "scoop out" the seat's bottom cushion to get the driver to sit low enough. (I didn't just lower the seat, like all you guys are thinking I should have, because I like the way it interfaces with the package shelf area.) The driver is assembled from Preiser "Eve" bits, with a Milliput dress. The (ahem, unnatural) color is just an undercoat; her final fleshtones, etc will be done in oils, which work really well for fleshtones and other things where you want to blend colors together.  The next picture is better:  The four dark doodads are Buck Rogers-style rocket exhaust nozzles, built from Plastruct tube and rod, and the four orange things are flaming exhaust plumes. I dug out an old Hawk Atomic Bomber kit which had neat-o exhaust flames molded in clear orange, then poured a mold and cast four plumes in clear epoxy resin, tinted orange. They turned out really well. Each exhaust will be lit by an LED. If anyone here would like a plume or two, drop me a line. Off to the side is the steering wheel (duh) with its aircraft-style control column. |
|
|
|
Post by theflame on Jul 4, 2008 17:37:19 GMT -6
This is a cool build overall, but I LOVE those plumes! They're amazing! I'd love a couple of those bad boys in my collection! They're gorgeous!
|
|
|
|
Post by rocketeer on Jul 5, 2008 9:43:12 GMT -6
Drop me a line (I've unhidden my email address) and I'll send you a couple. It may take a while, since I only have the one mold and the resin takes a day or two to set up.
|
|
|
|
Post by JerryG on Jul 5, 2008 10:21:30 GMT -6
wow great job on them fire plumes...I,ll wait to see how this will turn out.
|
|
|
|
Post by barten on Jul 5, 2008 15:43:21 GMT -6
Killer stuff !! ! ! !
WOW!
GB
barten
|
|
|
|
Post by Tim Nolan on Jul 5, 2008 18:40:21 GMT -6
I really like what you have going on now! You did a killer job casting those flames! I'd love to have a couple of those too in the future if you can spare a couple! I'd be glad to reimburse you for resin/time! Thanks!
SO WHAT ARE YOU DOING WITH THAT ROOFLINE? ;D
|
|
|
|
Post by A.J. on Jul 6, 2008 5:56:11 GMT -6
Very interesting project. Keep them posts coming. This is shaping up to be a very cool build. Lot's of interesting tricks as well.
Uh, if I could get 2 of those plumes, I'd greatly appreciate it. They would look outstanding on my snap draggin volksrod build. Just let me know what I owe ya and where to send it to.
I had actually thought when I first seen them that they were something from a Christmas tree light or something. Very cool item!
|
|
|
|
Post by rocketeer on Jul 6, 2008 13:19:59 GMT -6
I really like what you have going on now! You did a killer job casting those flames! I'd love to have a couple of those too in the future if you can spare a couple! I'd be glad to reimburse you for resin/time! Thanks! SO WHAT ARE YOU DOING WITH THAT ROOFLINE? ;D The roof remains the same. Stay calm; it'll grow on you. ;D So far, Dr. Kerry, Tim Nolan, The Flame, and A.J. have requested exhaust flames. I just finished making a triple mold, so I can cast three at a time; less wasted resin that way. And I poured a set this morning. But the resin takes a good solid 24 hours to set up, and the mold is kind of fiddley--the castings want to have air bubbles--so I'm not sure whether I can count on getting three good castings consistently. I guess what I'm trying to say is that it may take a bit before you get your flames. And it's going to take even longer if I don't have your address I have Kerry's, but the rest of you ought to PM me with your mailing addresses. At this time I don't plan on charging anything, but if I find myself devoting all my free time to making flame castings, that may change. |
|
|
|
Post by mrtc4w on Jul 15, 2008 12:45:32 GMT -6
If it is not a top secret, what brand resin are you using?
Thanks,
Marty
|
|
|
|
Post by rocketeer on Jul 15, 2008 20:25:07 GMT -6
No secret at all: EasyCast clear casting epoxy, bought at Michael's. It seems to work well enough; it's very transparent when cured. It does take a long time to completely cure, though: at least a day before you can pull it from the mold, and several more after that until it's fully hard. The slow setup time means that your mold has to be leakproof, because it stays liquid so long that it'll all run out if it sees a crack. I'm doing the tinting with a little set of liquid dyes my wife bought me for my birthday; they're intended for use with polyester resins, but work fine with the epoxy. One drop red, twelve drops yellow. I'm gonna run out of yellow long before I run out of red. |
|


 so now I've got to buy more.
 I had to "scoop out" the seat's bottom cushion to get the driver to sit low enough. (I didn't just lower the seat, like all you guys are thinking I should have, because I like the way it interfaces with the package shelf area.) The driver is assembled from Preiser "Eve" bits, with a Milliput dress. The (ahem, unnatural) color is just an undercoat; her final fleshtones, etc will be done in oils, which work really well for fleshtones and other things where you want to blend colors together.


