|
|
Post by flounder on Apr 9, 2011 11:37:26 GMT -6
OK Klowns here i where I am so far. As usual, I am making parts 'cause that seems to be the most fun for me. If you eagle eye the pics you will see the scratched out manifold assembly and angle drive magneto. I also modified the stock oil pan to a more shallow box style. The problem now is fit. In the first pic you can see that I want the engine to peek out of the body line. I am going to to do some tricks with the valve covers to help with the streamlining. 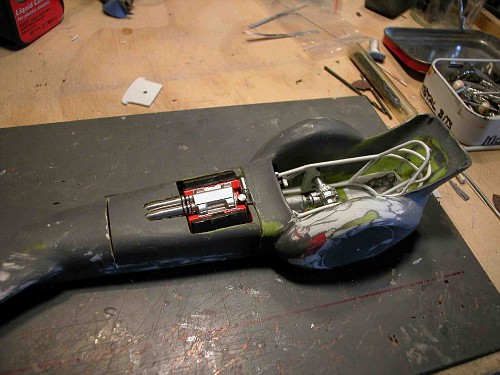 Hosted on Fotki Hosted on FotkiThe right side is OK. The manifold is very close the the chassis. YOu can get a better view of the angle drive distributor. The cap is scratched out too. 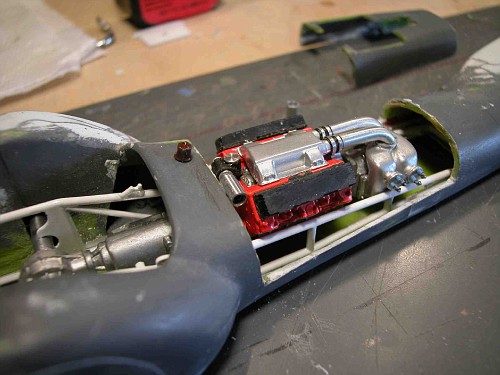 Hosted on Fotki Hosted on FotkiPOOP! The intakes are lined up directly with the frame rail! I am going to modify the chassis so the trumpets clear it and reach the the outer edge of the body ala Orange Crate. I can't go up with the top rail because I will hit the pop off valves on the other side. I have to go down. 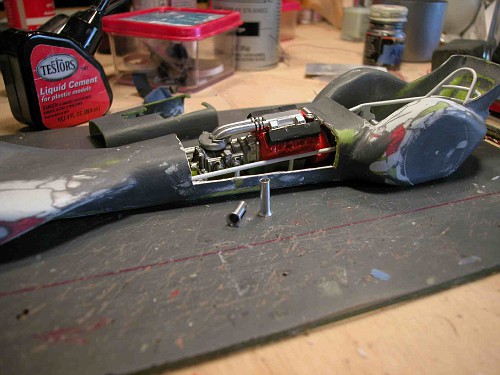 Hosted on Fotki Hosted on FotkiTill next time. Flounder |
|
|
|
Post by johnverkerk on Apr 9, 2011 13:58:02 GMT -6
GREAT SCOTT!!!!!,,,,, ;)Your attension to detail,,blows me away!!!!This will be pretty kool when done,,,you must be going thru a salt flat stage,,lol!!Where's the vette ???is it done  I'll be waiting to see how far you go with this one!!!!Please keep us posted!!!!  |
|
|
|
Post by mykturk on Apr 9, 2011 14:09:21 GMT -6
Lovin' this one Scott!
|
|
|
|
Post by badroadahead on Apr 9, 2011 17:15:18 GMT -6
Very nice scratch building....this is what I love about this site.... ingenuity.
The engine is perfect for this vehicle too.
This is going to be quite streamlined when finished.
Dave
|
|
|
|
Post by kettlekettle on Apr 9, 2011 23:51:50 GMT -6
keep up posted on this one ... love to see more
|
|
|
|
Post by starbaker on Apr 10, 2011 2:54:14 GMT -6
Wow. Nice.  |
|
|
|
Post by flounder on Apr 20, 2011 22:18:20 GMT -6
Update time. Without a deadline I can settle in and detail. First I had to fix the frame. The lead bars are low enough to clear the intake trumpets. I added front motor mounts because the OC engine attached to the firewall at the trans instead of the block. Still a little sanding to go. 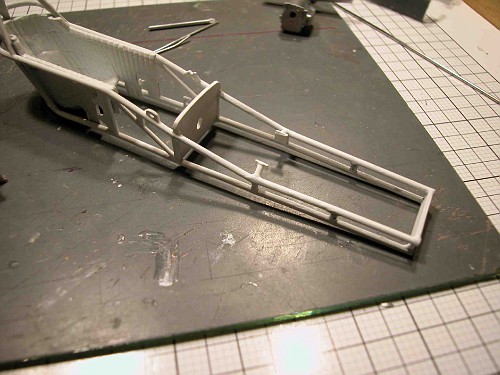 Hosted on Fotki Hosted on FotkiThe magneto is installed. The entire unit is scratchbuilt. Getting those little spots there was fun. I also made some plugs for the end of the plug wires. Not hard to do and adds a little extra realism. Sorry about the funky angle of the pic. The epoxy was still drying. 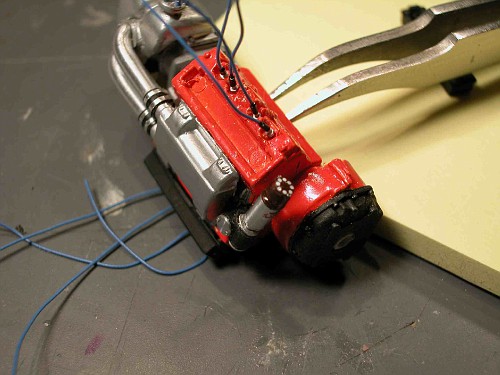 Hosted on Fotki Hosted on FotkiNext will be the recreation of the hydromatic shifter. I am starting with some polished stainless tube. Too much fun. Good thing I am going to open a hatch on the roof or that will not be visible. 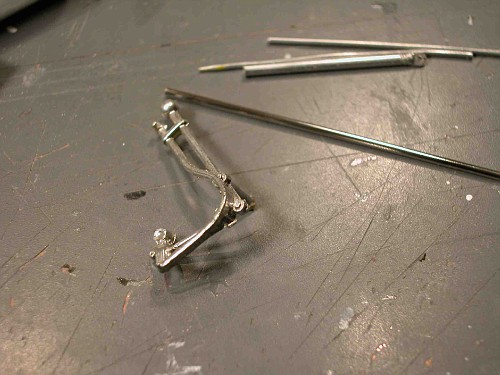 Hosted on Fotki Hosted on FotkiHope you Klowns like it. Until next time. flounder. |
|
|
|
Post by Tim Nolan on Apr 27, 2011 9:15:42 GMT -6
Glad to see you building again Scott, and this is really lookin' way-kool! How's your challenge build? Do any more work on it? Best to you and family......  |
|
|
|
Post by Dennis M on Apr 27, 2011 12:46:31 GMT -6
Super job Scott. Dennis
|
|
|
|
Post by flounder on Apr 27, 2011 22:54:47 GMT -6
Thanks to everyone for the encouragement!!!!! I am making progress on the shifter. WHat you see is is based on a thread found on the HAMB board. I learned that most applications were angle pan. The shifter is made from aluminum and stainless. The brackets and rod ends are aluminum. The reverser cables was some wire I pulled from a speaker or something. I modified the rear scatter shield to act as a bracket. Should all be together soon. 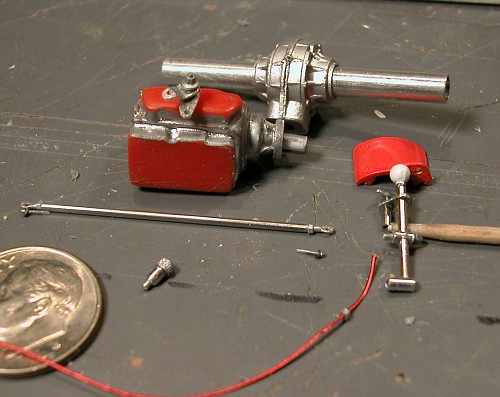 Hosted on Fotki Hosted on FotkiI haven't given up on the Beauty. But is now third in line. After this project, I will finish the Scorpion, then the Beauty will follow. I promise I will NOT start another project. Flounder |
|
|
|
Post by flounder on May 4, 2011 22:03:10 GMT -6
Well, the shifter is built and in place for a mock up. I also got the steering assembly mock up in place too. The trans is a hyrostick so it is a straight up throw. I think the T handle is the reverse. I matched the Orange Crate set up. Here's the question: The shifter looks pretty close in there and a little funny behind the steering wheel. Should I move it to be mounted outside the chassis? Flounder 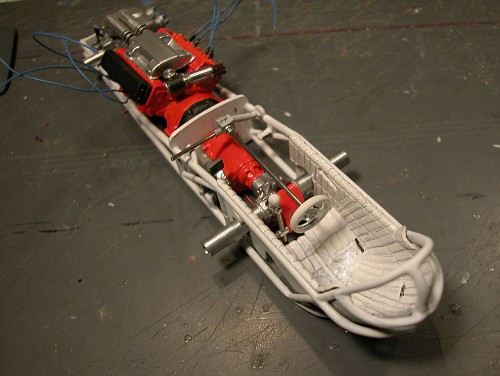 Hosted on Fotki Hosted on Fotki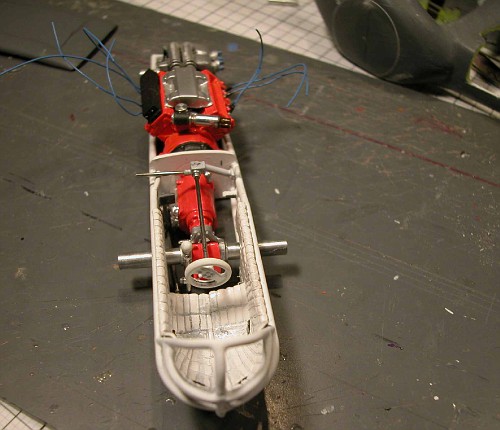 Hosted on Fotki Hosted on Fotki |
|
|
|
Post by francis on May 5, 2011 3:29:48 GMT -6
well from personally experience racing my altered
there is hardly enough room in there to put
your feet in there
l would put the shifter on your right hand side
approximately elbow hight
by the way that streamliner is looking absolutely killer
|
|
|
|
Post by modelcitizen on May 7, 2011 1:00:08 GMT -6
I have to agree with Joe D. on the shifter, right hand, cockpit wall. In regard to the intakes, an ellipse built into the frame rail may be in order??? From an engineering standpoint, you certainly wouldn't loose any strength and you may even gain some with proper gusseting.  Geeze!!! Engineering in scale!!! We really are sick puppies aren't we!!! ;D ;D ;D Whatever happens, this Monster is wicked sick Scott!!! ;D ;D ;D Keep after it!!!     "Paulie"  |
|
|
|
Post by starbaker on May 7, 2011 1:15:17 GMT -6
Great work ~ it just keeps getting better! 
|
|
|
|
Post by snakeplissken81 on May 7, 2011 6:57:15 GMT -6
Wow! That is the beginning of something great.
|
|
|
|
Post by mykturk on May 8, 2011 16:12:04 GMT -6
It ether needs to be mounted "outboard" or higher... Or outboard and higher...
It just looks 'inconveniant to use' where it is.
Nicely made though!
Well done grasshopper!
|
|
|
|
Post by baddgass on May 10, 2011 16:53:52 GMT -6
This is GREAT, love the blower setup.
|
|
|
|
Post by flounder on May 26, 2011 23:09:46 GMT -6
Well, as usual progress is slow. I am going to move the shifter outside the frame. (Thanks for the input guys.) It is going on the right because the actuator is one the right. I'll have to put a british flag on it somewhere. I had to start over on the seat because despite lots of reworking it did not fit well and there was no way to reattach the head rest part. New seat-new plan. I have also come to some grim realizations. I can get to all of the interior right now because the roof is not attached.  Hosted on Fotki Hosted on FotkiHowever, once the lid is on, things get tricky. I am going to cut open a hatch (gotta show off all that interior work somehow), but the roof will be glued and molded on place before the chassis goes in.  Hosted on Fotki Hosted on FotkiI did open up the underneath so the chassis just barely fits by the lip with just a bit of coaxing. But the shifter and friends will have to go on after the chassis goes in. This will require some planning and tweezer work.  Hosted on Fotki Hosted on FotkiMore TK Flounder |
|
|
|
Post by rocketeer on May 27, 2011 11:58:18 GMT -6
Why not hinge the roof?
|
|
|
|
Post by davemarek on May 29, 2011 10:59:06 GMT -6
Glad I checked...Looks like you are still crankin!
|
|
|
|
Post by koffinbuilder64 on May 29, 2011 20:25:08 GMT -6
Lookin good Flounder!! Keep at it!! Love the detail work!!
|
|
|
|
Post by dpaintbizer on May 29, 2011 20:47:56 GMT -6
...I kinda got a sick idea for ya....... cut it at the firewall. and hinge it backwads....up up & away.......... back to my korner now................ ~ Dean ~
|
|
|
|
Post by flounder on Jun 13, 2011 23:47:30 GMT -6
This is why it takes soooo long to finish. What you see here is the roof hatch with the metal supports and a working latch. Not shown is the support that was halfway done when I missed on a hole and had to toss it aside. The metal cylinder is the beehive oil filter made with aluminum sheet, a Micro-mark disk punc,h a rat tail file, exacto, and drill bits. It took a looong time, just to get it this far. It was something I wanted to try, but I will never do it again. It still need to be epoxied together which will compress it and even out the ridges. Thanks for all the input on the roof hatch. I considered the hinge at the back, but really wanted to not have a seam there. I also tried to figure where I could hinge more of the back half of the body, but agaian, the seam was the issue. Thanks for looking. Flounder 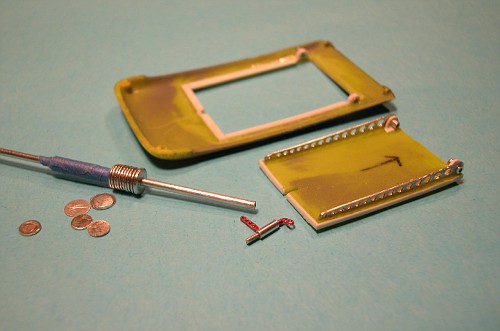 Hosted on Fotki Hosted on Fotki |
|
|
|
Post by mykturk on Jun 14, 2011 11:29:44 GMT -6
Working latch? So there'll be a 'working driver' too?
Awesome stuff Scott!
|
|
|
|
Post by davemarek on Nov 6, 2011 14:45:15 GMT -6
Jesus...Just finish
|
|
|
|
Post by Tim Nolan on Nov 25, 2011 22:41:48 GMT -6
Holy sh*t Scott, it looks great, but how long has it been?? LOL!!! The brass work is incredible, you are a master builder my friend..... ;D
|
|
|
|
Post by flounder on Nov 26, 2011 19:45:43 GMT -6
Hey Dave and Tim!
Has it really been a year? WOW. Ok here's the story. This one has been packed away for a while.
I cut a deal with MCM to do a series of scratch building articles on the Scorpion build. I have a four articles turned in and have three more ready to send. After that there are a couple more to go to finish it all up. (I am pretty excited about the whole thing.)
Then I will get back to this project and finally the old Beauty and the Beast challenge we started oh so many years ago.
Best regards and happy holidays my friends
Flounder
|
|
|
|
Post by baddgass on Dec 16, 2011 4:42:03 GMT -6
Looking good love the detail and that engine.
|
|

