|
|
Post by ira on May 25, 2012 15:33:02 GMT -6
[glow=red,2,300]ALIEN RATZ!!!![/glow] 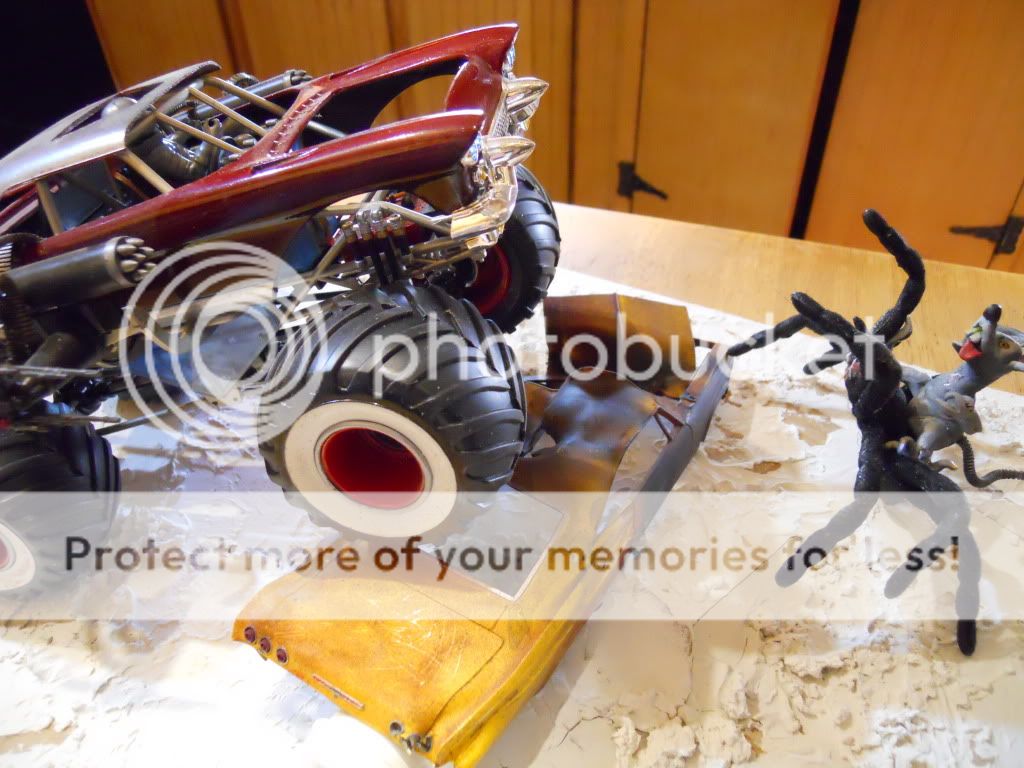 Amazing Build Don! The Caddy Body is Perfect for this CAR-TOON.... ;D |
|
|
|
Post by ira on May 25, 2012 15:46:33 GMT -6
[glow=red,2,300]Gettin' A Grip!!![/glow] I re-shaped Freddy's Hand to "Hold" something rather than "Grab" something...   Freddy's Hand is now glued in place and His Body is Sanded Smoooth... ;D |
|
|
|
Post by Mysterion on May 25, 2012 17:26:56 GMT -6
Trying my best to get these done in time. I'm mentally exhausted, but muddling through. I'm redoing the clear center sections to the wheels, the fronts are almost done and I was going to work on the rears, but the outlaws are on the Speed channel tonight. I can't find my bag of parts for this build, it has the bombs machine guns and the sight in it. Anyway, here's how she sits as of tonight.  |
|
|
|
Post by ira on May 25, 2012 17:29:10 GMT -6
[glow=red,2,300]HALF CHASSIS!!![/glow] I am using the back half of the Vette Chassis Plate, so I cut the front part off. I carved the Chassis Plate to fit the Body. 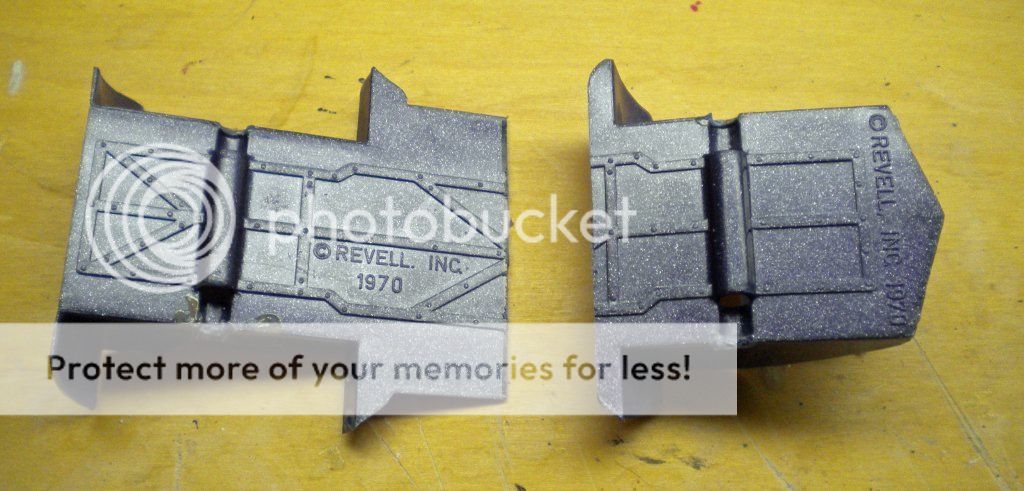 I found a 16th scale '56 T-Bird rear end, with the ends cut off it's a Perfect Fit!  I painted the Chassis Plate with Flat Black and the Rear End with Diamond Dust.  Next the Interior!  |
|
|
|
Post by Mysterion on May 25, 2012 18:06:29 GMT -6
The back tires, sanded and ready for the centers.  I used .040 x.040 square stock to make a lip for the center to attach to.  |
|
|
|
Post by ira on May 25, 2012 18:53:17 GMT -6
[glow=red,2,300]BiG FAT TIRES!!![/glow]
Nice Work Dave... ;D
|
|
|
|
Post by redbaron on May 25, 2012 20:11:14 GMT -6
I'm completely finished with the gypsy wagon I will be posting full sized pics of it in the contest page in the next few days
|
|
|
|
Post by ira on May 25, 2012 20:26:00 GMT -6
[glow=red,2,300]Here's The HOG!!![/glow] I made a Hog Head with Squlpey...  It's a little rough, but I think this will be a GOOD HOG!  Yep, here is our New Driver... 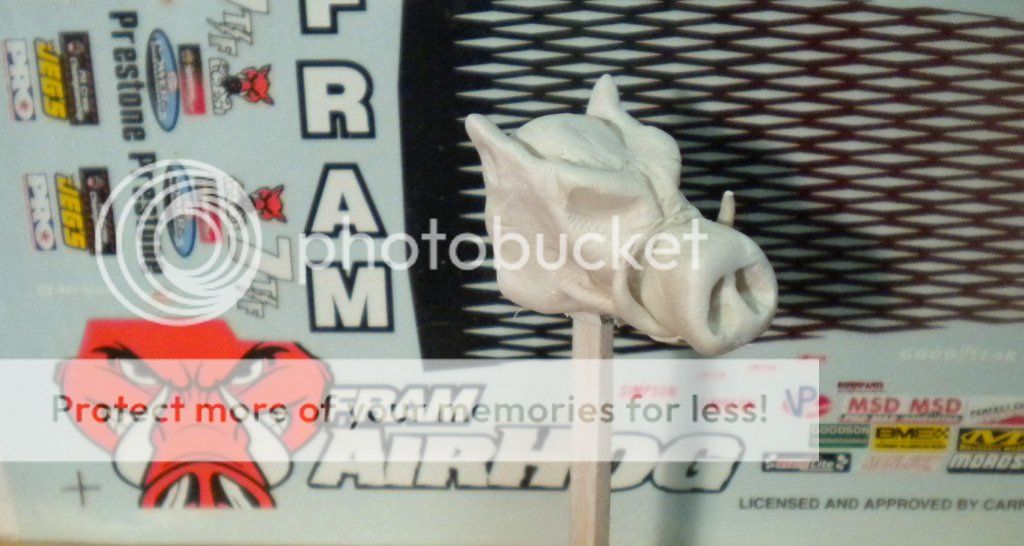 ;D |
|
|
|
Post by Pat Minarick on May 25, 2012 20:37:53 GMT -6
[glow=red,2,300]Here's The HOG!!![/glow] I made a Hog Head with Squlpey... It's a little rough, but I think this will be a GOOD HOG! Yep, here is our New Driver... ;D Looks cool ! Have you used sculpty before? |
|
|
|
Post by Mysterion on May 25, 2012 22:00:04 GMT -6
Nice Hog! Working on the cut, I should have it done tomorrow night.  |
|
|
|
Post by ira on May 26, 2012 8:56:23 GMT -6
[glow=red,2,300]FREDDY Gets Some COLOR!!![/glow] Sprayed Freddy with some DupliColor White Primer. 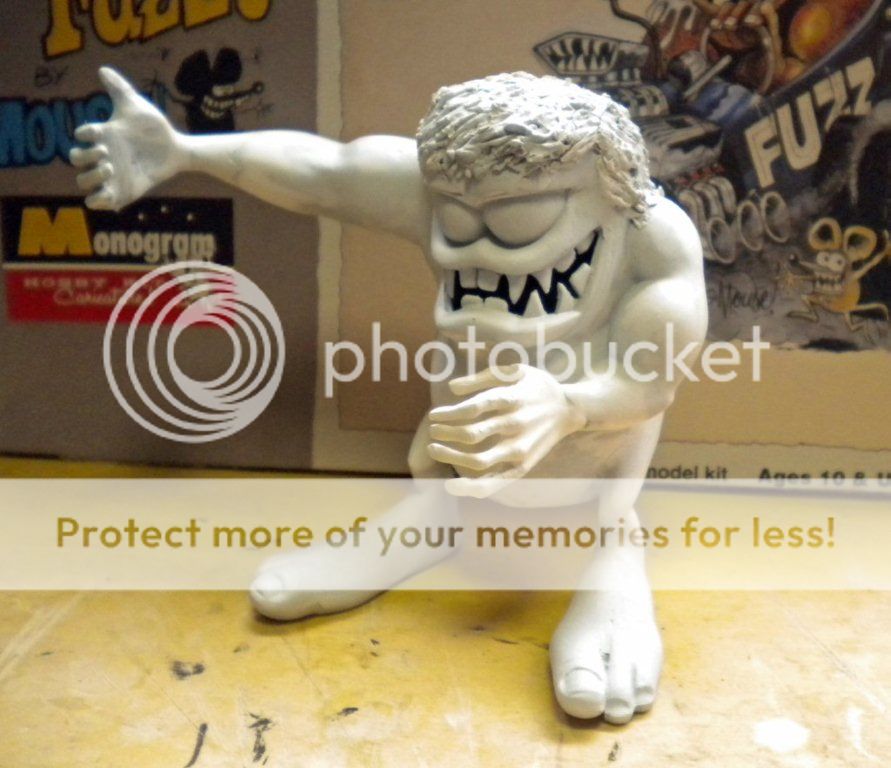 Next I hand painted a coat of "Wood Color" Acrylic, for Freddy's Tan! 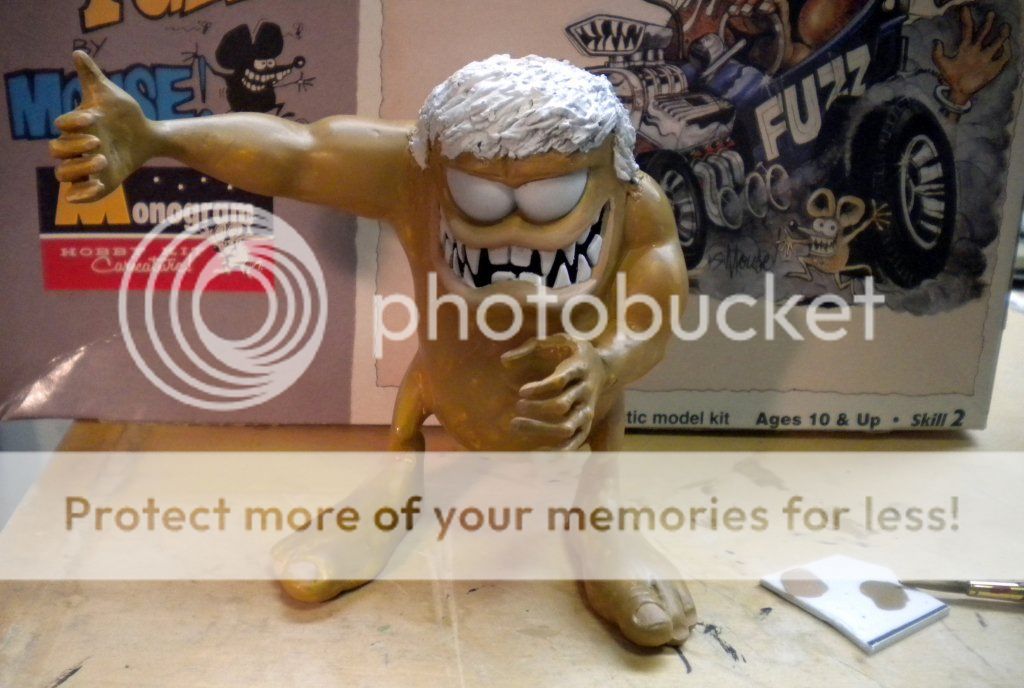 I mixed 2 Yellows and some White for the Freddy's Sun Bleached Hair. 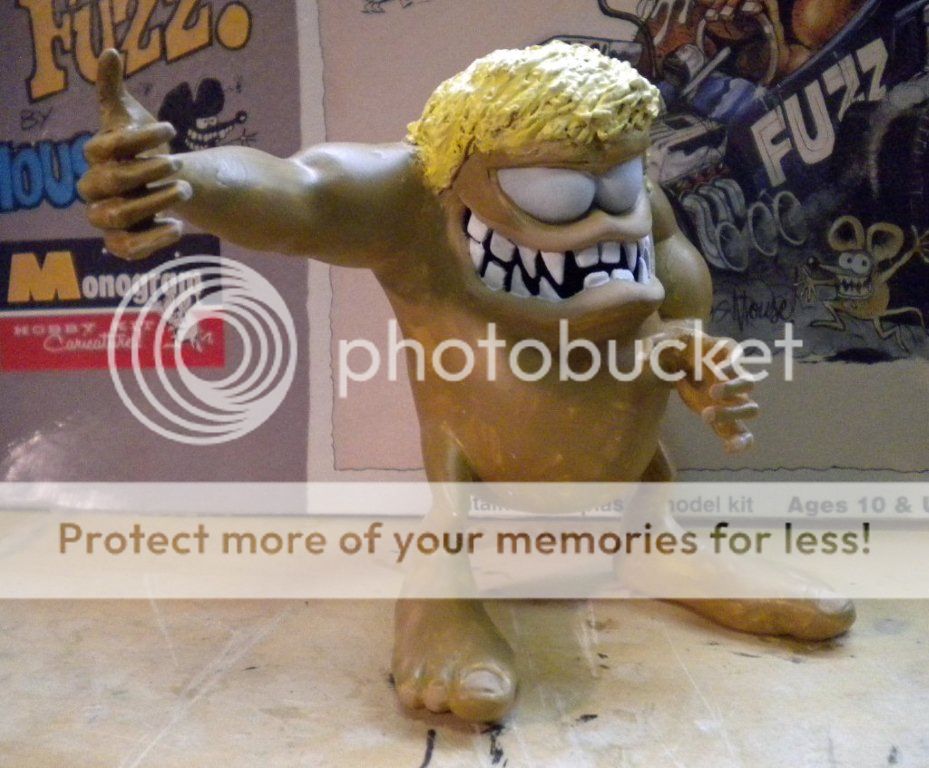 Oh No! Freddy Forgot His Pants Again... ;D |
|
|
|
Post by ira on May 26, 2012 9:09:34 GMT -6
[glow=red,2,300]HOG VETTE WHEELS!!![/glow] Instead of the stock "Deals Wheels" Tires, I switched to these...  The Rears are from a 16th scale Ferrari. The Front Wheels are from the Beatnik Bandit II, with Skinny Vintage Revell Gasser Tires. |
|
|
|
Post by ira on May 26, 2012 9:11:46 GMT -6
[glow=red,2,300]Here's The HOG!!![/glow] I made a Hog Head with Squlpey... It's a little rough, but I think this will be a GOOD HOG! Yep, here is our New Driver... ;D Looks cool ! Have you used sculpty before? Thanks! ;D Yea, I used it for my "Dream 53" Driver too... |
|
|
|
Post by Mysterion on May 26, 2012 20:10:49 GMT -6
A last minute change in color. I was originally going to do the wheels silver or Alclad. I went with red at the last second and boy am I glad I did! The red plays off the silver and the black of the tires perfectly. One more coat on the backs and them I can paint the tires and make the new clear centers.  |
|
|
|
Post by ira on May 26, 2012 22:53:48 GMT -6
[glow=red,2,300]The Red Looks Great!!![/glow] ;D Nice Progress Dave! Any graphics planned for this one? |
|
|
|
Post by Starry Eyes on May 27, 2012 8:22:50 GMT -6
Awesome work Dave .. lovin' the red ..
|
|
|
|
Post by Mysterion on May 27, 2012 8:28:47 GMT -6
Thanks guys.
I do have a sheet of Pin-Up girls I bought with the idea of putting one on the "hood", but am afraid the edges of the decal will show against the matte silver. If I have time, I'll shoot a test panel and put a decal on to see how it looks.
I'm terrified to tape over the rivet decals, I can just see a chunk of silver coming up with the tape, so no graphics unless I come up with some brush painted ones.
|
|
|
|
Post by Mysterion on May 27, 2012 8:57:47 GMT -6
The club logo on the jacket came out nice, I'm going to wait on revealing that for later. With the heavier head and the reshaped legs and arms, the body needs ballast to keep from falling forward on the bike. I took a small steel bolt, cut the head off, then cut it in half, cleaned up the threads a bit and cut slots in the top to fit a small screwdriver. One run all the way down and one about half way in.  |
|
|
|
Post by ira on May 27, 2012 9:32:58 GMT -6
[glow=red,2,300]FREDDY'S SHORTS!!![/glow] I drew an outline for Freddy's Cut-Offs with a pencil. Then I used Blue Acrylic mixed with a little White and painted His Shorts.  Freddy's Belt is made from 1/8th inch wide Masking Tape painted Brown. 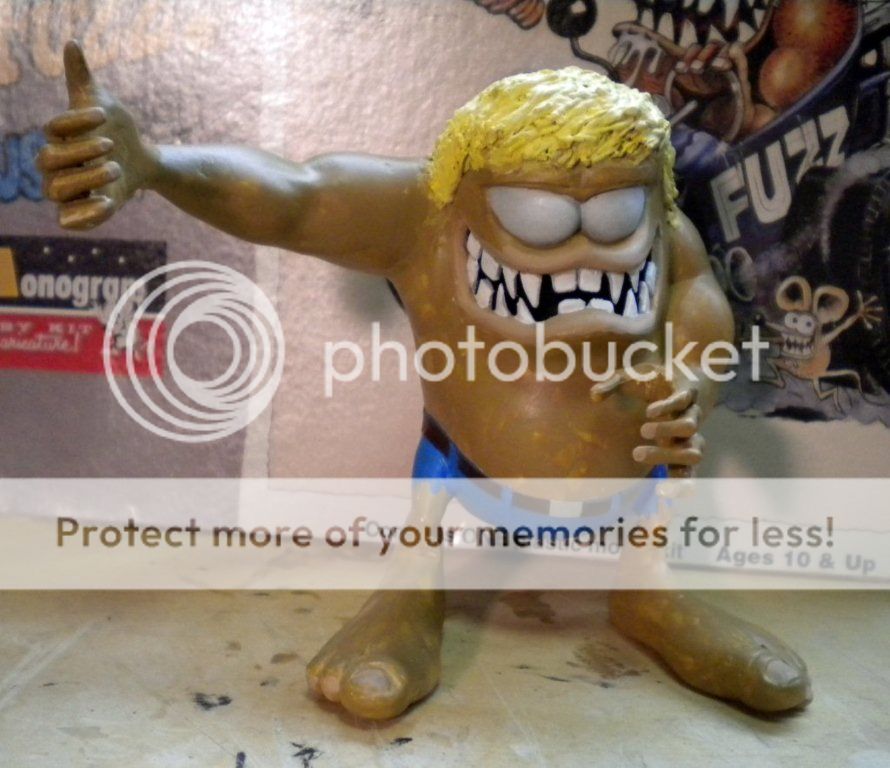 I made the Belt Loops with stripping tape and painted them Blue. The Belt Buckle is Silver Stripping Tape.  Almost forgot...made Freddy's Belly Button with a Dremel Tool. ;D |
|
|
|
Post by Mysterion on May 27, 2012 19:35:37 GMT -6
The back wheels and tires are done. I might add some lettering before they go on for the last time.   |
|
|
|
Post by Pat Minarick on May 27, 2012 22:51:59 GMT -6
|
|
|
|
Post by Mysterion on May 28, 2012 7:34:59 GMT -6
That Joe Dirt car came out great! A close up of the rear wheel, the center hub isn't lined up yet.  I also found out what the rear trailing arms and rear are from. The trailing arms are the fronts from a Lil' Yeller (or I guess any of the "Lil" kits), the rear is from the same kit. |
|
|
|
Post by Pat Minarick on May 28, 2012 8:16:17 GMT -6
That Joe Dirt car came out great! A close up of the rear wheel, the center hub isn't lined up yet. I also found out what the rear trailing arms and rear are from. The trailing arms are the fronts from a Lil' Yeller (or I guess any of the "Lil" kits), the rear is from the same kit. Thanks! I see you found your bag of parts with your bombs. Looking cool! Red rims are perfect. |
|
|
|
Post by ira on May 28, 2012 8:40:36 GMT -6
[glow=red,2,300]GREAT PROGRESS DAVE!!![/glow]
The Red & Clear Wheels are Cool & the Blue Bombs are a Nice Touch too!
;D
|
|
|
|
Post by ira on May 28, 2012 9:01:13 GMT -6
[glow=red,2,300]JOE DIRT CHARGER!!![/glow] Looks Great, Real Nice Build, Amazing Detail & Paint! |
|
|
|
Post by ira on May 28, 2012 9:09:33 GMT -6
[glow=red,2,300]FREDDY'S NEW SURF BOARD!!![/glow] Freddy's Board is painted with Testors Saffire Blue on top and Testors Jade Green on the underside.  The decals are from Slixx. 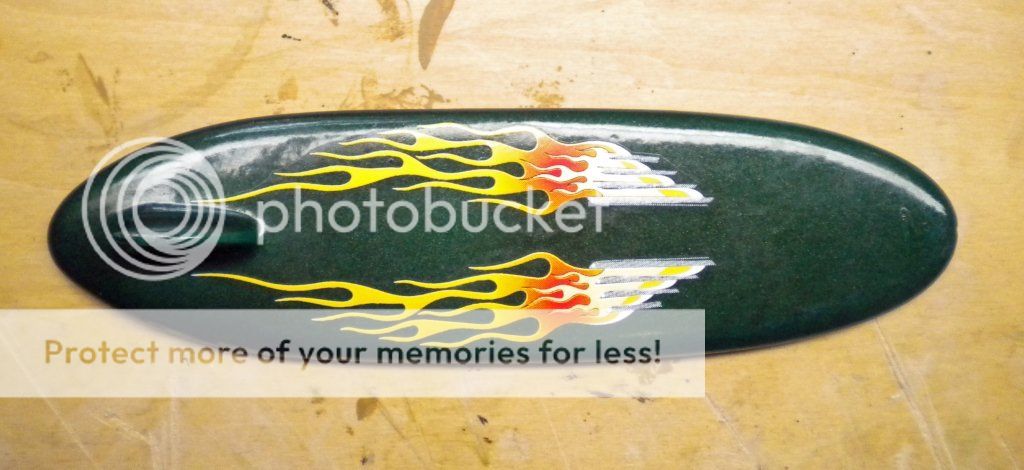 [glow=red,2,300]Nice & Shiny!!![/glow] |
|
|
|
Post by Pat Minarick on May 28, 2012 9:11:40 GMT -6
[glow=red,2,300]JOE DIRT CHARGER!!![/glow] Looks Great, Real Nice Build, Amazing Detail & Paint! Thank you! I really liked building this one. Thinking of building another one or a General Lee |
|
|
|
Post by ira on May 28, 2012 12:41:28 GMT -6
[glow=red,2,300]HOG BODY WORK!!![/glow] I used a Dremel Tool with a Drum Sanding Bit to smooth out the area where both bodies meet. Added putty to a few spots... 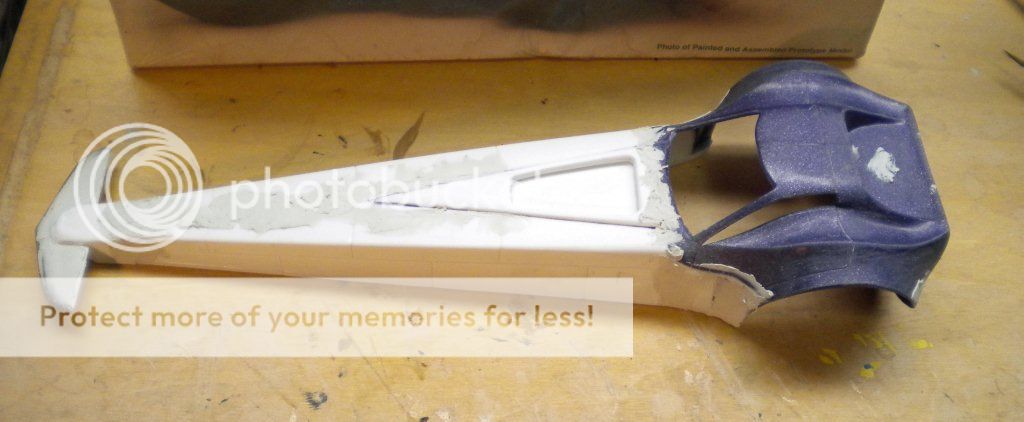 I sanded smooth the rear end and drilled out the Taillights.  [glow=red,2,300]More Sanding....[/glow] |
|
|
|
Post by Mysterion on May 28, 2012 14:21:27 GMT -6
Now to reveal why the bombs were painted blue. Thanks Dave!   |
|
|
|
Post by ira on May 28, 2012 16:23:00 GMT -6
[glow=red,2,300]MORE CAR-TOONS CONTEST PRIZES!!![/glow] We just got word that we will be recieving some Very Special CAR-TOONS CONTEST Prizes...from an [glow=red,2,300]AMAZING[/glow] Place! Last Minute Photos and Details coming later this week! [glow=red,2,300]WOW!!![/glow] ;D |
|


