|
|
Post by hobbybobby on Jun 21, 2014 8:26:22 GMT -6
This project here is an old idea, and finally I'm going to implement it... This is the kit... 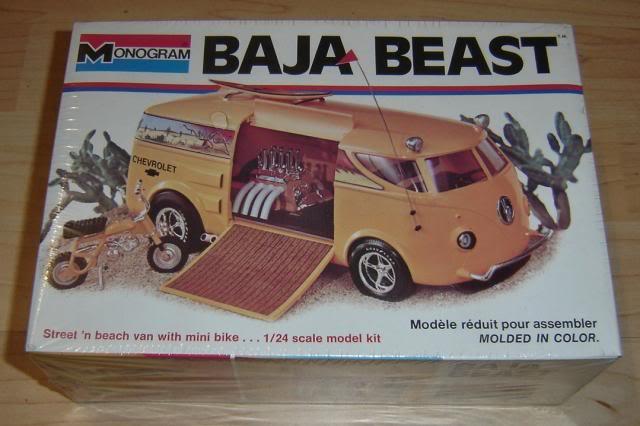 The kit is great and offers so few goodies... But... I wanted to have this more deeply, very deeply... So, the kit is a great starting Point...  First, the front spoiler has to go... 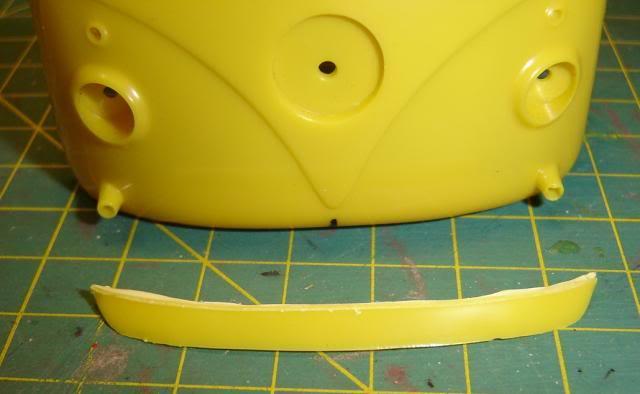 To go deep, still a lot needs to be done... As a second step, the wheel arches comes to amendment... 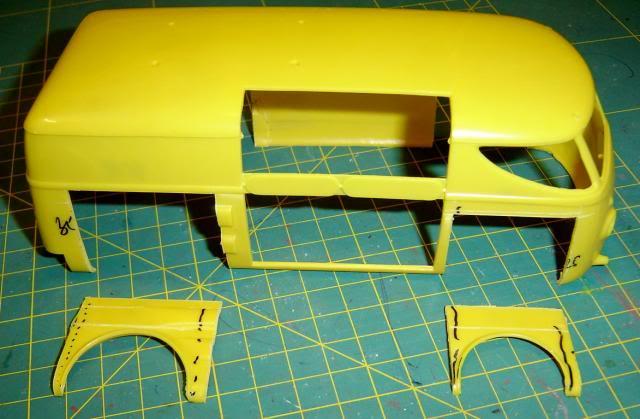 |
|
|
|
Post by DVS on Jun 21, 2014 8:53:08 GMT -6
Can't wait to see what you have planned for this.
|
|
|
|
Post by hobbybobby on Jun 22, 2014 6:23:17 GMT -6
Well, there is not really an elaborate plan... It is at the beginning just an idea, that I refine during the conversion, the rest is sometimes just pure coincidence...  And, it goes on... My kit is a few years old, the plastic has become very crispy and unexpected things occur when you edit...  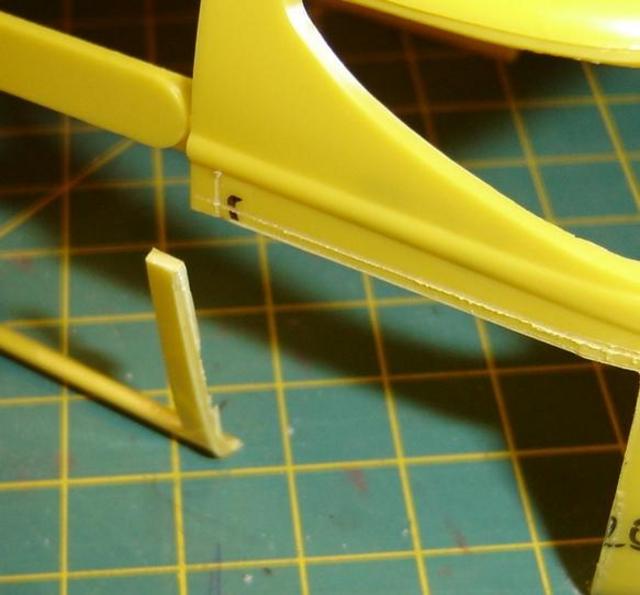 ... and the same on the other side... 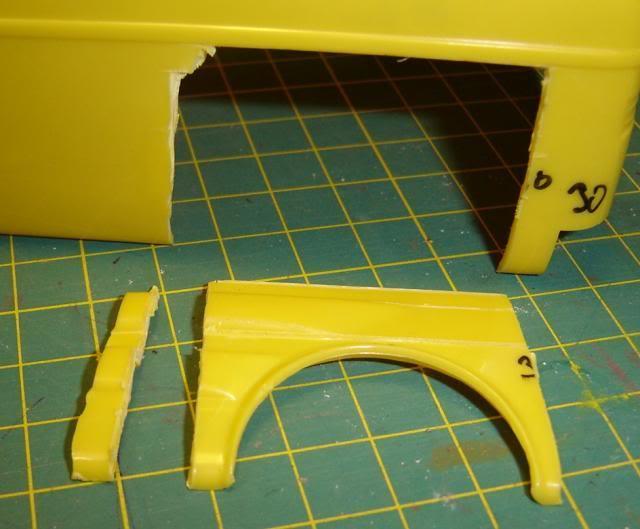 Before I can continue, I need to repair it first...  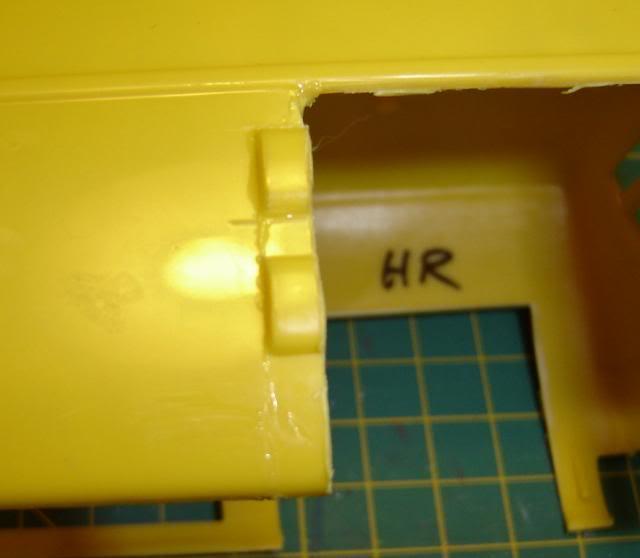 |
|
|
|
Post by hobbybobby on Jun 22, 2014 7:36:28 GMT -6
And, it goes on... Left is the rear wheel arch, on right is the front one... 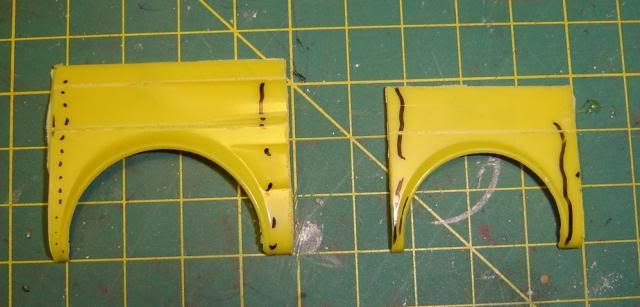 I cut off on top the desired partials... 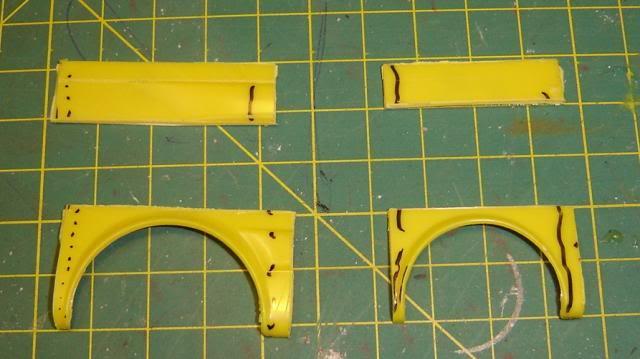 ... and put everything back to new Position... 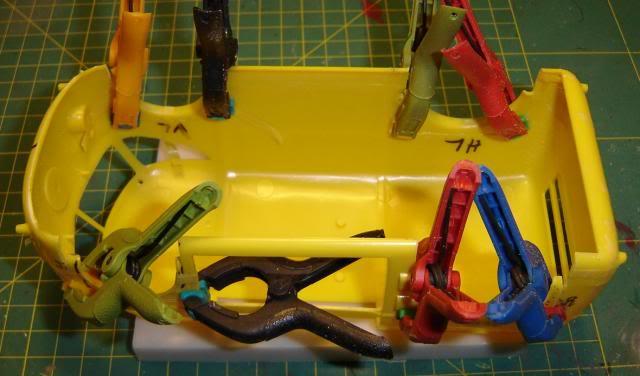 |
|
|
|
Post by ira on Jun 22, 2014 7:47:19 GMT -6
Great Start Bobby! 
|
|
|
|
Post by hobbybobby on Jun 22, 2014 8:48:14 GMT -6
Thank you, Ira, here's a little confession: actually, only your avatar is guilty, that I've started this one...  |
|
|
|
Post by Bert on Jun 23, 2014 10:55:53 GMT -6
Your are certainly not afraid to cut one up my friend. Nice start.
|
|
|
|
Post by scurvydklown on Jun 23, 2014 14:30:06 GMT -6
Always a fan of a slammed VW van.
|
|
|
|
Post by hobbybobby on Jun 24, 2014 16:06:38 GMT -6
Thank you very much!  Everything is glued and holds, so far, this is the current state... 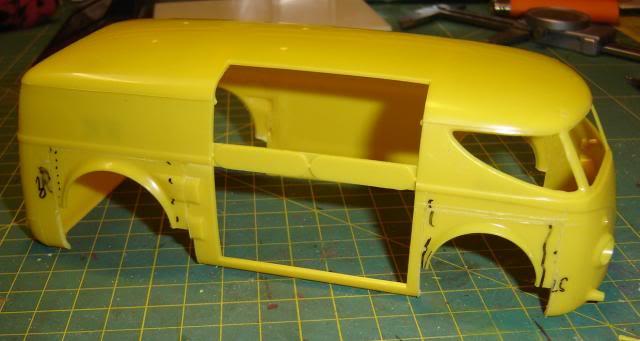 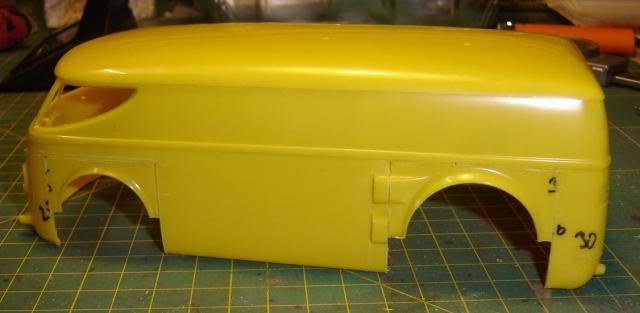 |
|
|
|
Post by ira on Jun 24, 2014 17:34:53 GMT -6
Go Bobby! 
|
|
|
|
Post by scurvydklown on Jun 24, 2014 21:37:22 GMT -6
You're giving me evil ideas. I have a BMW M3 DTM kit, and I'm not afraid to use it.  |
|
|
|
Post by hobbybobby on Jun 29, 2014 9:22:21 GMT -6
And it goes on... Again this picture:  ... from the truncated upper parts, I cut narrow strips that I use to fill the recesses... 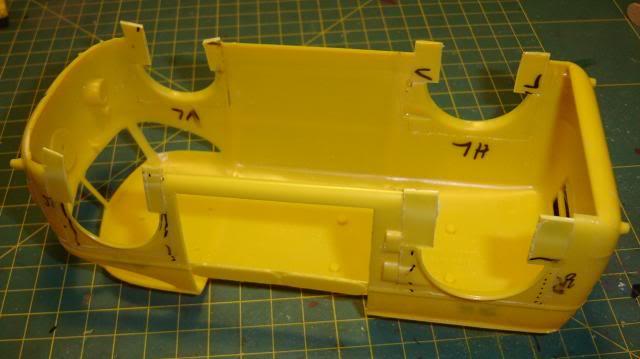 |
|
|
|
Post by hobbybobby on Jun 29, 2014 9:44:48 GMT -6
|
|
|
|
Post by ira on Jun 30, 2014 7:51:43 GMT -6
What's Next? 
|
|
|
|
Post by hobbybobby on Jun 30, 2014 16:51:32 GMT -6
Actually, Ira, I have no idea... ... but I think, next I will most likely continue with the Rolling Chassis... ... means, the frame plus the "running gear" like engine, transmission, driveshaft, differential and suspension...  |
|
|
|
Post by hobbybobby on Jul 4, 2014 16:32:19 GMT -6
And, it goes on... I will provide this project with the original motor from the kit... 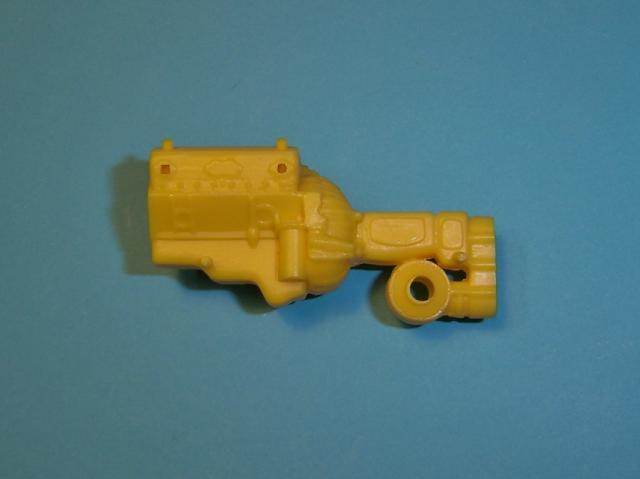 ... and here are the remaining components... 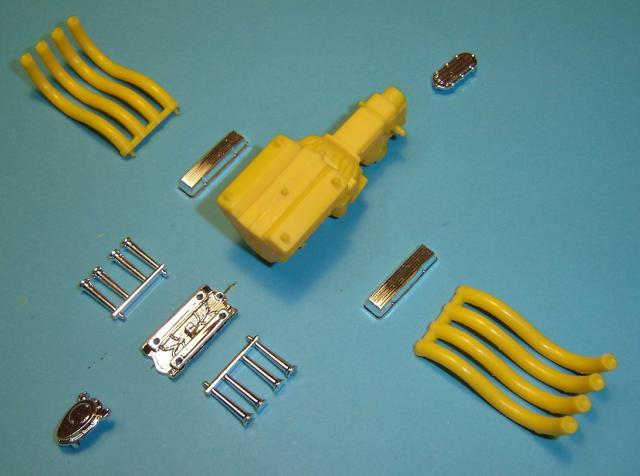 I make a small sample, to make sure everything fits together... 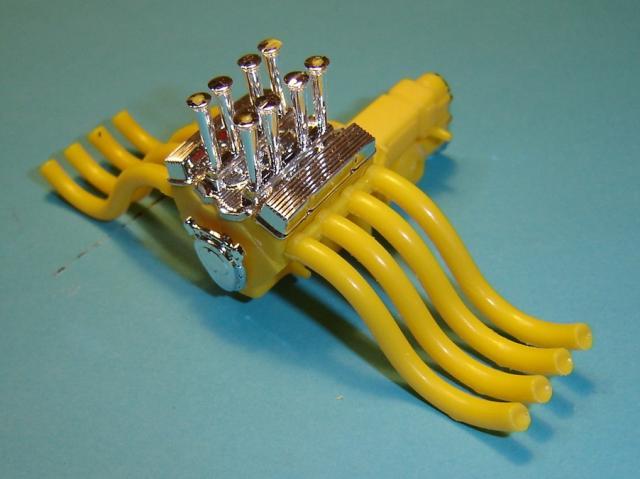 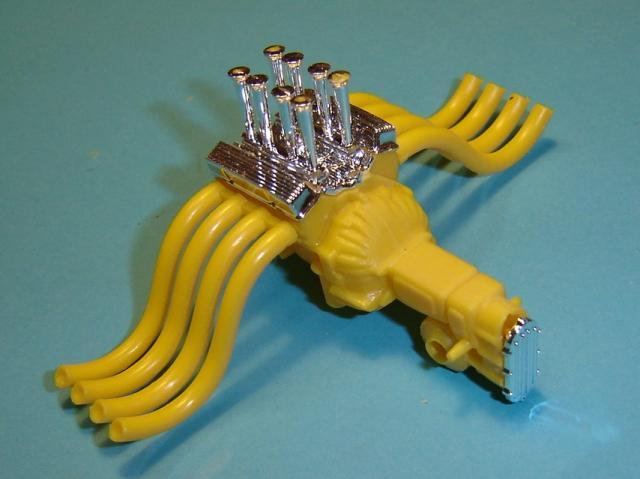 The exhaust pipes look out under the body, intended in the original construction of the kit... ... now, in my deep Version, that is no longer possible... ... the engine remains, but I have to think of something else with the tailpipes... |
|
|
|
Post by hobbybobby on Jul 5, 2014 14:21:40 GMT -6
And, it goes on... The substructure, or the chassis is having at the end most changes... Here's the original ... 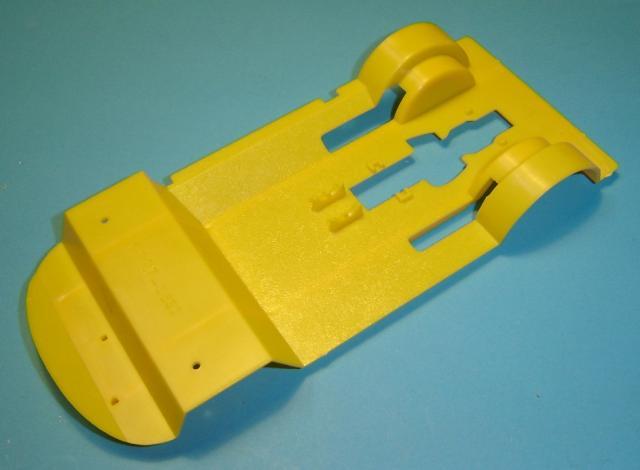 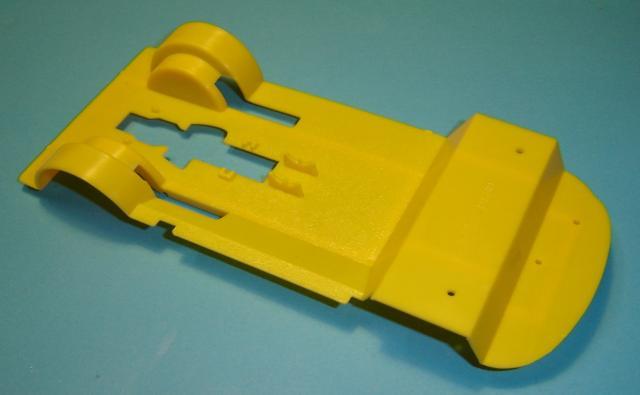 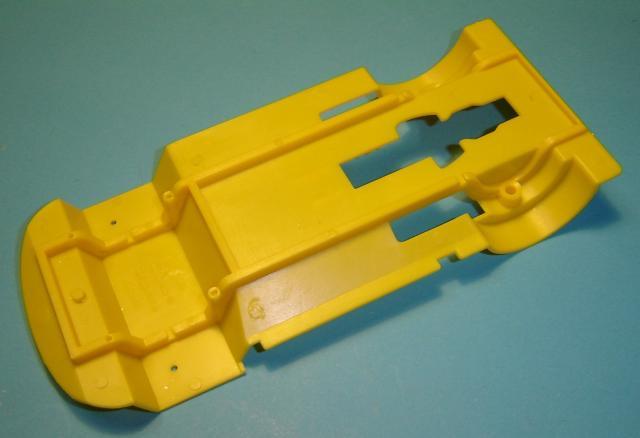 Seen from below, fits so far everything... 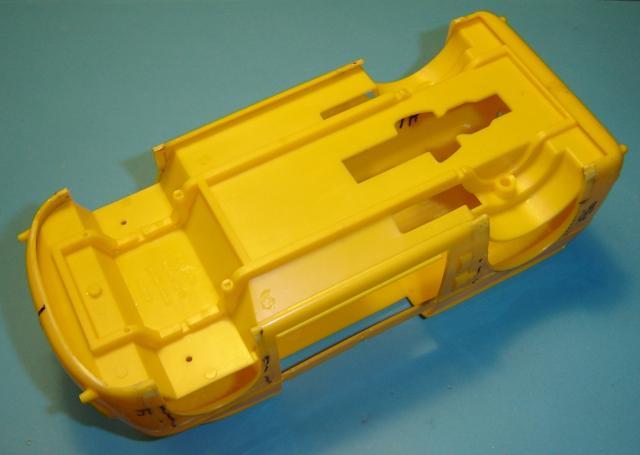 ... but once you look at it from the side... 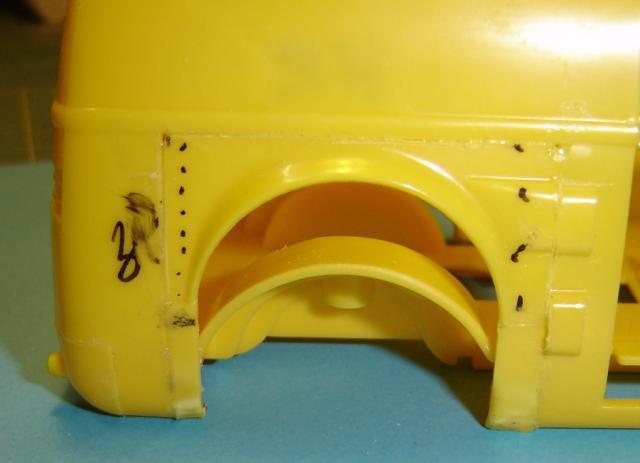 ... one sees immediately what it must be changed... 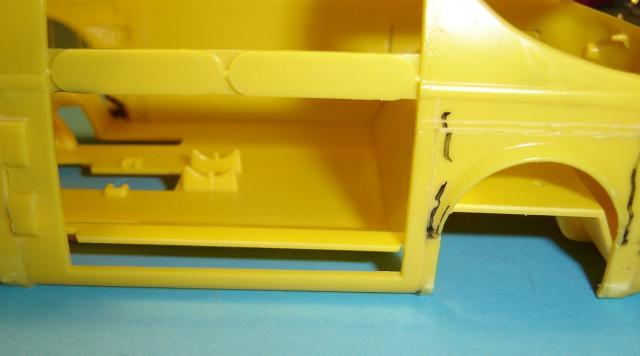 |
|
|
|
Post by hobbybobby on Jul 5, 2014 15:36:44 GMT -6
But before I begin to modify the Chassis, I look at a further change what affects the Body...  This is a view of the imaginary original kit door-opening System... 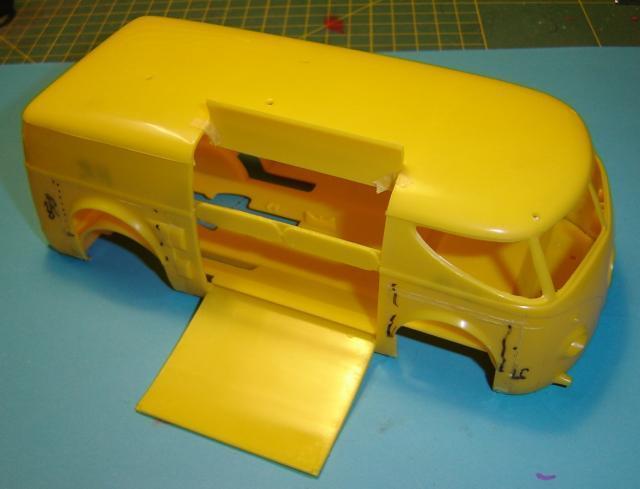 Since my version of this vehicle will be very low, I do not need a ramp for the minibike...  So I imagined the following type of door: 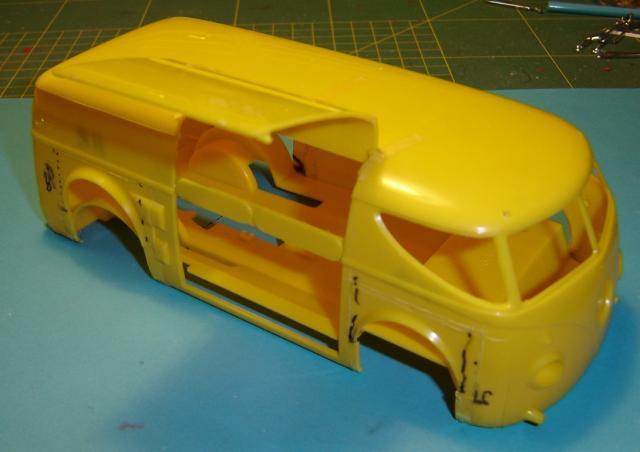 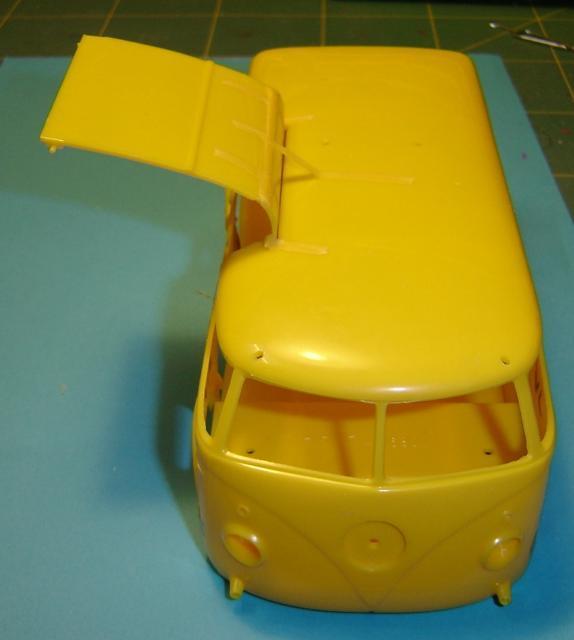 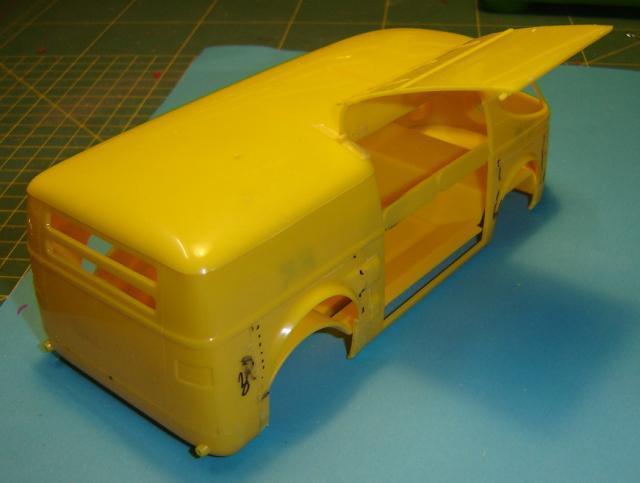 |
|
|
|
Post by scurvydklown on Jul 6, 2014 10:06:47 GMT -6
Do you think your chassis plan will be to channel the body, raising the entire frame up inside, or to just rebuild taller wheel arches? Have you considered flipping the V-drive attachment on the back of the transmission so that the axle centerline sits above the transmission?
|
|
|
|
Post by hobbybobby on Jul 7, 2014 14:35:43 GMT -6
Well, Dave, to be honest, I do not have again a precise plan also for this Project...  ... there are certain ideas, no question, but, on the whole, I solve gradually the problems that come up to my builds... A channeling of the body is out of the question, I think that the body, as it is now, looks good enough.  I have set up the wheel wells, to come up with my new tires, at the same time, I reach therefore the desired depth... Raising the entire frame inside? Ooolala, that would in fact be something... ... hmm, but that is too time consuming for me at the Moment...  Just to build larger wheel arches again, is the most plausible Version... And yes, Dave, flipping the V-drive attachment on the back of the transmission so that the axle centerline sits above the Transmission gives you full marks!  But as I said, all in good time, step by step... And, it goes on... The hatched area is not exactly equal to the rest... 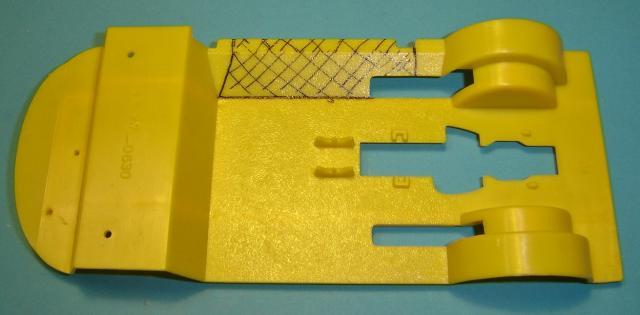 ... also seen from below... 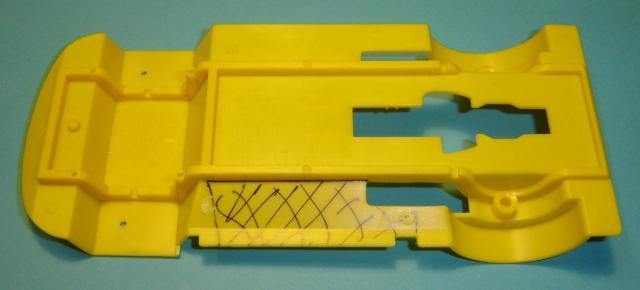 ... but I want to have this area at floor Level, so I'm doing a few cuts, warm up the area, and just bend it down 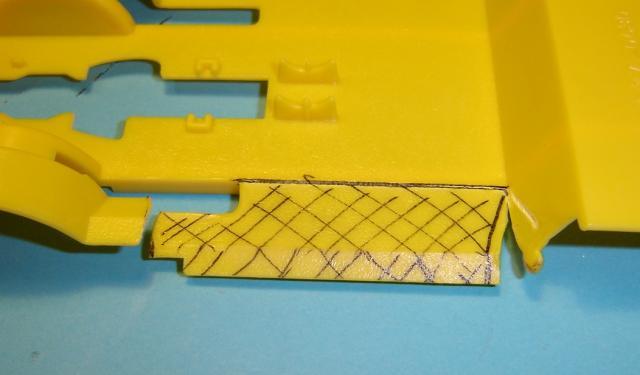 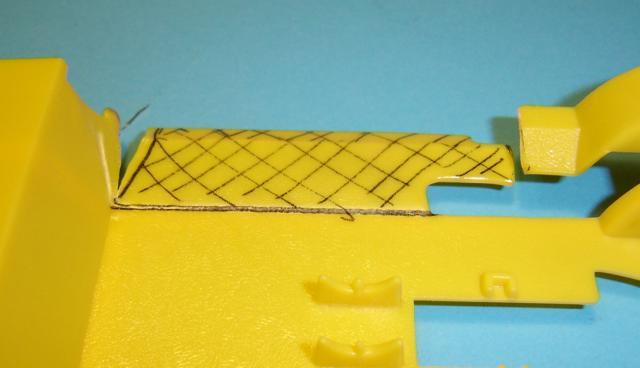 With the front narrow strip, I proceed in the same way, but this time I turn it to the top until it is flat... 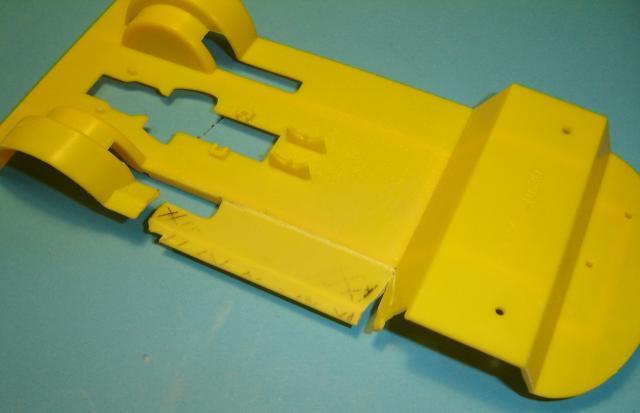 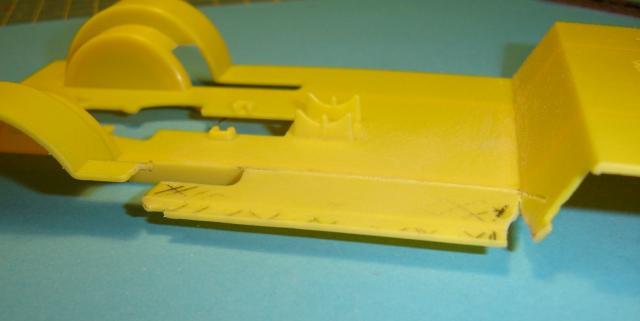 And here is a small sample: the new "floor Level entry"... 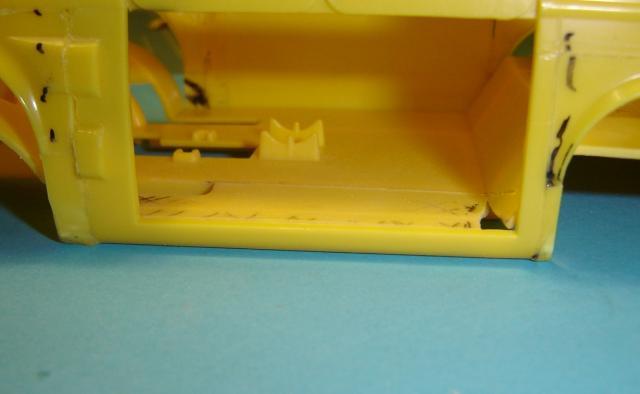 |
|
|
|
Post by johnverkerk on Jul 15, 2014 17:08:21 GMT -6
WOW!! BOBBY!!! LOOK AT YOU GO!!! SOOOO MANY COOL LOOKING PROJECTS!!KEEP UP THE WORK!!!LOVE SEEING YOUR BUILDS!!
|
|
|
|
Post by hobbybobby on Jul 26, 2014 17:45:51 GMT -6
Thank you very much, John!  And it goes on... Now we come to, flipping the V-drive attachment on the back of the transmission so that the axle centerline sits above the transmission...  So it looks at the beginning:  Then, I had to be very careful and have separated it... 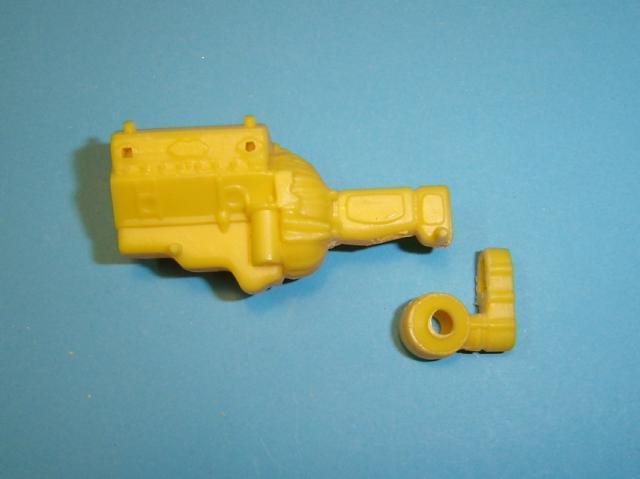 ... and turned it up... 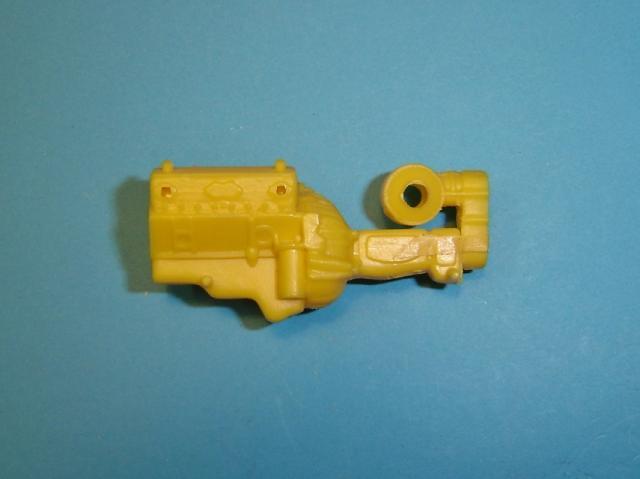 This is the new position of the rear axle: 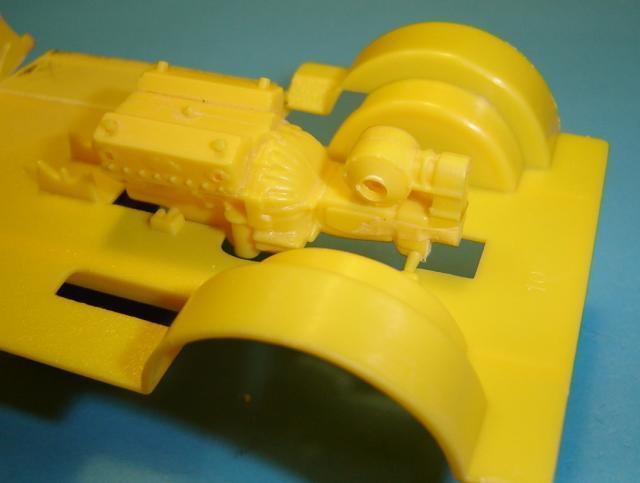 a] |
|
|
|
Post by hobbybobby on Jul 26, 2014 18:27:30 GMT -6
Next, I remove the wheel arches... ... and for that I mark out the cut edges... 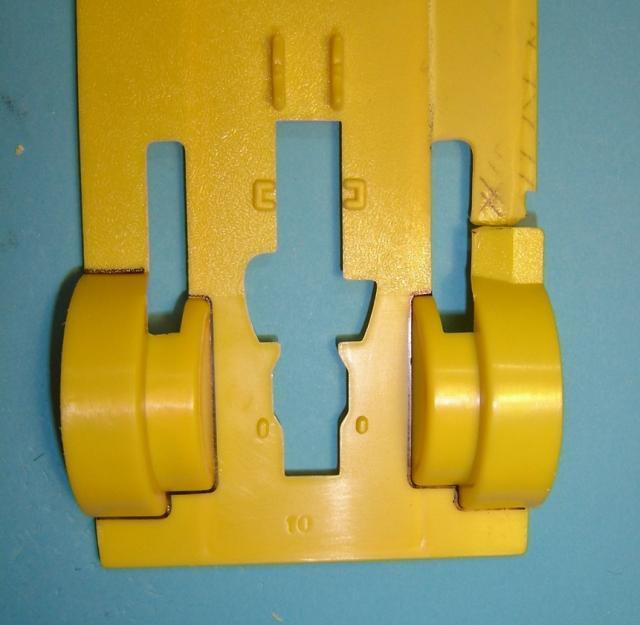 ... and remove them... 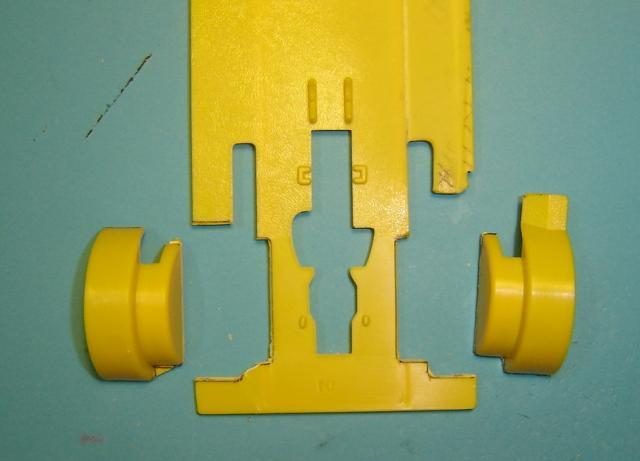 Here you can see it better, the new position of the rear axle...   |
|
|
|
Post by RatRod on Jul 27, 2014 13:03:56 GMT -6
Man, another cool project!!!
|
|
|
|
Post by scurvydklown on Aug 5, 2014 8:33:46 GMT -6
Wow! I'm guessing it's due for some large-diameter Hobby Bobby rubber out back. Going to have a killer stance!
|
|
|
|
Post by modelbuff1958 on Jan 20, 2015 17:10:26 GMT -6
This is great work
|
|
|
|
Post by hobbybobby on Aug 17, 2017 18:25:52 GMT -6
The pictures are renewed...
|
|

