|
|
Post by TooOld on Sept 21, 2014 9:29:05 GMT -6
I've had this for a looong time and have decided it's time to do something with it . It was partially built when I got it and it literally fell apart when I touched it so glue residue won't be a problem . It's missing a few parts but I have a couple of Street T's that I can steal from !  The plan is to build it the way it was meant to be , no super detailing or aftermarket parts . The only detailing I plan will be with a paint brush , and I'll try polishing the plastic instead of painting it . Here's what I'm starting with . . . should be fun !   |
|
|
|
Post by ira on Sept 21, 2014 11:42:10 GMT -6
Great Project Bob! 
|
|
|
|
Post by falconwagon on Sept 21, 2014 14:25:24 GMT -6
Go For It !!
|
|
|
|
Post by 70spop on Sept 21, 2014 19:05:47 GMT -6
Cool! Sounds like you got a good one to start with. Can't wait to see it!
Brian
|
|
|
|
Post by TooOld on Sept 21, 2014 20:31:05 GMT -6
Disassembly was a breeze and any glue residue came right off without any damage to the plastic .  And here they are after wet sanding with progressively finer grits of sandpaper . I'll start polishing them tomorrow !   |
|
|
|
Post by TooOld on Sept 23, 2014 17:28:17 GMT -6
I did some polishing today and things are looking pretty good . I think after the decals are on I'll spray some clear to give it a nice shine !    |
|
|
|
Post by TooOld on Sept 24, 2014 6:02:56 GMT -6
I just finished re-building a Little T that I got a few years ago. It was started, no paint, missing a few small parts but I am leaving it as-is. Now I am repairing the Bugatti T35 that I built in 1967. After that I will be re-building an original Blue Beetle. I have built the various re-issues of the Little T including the version with the trailer and they are all fun  I've got an original Blue Beetle that I plan on rebuilding too , it might be next on my bench ! I'd love to find a Bugatti T35 , how 'bout posting some photos ? |
|
|
|
Post by TooOld on Sept 24, 2014 18:43:43 GMT -6
|
|
|
|
Post by 70spop on Sept 24, 2014 19:17:51 GMT -6
Looking good! Pretty impressive about the decals. The red wheels and red backing plate detail looks good.
Brian
|
|
|
|
Post by ira on Sept 24, 2014 23:16:39 GMT -6
The 48 year old decals actually went on pretty nice . I coated them first and after cutting them apart they had to soak for about 5 minutes before they would release from the backing , but they look okay . I painted the wheels and backing plates with Testors 1103 Red , and painted the engine with some clear red to darken it up a bit . Here's some photos !   |
|
|
|
Post by TooOld on Sept 25, 2014 6:16:33 GMT -6
Looking good! Pretty impressive about the decals. The red wheels and red backing plate detail looks good. Brian Thanks Brian ! |
|
|
|
Post by TooOld on Sept 25, 2014 6:26:03 GMT -6
Thanks Ira ! I coated them with Testors Decal Bonder . A lot of people use clear spray paint but I've always used the Decal Bonder , I know it works and have never had a reason to try anything else . I also tried something different on these . . . they were a bit yellowed so I used some SemiChrome polish on them . Very lightly to remove the yellow from the surface and not go thru to the colors . . . It worked ! ( I tested this first on some other decals )  |
|
|
|
Post by TooOld on Sept 27, 2014 14:23:38 GMT -6
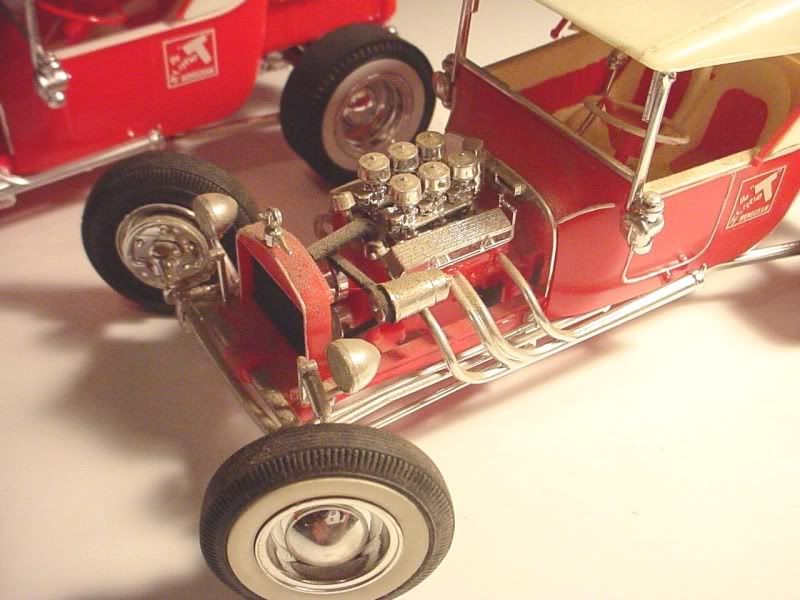
Most of the engine is assembled so I placed it in the frame to help locate the rear suspension .  Here's my fancy 3-point fixture to locate the rear while the glue dries !  I sprayed some DullCote on the axle housings to add a little contrast .  The headers just looked terrible without flanges so I made some out of scrap plastic . Not perfect but I think they look better .  |
|
|
|
Post by AL on Sept 27, 2014 19:43:56 GMT -6
One of my aabsolute faves !
Very nice work !
=btw. Haven't been around in awhile;
Hi guys ! :-)
Al
|
|
|
|
Post by RatRod on Sept 27, 2014 20:54:02 GMT -6
You are doing a great job Bob!!! What's funny is your going the route the original builder of mine went!!!
How I got mine, 40+ year old build.... Smoke & dust contamination everywhere, but notice the hand painted pinstriping. Smoke & dust contamination everywhere, but notice the hand painted pinstriping.
After the first wash..... And the restored product.... And the restored product.... Keep at it ob!!! Keep at it ob!!!
|
|
|
|
Post by TooOld on Sept 28, 2014 10:06:51 GMT -6
One of my aabsolute faves ! Very nice work ! =btw. Haven't been around in awhile; Hi guys ! :-) Al Thanks much Al ! Good to see you back , there are a lot of people MIA around here !  |
|
|
|
Post by TooOld on Sept 28, 2014 10:12:08 GMT -6
You are doing a great job Bob!!! What's funny is your going the route the original builder of mine went!!! Thanks John ! I saw a Big T with the pinstripes on it and thought I'd give it a try , it's different ! I'm enjoying this one a lot so I think I'll start looking for another one !  |
|
|
|
Post by TooOld on Sept 30, 2014 16:01:54 GMT -6
Finished up the chassis last night . The working steering is about the best I've seen in a kit , and I think it looks better than the Revell version ( Tweedy Pie , Rodfather ) . The headers are just tacked on for the photos .    |
|
|
|
Post by TooOld on Oct 3, 2014 17:33:44 GMT -6
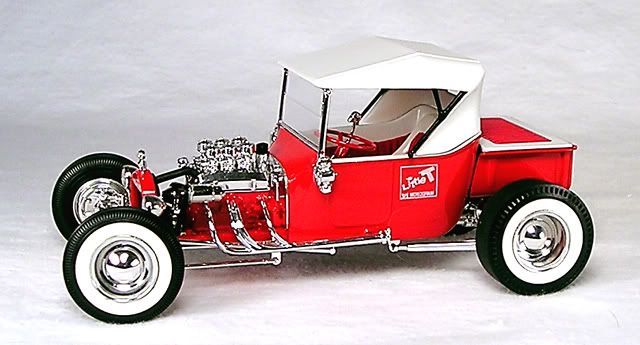
Just a few finishing touches and it will be done , I'll take some photos this weekend . Here's a sneak peek !   |
|
|
|
Post by 70spop on Oct 3, 2014 22:05:47 GMT -6
Neat! That's looking great. I like the tank on the rear. Looking forward to more photos.
Brian
|
|
|
|
Post by ira on Oct 4, 2014 0:39:08 GMT -6
Looks Like New!Real Nice Work Bob... 
|
|
|
|
Post by TooOld on Oct 4, 2014 18:09:18 GMT -6
Thanks Brian and Ira , I'm posting photos in Completed Show Rods tonight !  |
|
|
|
Post by Dennis M on Oct 14, 2014 19:38:58 GMT -6
Fantastic job.
|
|
|
|
Post by TooOld on Oct 15, 2014 13:36:33 GMT -6
Thanks Dennis ! Love your baby Deuce !  |
|

