Post by robriley on Oct 6, 2008 19:40:38 GMT -6
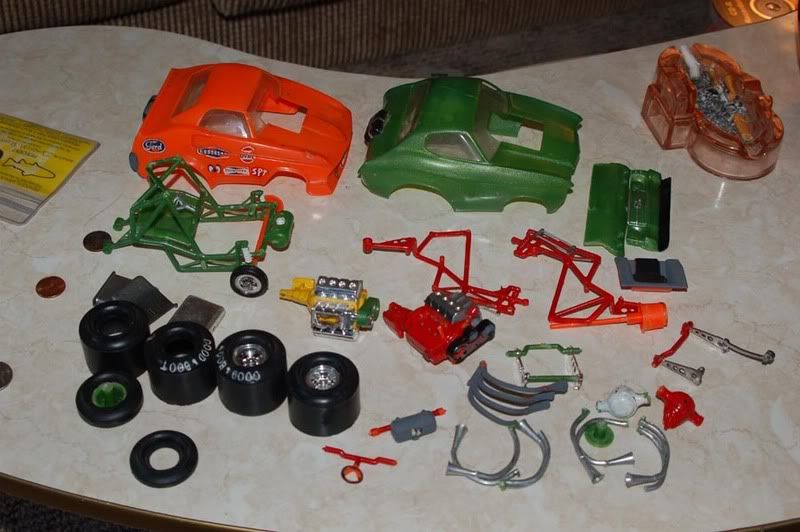
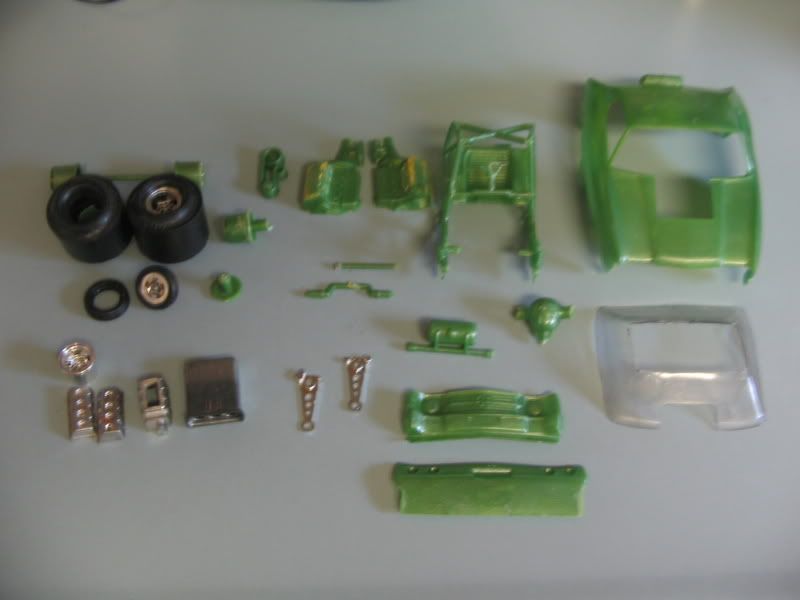
Here's my deals wheels super spurt chevelle for the challenge that Jay and I have going. I traded jay something for the super spurt, and here's what it looked like when i got it. yes, this is an original version, not a funster version.
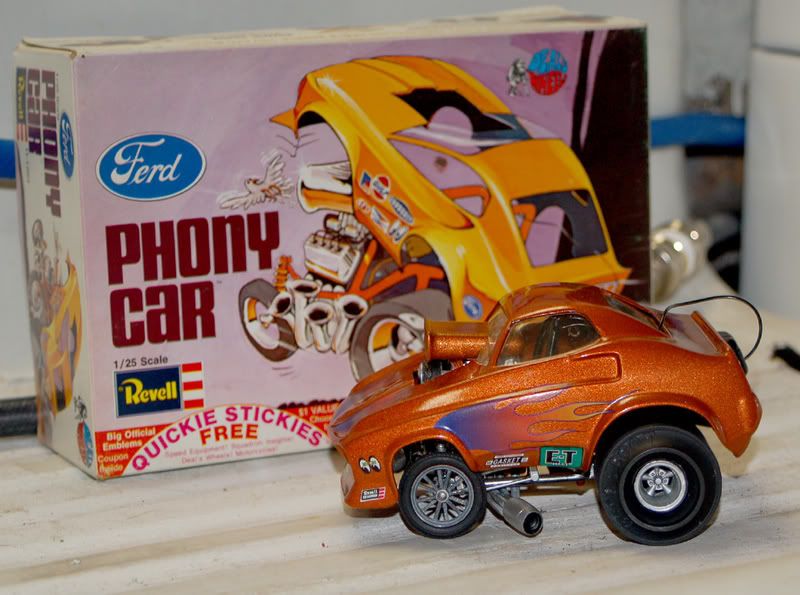
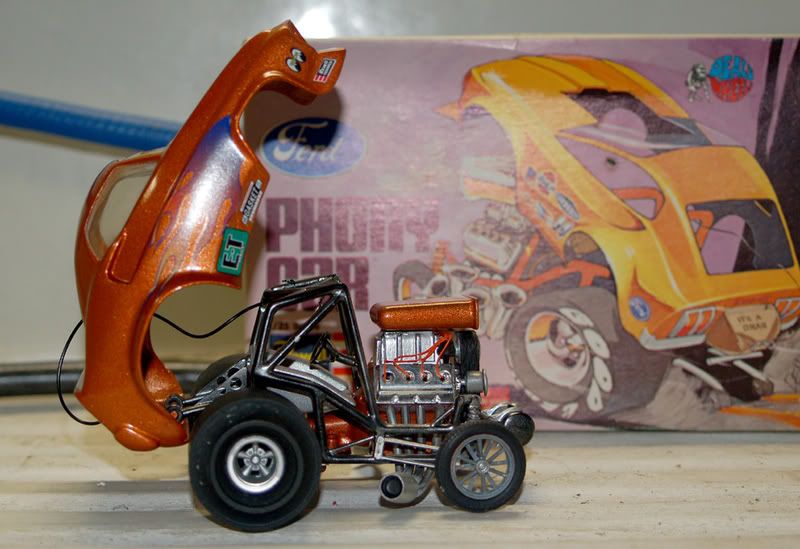
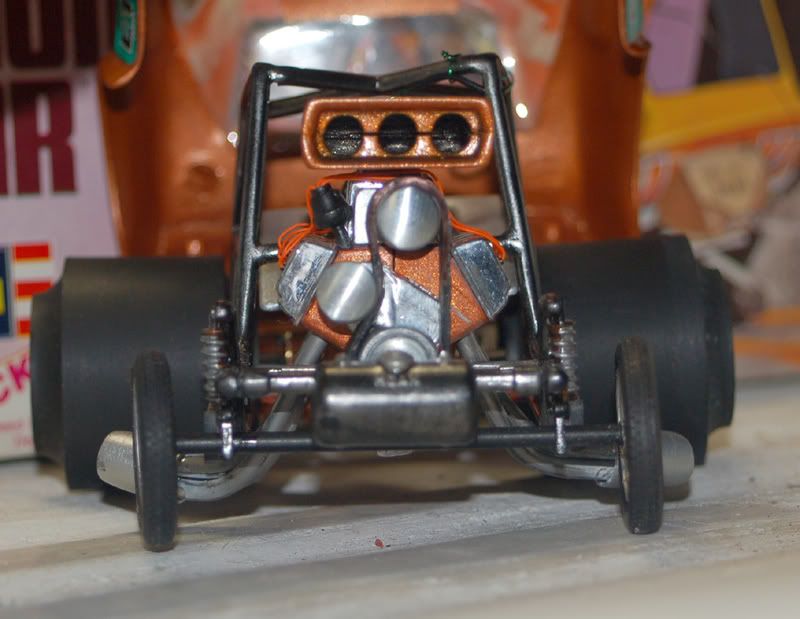
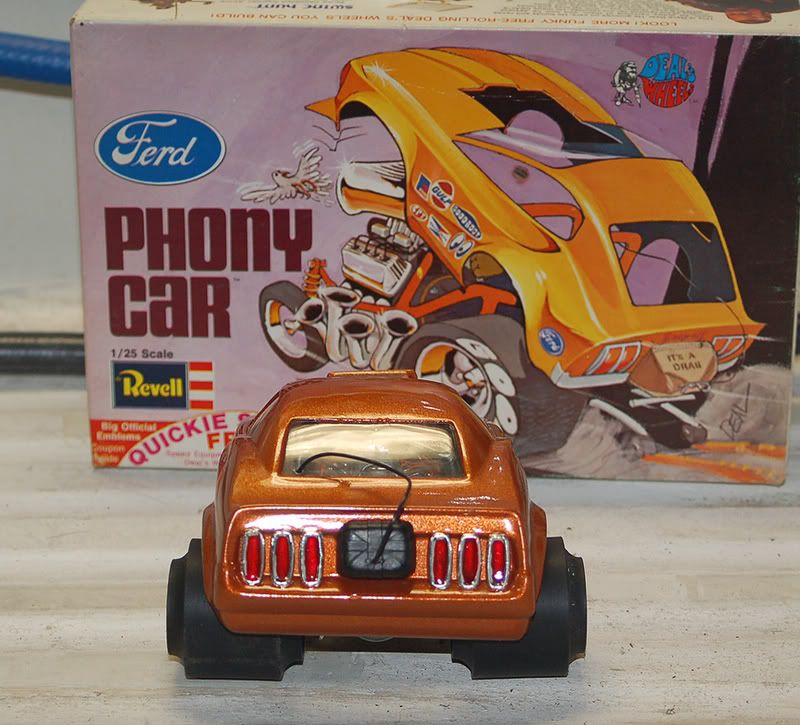
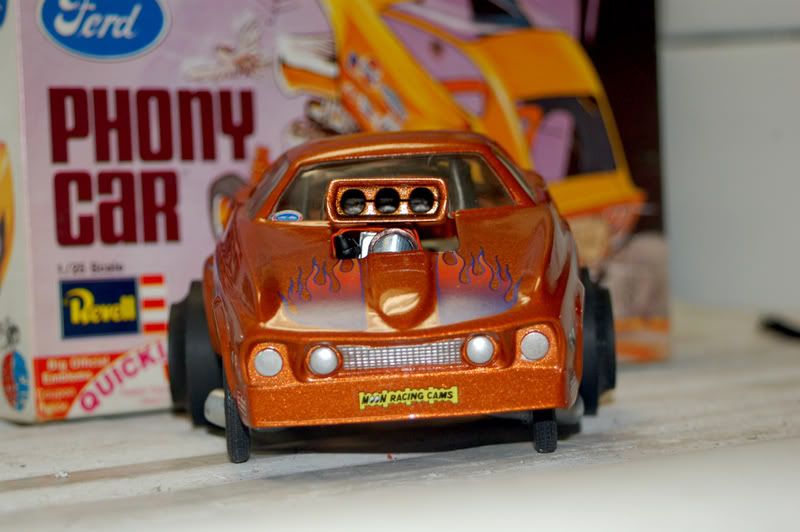
Here's what it looks like now.
The front rims and tires are from the bantam blast altered.
The back rims are from a cop out.
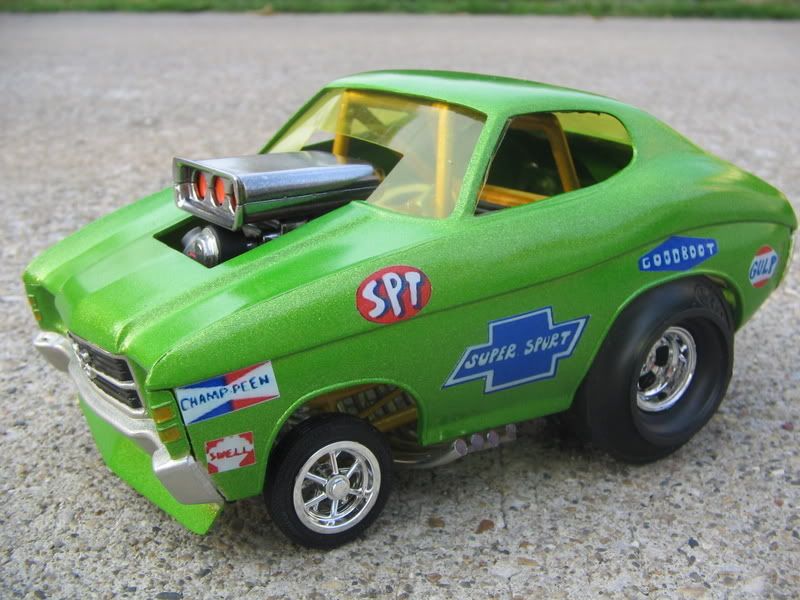
I wasn't going to put decals on it, but a little birdie told me that I should think about adding decals. I made the decals with the testors decal maker.
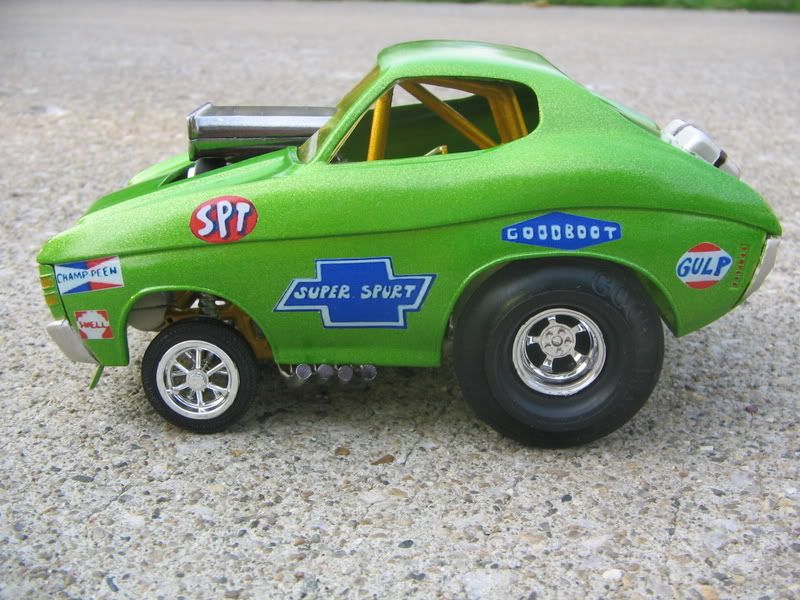
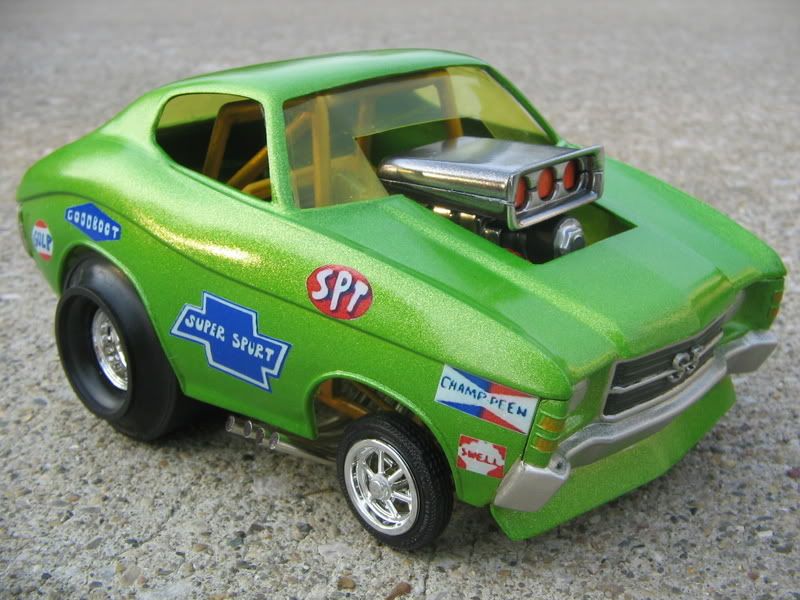
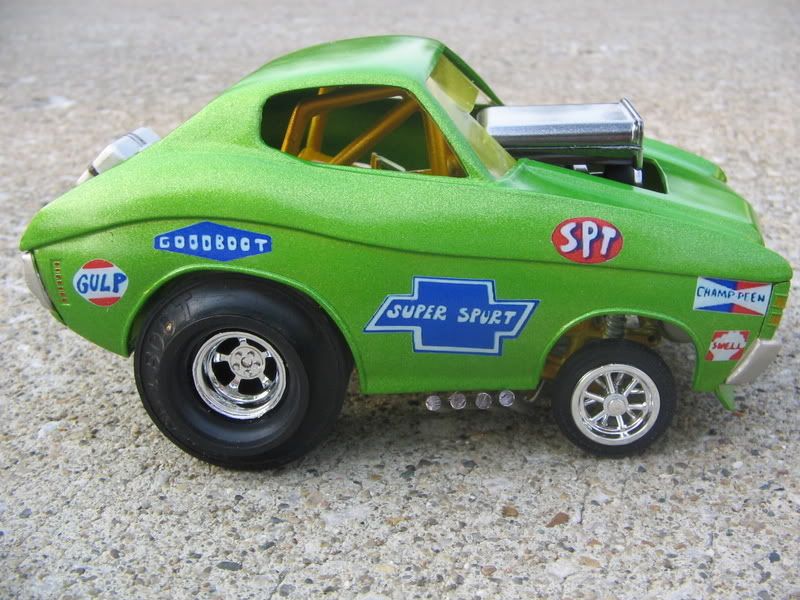
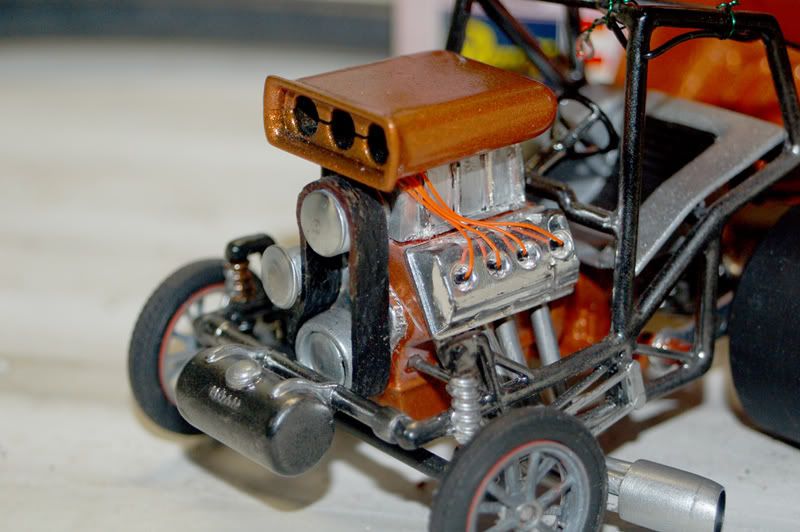
The blower, scoop and valve covers were missing about 80% of their chrome. I sent them to Chuck Darnell, and he sprayed them with alclad for me (thanks Chuck !)
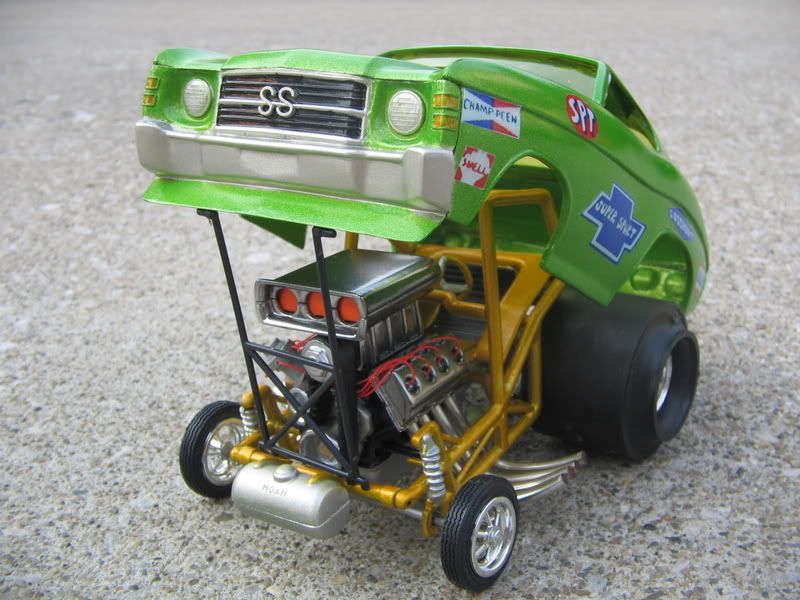
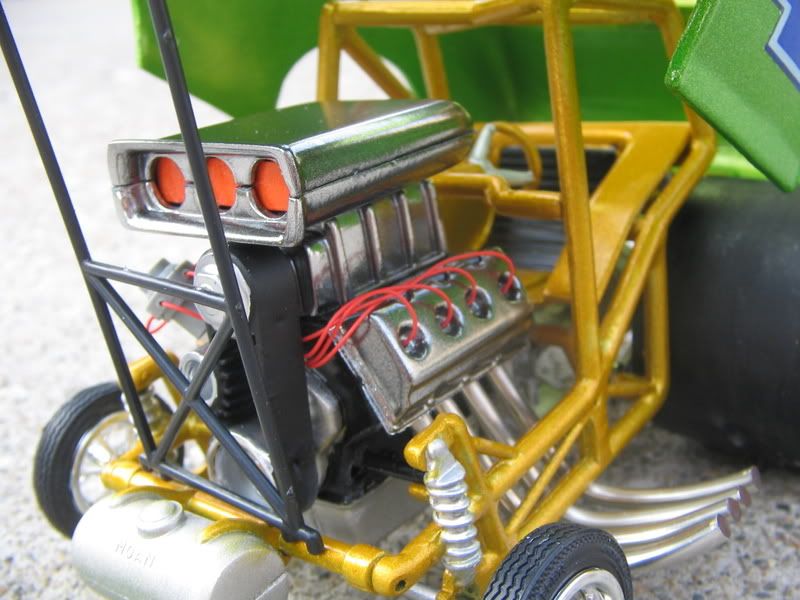
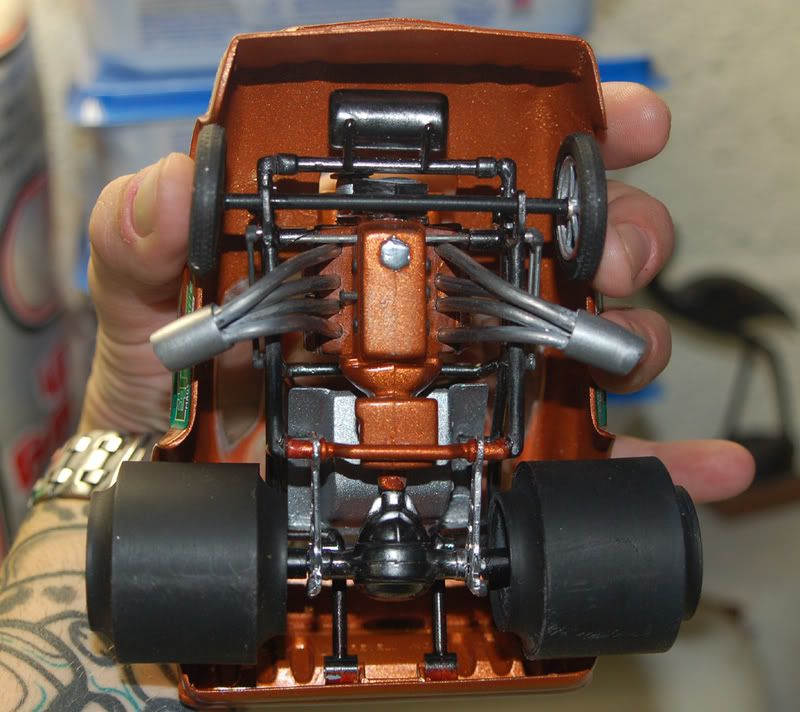
I bent the headers up from peices of silver solder. I had to literally grind, file and sand glue off of the chassis because there was so much glue used on it. The chassis was actually warped and melted because the previous builder used so much glue on it. after i got the chassis smooth and fairly straight, i sprayed it with a base coat of krylon "nickel". I masked off the "moan" tank in the front and then sprayed the testors "inca gold" laquer. I followed that up with testors clear laquer. The rear axle and front shocks are also done with the krylon "nickel" paint. there was no rear suspension to speak of because the ladder bars /wheelie bars were broken, and there were no rear shocks. I found a set of coil over shocks in my parts box that took the place of the originals. The coil over shocks are attached to the ladder bars, and the ladder bar /shock combo is what's holding the rear axle in place. There was no front axle, so I made one from a peice of coat hanger rod.
The engine block was in pretty bad shape as well, and I had to grind, file and sand excess glue off of it. I sprayed the engine gloss black, transmission, oil pan and the timing cover got the krylon "nickel" paint sprayed on them. There was no engine mount, so I made one from a peice of plastic rod. the chassis was so out of whack, that I had to make the hole in the block for the engine mount rod bigger....so the engine would sit straight. (the rod runs through the engine block). I also had to notch the top of the trans. where it mounts to a crossmember on the chassis.
I made the magneto from some peices that I found in my parts box (no idea what they were originally for). I used red wire wrap for the plug wires. I was going to add fuel lines, but as crowded as it is around the engine, I thought they might clutter it up too much...so I left them off.
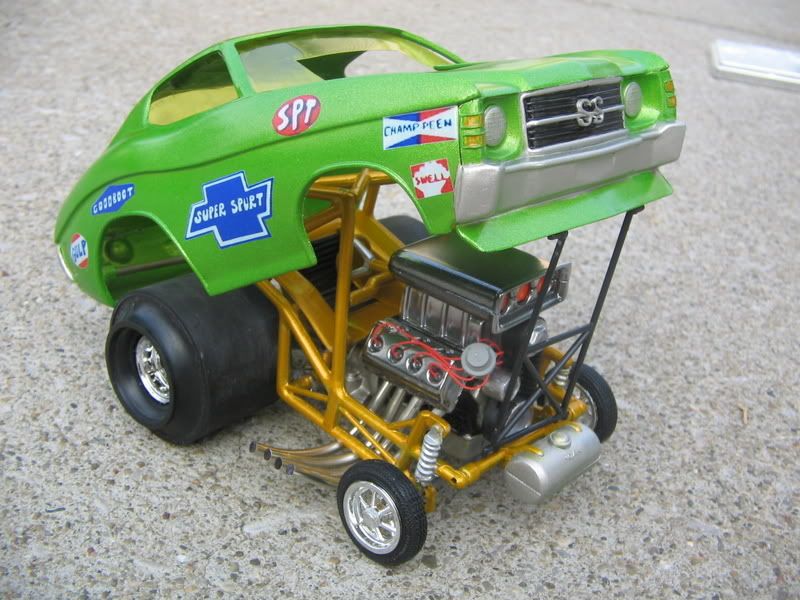
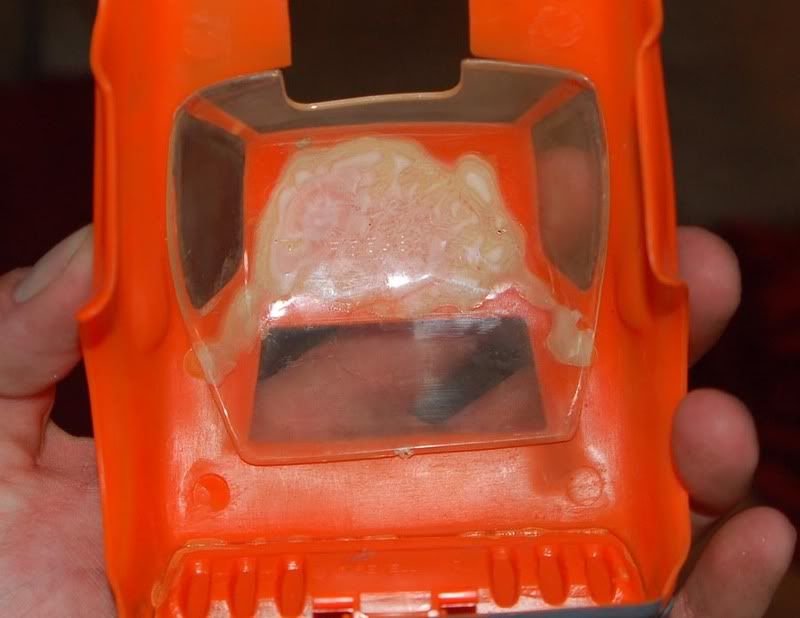
The roof was melted and cracked in the center. I think the original builder used an entire tube of testors orange glue to hold the windows in. I had to cut the windows out of the body by carefull cutting through the clear plastic without getting into the roof on the inside. (i used a hot exacto knife to do this)I made some new windows out of some thin yellow pvc sheet that I got from hobby lobby. I experimented with all kinds of things to make new windows but nothing was working. I wanted the windows to be tinted with color, so I experimented with plastic and colored cellophane...which didn't work so well either. The pvc sheet was my last choice and it worked pretty good. There is actually some of the original window still glued to the inside of the roof.
The original hinge for the body was broken, so I made a whole new hinge out of some hollow plastic tubing, a peice of coat hanger, and a straw from a capri sun juice box.
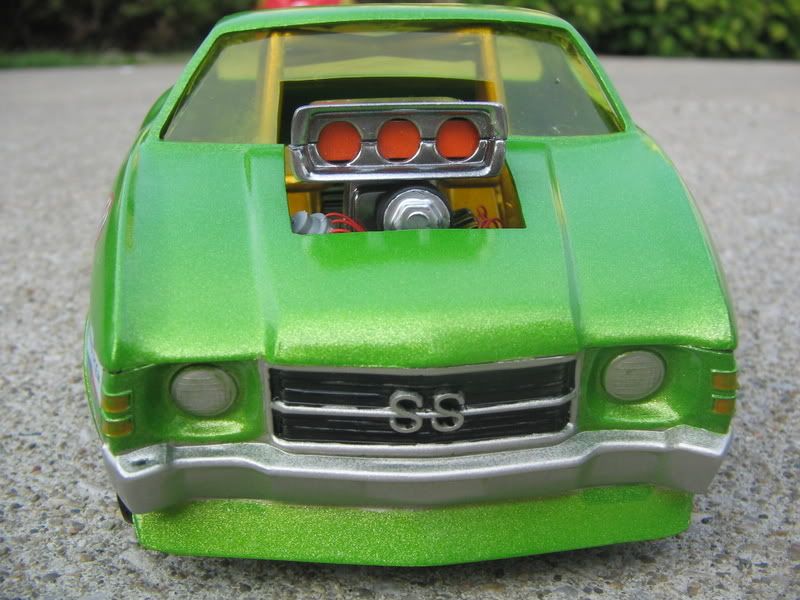
I made an insert to cover the 3 open holes in the scoop so it looks like the scoop has typical red butterflies. The insert is just a peice of paper, with clear red cellophane glued to it.
For the body, I sprayed it with a base coat of the krylon "nickel" paint inside and out. Then, I masked off the bumpers, grill and headlights. I sprayed it with testors "lime ice" laquer inside and out, and removed the tape on the bumpers , grill & headlights. The "lime ice" laquer is very close to the original metallic green plastic that this car was molded in. I painted the grill flat black, front turn signals amber, rear tail lights and rear side marker lights red, then sprayed the whole thing with testors clear laquer.

I tucked the rear tires in by shortening the pegs on the wheel backs, and by turning the inside sidewalls of the tires backwards (so the big lip on the sidewall is on the inside of the tires rather than on the outside.). The big lip on the inside of the sidewalls would have hit the frame, preventing me from tucking the tires in the way I wanted them. The rear valance pan (under the rear bumper) was melted right in the center on the outside where the original hinge was glued to it on the inside. I had to fill this area with bondo and sand it to get it smooth.
This was a total blast to build even tho i have alot of work in it.
so jay...my tank is full and i'm ready to run it...let's see the mustang.

Here's what it looks like now.
The front rims and tires are from the bantam blast altered.
The back rims are from a cop out.

I wasn't going to put decals on it, but a little birdie told me that I should think about adding decals. I made the decals with the testors decal maker.


The blower, scoop and valve covers were missing about 80% of their chrome. I sent them to Chuck Darnell, and he sprayed them with alclad for me (thanks Chuck !)


I bent the headers up from peices of silver solder. I had to literally grind, file and sand glue off of the chassis because there was so much glue used on it. The chassis was actually warped and melted because the previous builder used so much glue on it. after i got the chassis smooth and fairly straight, i sprayed it with a base coat of krylon "nickel". I masked off the "moan" tank in the front and then sprayed the testors "inca gold" laquer. I followed that up with testors clear laquer. The rear axle and front shocks are also done with the krylon "nickel" paint. there was no rear suspension to speak of because the ladder bars /wheelie bars were broken, and there were no rear shocks. I found a set of coil over shocks in my parts box that took the place of the originals. The coil over shocks are attached to the ladder bars, and the ladder bar /shock combo is what's holding the rear axle in place. There was no front axle, so I made one from a peice of coat hanger rod.
The engine block was in pretty bad shape as well, and I had to grind, file and sand excess glue off of it. I sprayed the engine gloss black, transmission, oil pan and the timing cover got the krylon "nickel" paint sprayed on them. There was no engine mount, so I made one from a peice of plastic rod. the chassis was so out of whack, that I had to make the hole in the block for the engine mount rod bigger....so the engine would sit straight. (the rod runs through the engine block). I also had to notch the top of the trans. where it mounts to a crossmember on the chassis.
I made the magneto from some peices that I found in my parts box (no idea what they were originally for). I used red wire wrap for the plug wires. I was going to add fuel lines, but as crowded as it is around the engine, I thought they might clutter it up too much...so I left them off.

The roof was melted and cracked in the center. I think the original builder used an entire tube of testors orange glue to hold the windows in. I had to cut the windows out of the body by carefull cutting through the clear plastic without getting into the roof on the inside. (i used a hot exacto knife to do this)I made some new windows out of some thin yellow pvc sheet that I got from hobby lobby. I experimented with all kinds of things to make new windows but nothing was working. I wanted the windows to be tinted with color, so I experimented with plastic and colored cellophane...which didn't work so well either. The pvc sheet was my last choice and it worked pretty good. There is actually some of the original window still glued to the inside of the roof.
The original hinge for the body was broken, so I made a whole new hinge out of some hollow plastic tubing, a peice of coat hanger, and a straw from a capri sun juice box.

I made an insert to cover the 3 open holes in the scoop so it looks like the scoop has typical red butterflies. The insert is just a peice of paper, with clear red cellophane glued to it.
For the body, I sprayed it with a base coat of the krylon "nickel" paint inside and out. Then, I masked off the bumpers, grill and headlights. I sprayed it with testors "lime ice" laquer inside and out, and removed the tape on the bumpers , grill & headlights. The "lime ice" laquer is very close to the original metallic green plastic that this car was molded in. I painted the grill flat black, front turn signals amber, rear tail lights and rear side marker lights red, then sprayed the whole thing with testors clear laquer.

I tucked the rear tires in by shortening the pegs on the wheel backs, and by turning the inside sidewalls of the tires backwards (so the big lip on the sidewall is on the inside of the tires rather than on the outside.). The big lip on the inside of the sidewalls would have hit the frame, preventing me from tucking the tires in the way I wanted them. The rear valance pan (under the rear bumper) was melted right in the center on the outside where the original hinge was glued to it on the inside. I had to fill this area with bondo and sand it to get it smooth.
This was a total blast to build even tho i have alot of work in it.
so jay...my tank is full and i'm ready to run it...let's see the mustang.

