|
|
Post by hobbybobby on May 23, 2009 19:08:57 GMT -6
Forgive me, I'm incorrigible...  Sometimes it's like a compulsion, a drug...  I had to do it again...  Actually, in the beginning, this project should be, a remodeling of the Sand Shark, to the Dog Catcher... As a show, how it could be rebuilt... And that goes as follows: This is the upper part of the Sand Shark body. 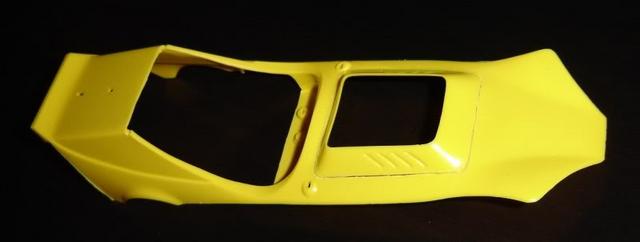 I carefully cut along the groove, with a sharp knife, the "hood". This procedure is very laborious and requires caution. 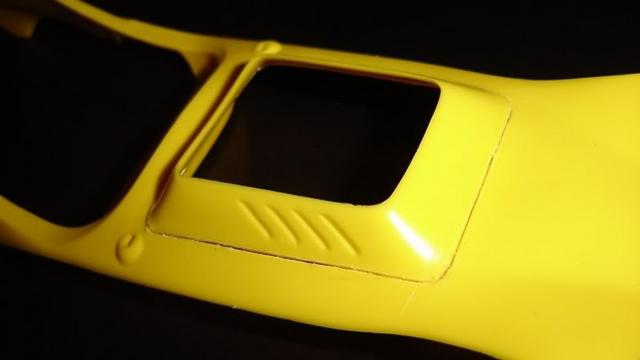 But it goes... 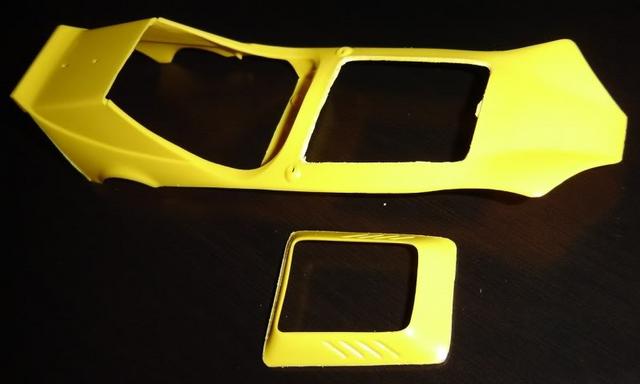 To ensure that the hood fits between the upper and the lower part of the body, I need to halve it in the height. 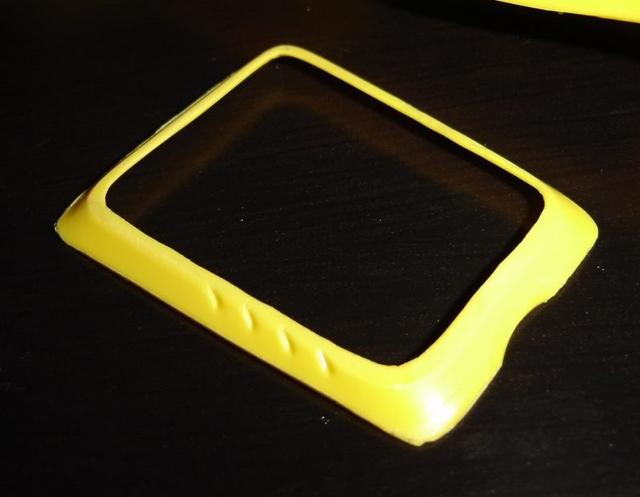 A trial in the inner, from the bottom of the upper body part... 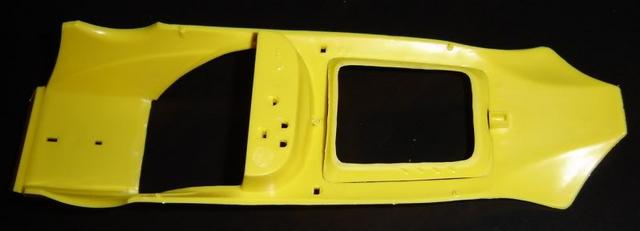 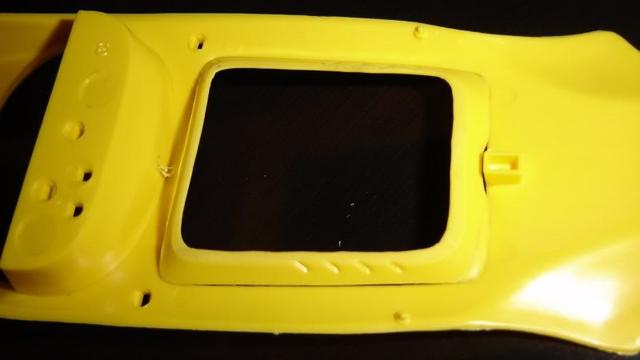 Seen from above, all three parts fit together. 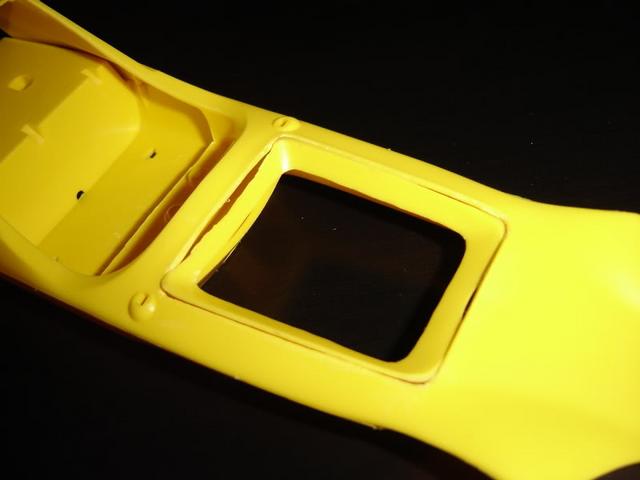 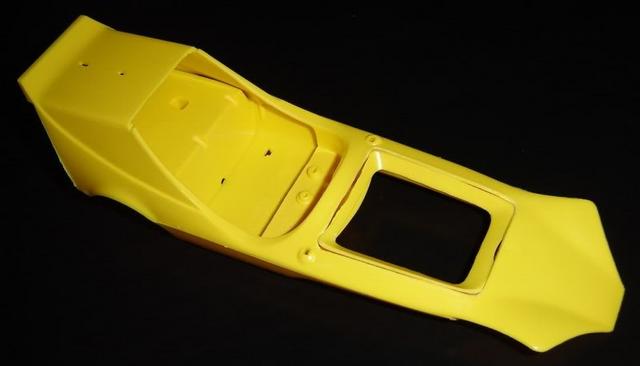 I glue now, all body parts together. 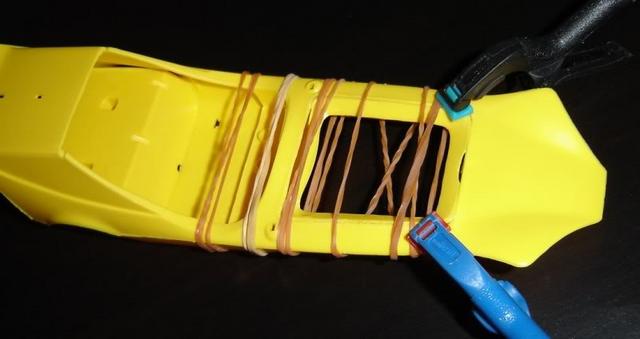 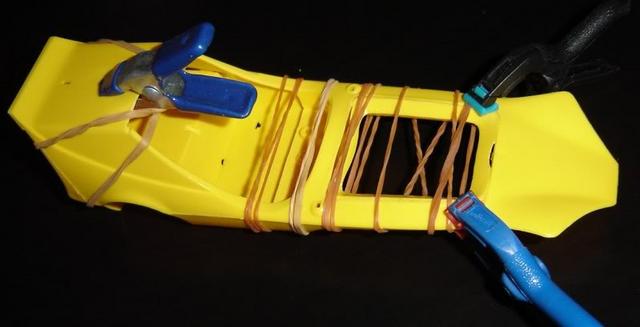 Here ends my Sandsharktodogcatcherremodeling... A brainwave completely changed my plans.  This roof, somehow, this is too short... This roof, somehow, this is too short...
Hmm...
A C- roof, as an extension?
Hmm...
How about the roof of the Piewagon?
How would this look like?
Hmm...Quick, now look after a few measurements, it would just fit!  Thought and done immediately! The piewagon roof, or what is left of them, after the carving. 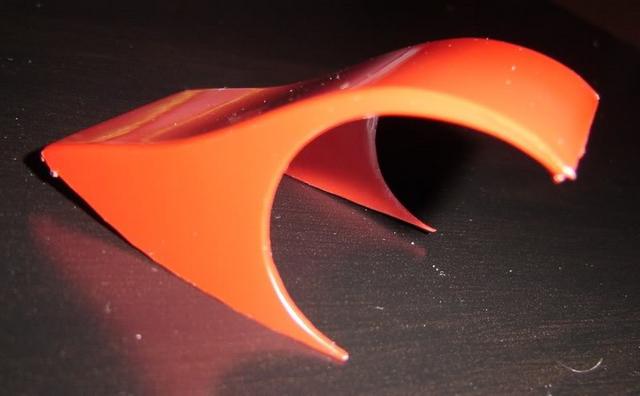 Well, is still a bit too tight. Therefore, I do this slot. 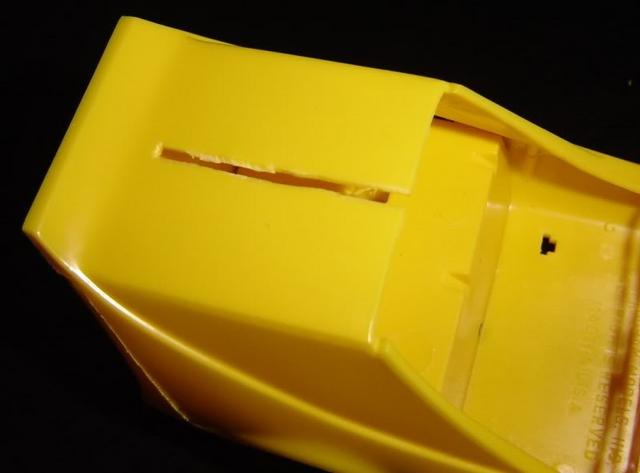 And now look, forced, it fits.  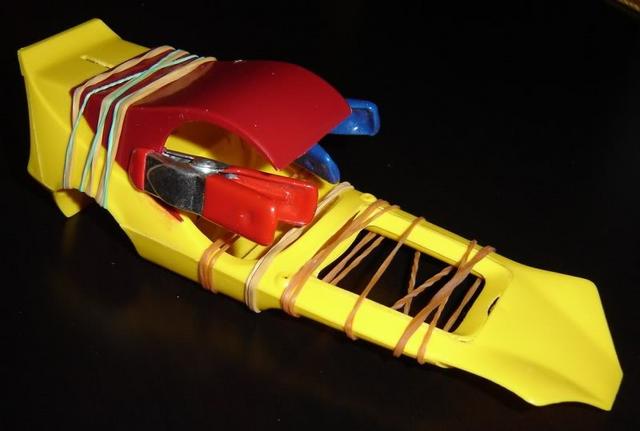 It actually fits, I'm very satisfied. ;D 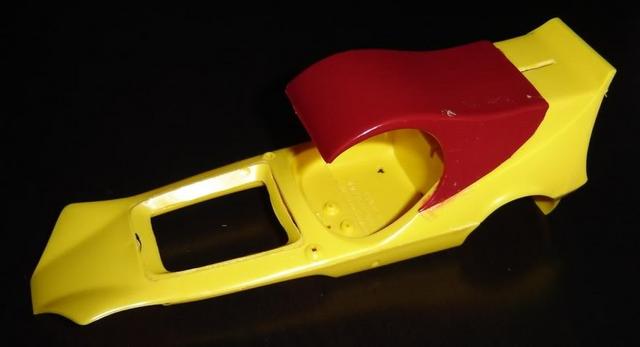 All the bumps are now covered with putty. 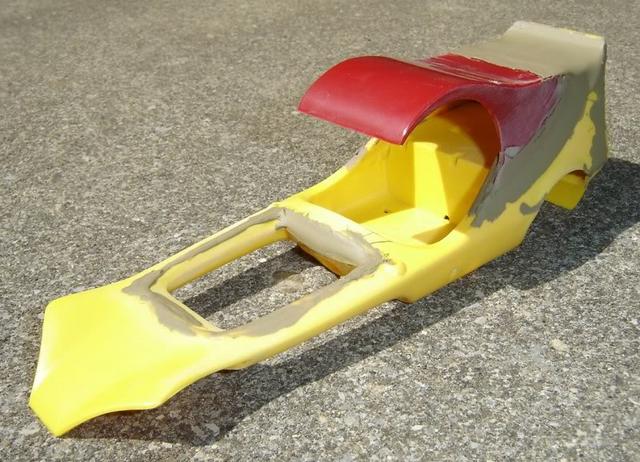 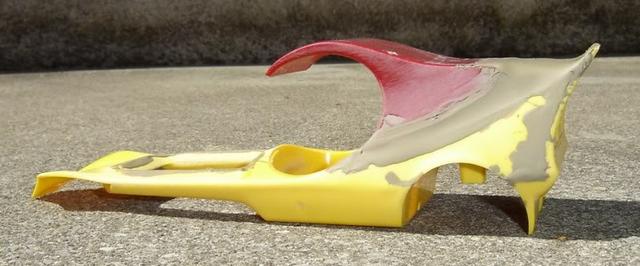 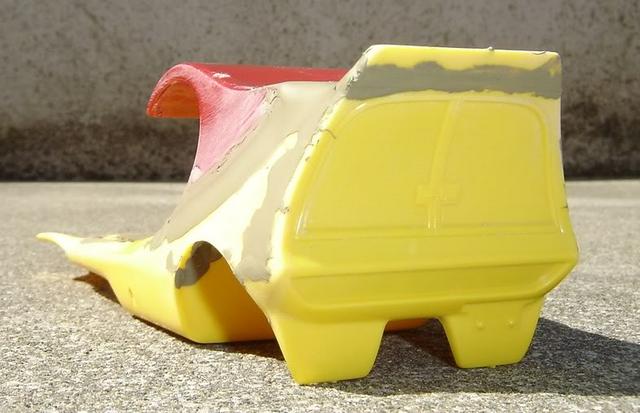 Sorry for the Sandsharktodogcatcherremodelinghowtothread, but I am glad to have made this build-turn. Especially, all in one morning...  ;D Hope you like it. |
|
|
|
Post by smartresins on May 23, 2009 19:33:01 GMT -6
I really like the concept of this one! Will you be opening the back? jody
|
|
|
|
Post by moparmarc on May 23, 2009 22:00:53 GMT -6
Looking good so far, keep the updates coming!!
|
|
|
|
Post by badroadahead on May 24, 2009 5:23:23 GMT -6
Bobby,
It looks good so far.
It's hard to make the Sand Shark into an eyepleaseing model...I think you are onto something.
I have started other projects in this similar way and they have a mind of their own. You start out making one thing and eventually something else evolves.
|
|
|
|
Post by ira on May 24, 2009 8:58:39 GMT -6
Don't know about the front, but the rear with the Pie Wagon top Looks Great!
You have inspired me to cut up a couple Tom Daniel kits for a new project. Got to check and see what kits to start with.
Love the smell of cutting plastic in the morning!
|
|
|
|
Post by hobbybobby on May 24, 2009 10:30:10 GMT -6
Thank you! ;D  Jody: No, the rear section remains closed. Ira: That sounds very good! ;D  When can we see something?  More progress: The first, rough layer is done. 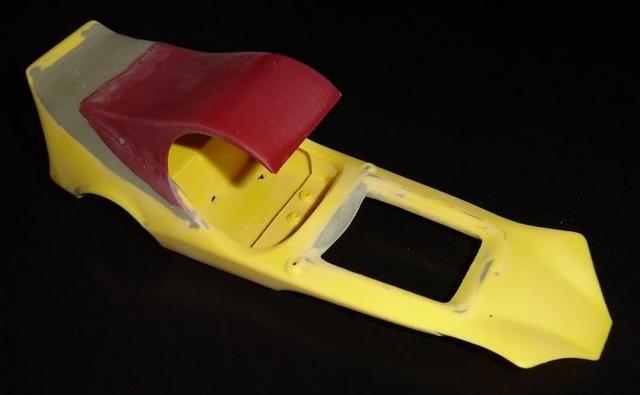 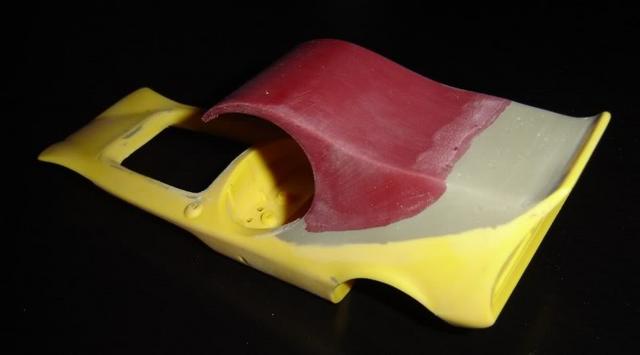 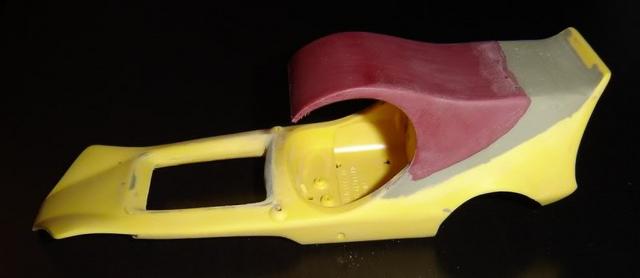 Now comes the finer work, again putty, sand again, etc., etc .... In the meantime, I dedicate myself to the motorization. Original motor from the kit, with a little detail work. 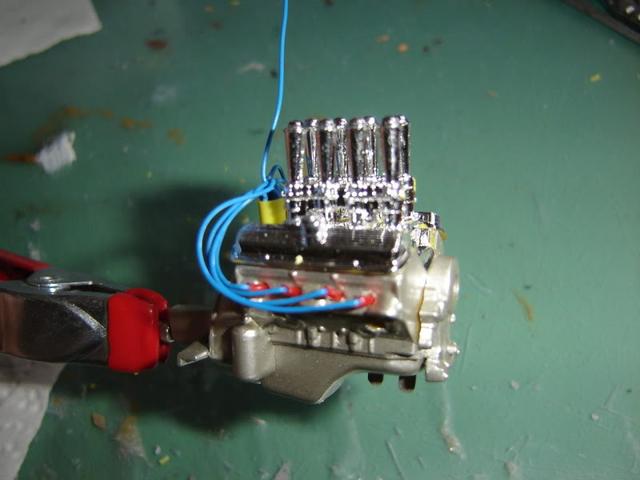 I think I'll leave the original front end, I like the parts.  |
|
|
|
Post by moparmarc on May 24, 2009 12:32:48 GMT -6
Looking good Bobby. I showed your project to my 11 yr old son and he was like..........."WOOOOOW  that is so cool!!" |
|
|
|
Post by snakeplissken81 on May 24, 2009 14:03:19 GMT -6
Looking real good.
|
|
|
|
Post by smartresins on May 24, 2009 17:12:55 GMT -6
Very cool. I look forward to seeing it all come together!! Jody
|
|
|
|
Post by Brandon on May 25, 2009 8:47:31 GMT -6
Very well proportioned! Looking great!
|
|
|
|
Post by TheMadModeler on May 25, 2009 13:23:11 GMT -6
Bobby you have a way with plastic.. That roof sets the whole thing off in the right direction. Very good so far.
BiLL..
|
|
|
|
Post by hobbybobby on May 25, 2009 15:46:38 GMT -6
Thank you for the kind words!  More progress: I am always, very bad upset about the non-existing openings at the exhaustends... I know, it would be a very costly or complicated casting, but these exhaust systems looks soooo unfinished.  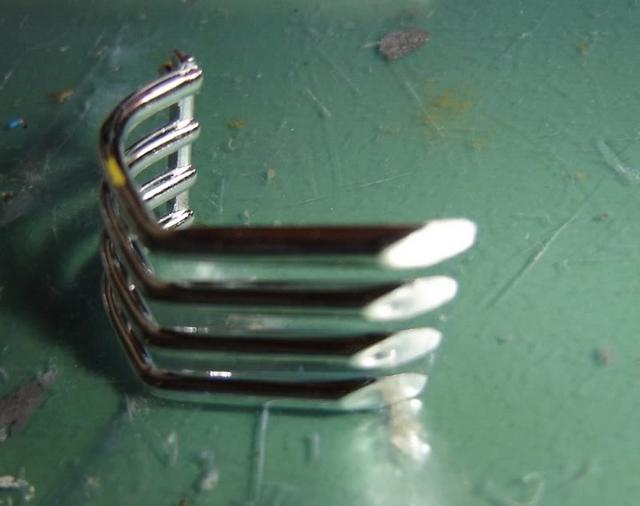 Take time and patience to get out of this, to make something better! Instead, the openings only to reply with dull black paint, I do real openings.  It is time consuming, but it is worth much! First I Drill small holes in the ends. 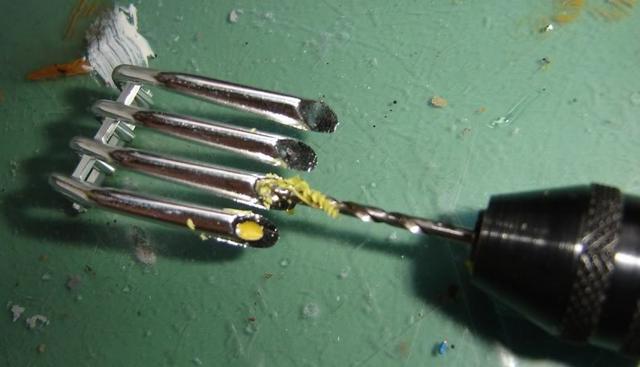 Then, I carve very carefully the openings. 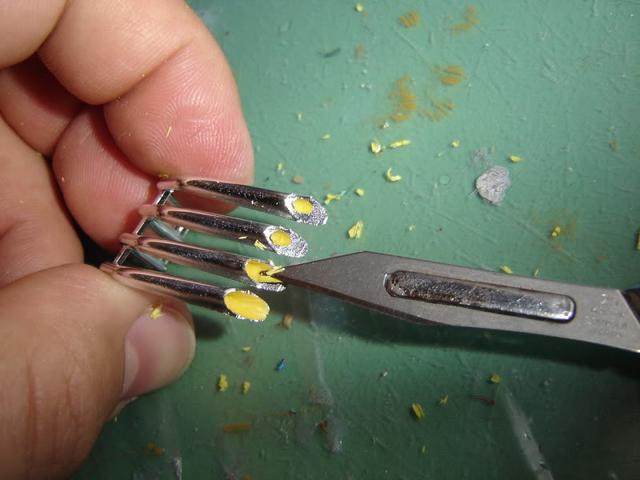 Until they look like that: 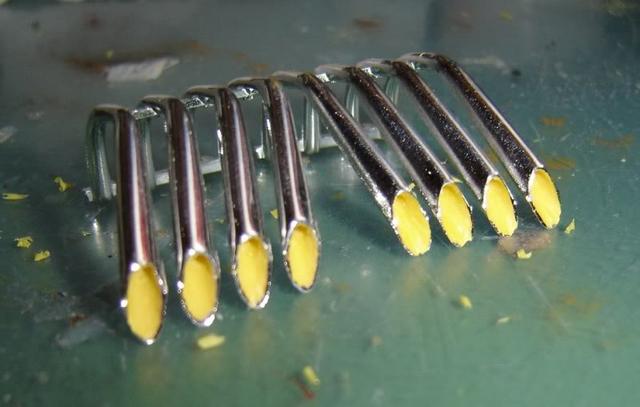 Another picture with better lighting so you can see what I mean: 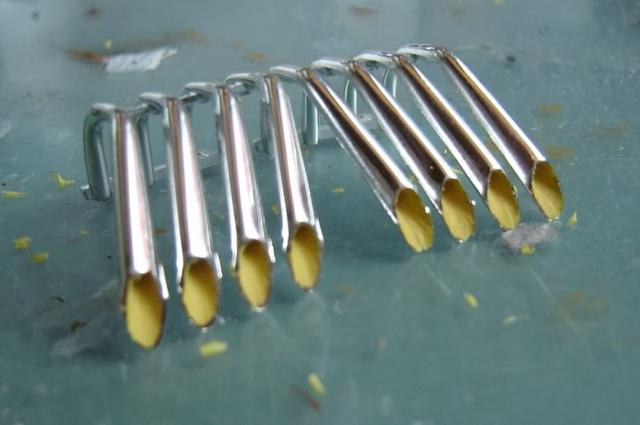 This is very recommended for imitation, it looks much better, right? Try it out and have fun.  |
|
|
|
Post by newoldskool on May 25, 2009 18:20:28 GMT -6
another sick build hobbybobby!
are you gonna put big rollers on it?
|
|
|
|
Post by moparmarc on May 25, 2009 19:10:52 GMT -6
Nice work on the exhaust. I do drill mine out from time to time but I've never gone as far with it as you did but they do look much better that way.
|
|
|
|
Post by rustybill1960 on May 26, 2009 10:49:20 GMT -6
    once again, another, "AWESOMELY AMAZING EXAMPLE !" of the true"klown koncepts of kreative plastic bashing!" I LOVE THIS PLACE!!!!!! YOU GUYS ARE GREAT FOR SIMULATING THE CREATIVE JUICES! keep it going bobby that is great work! ;D
|
|
|
|
Post by Dr. Kerry on May 26, 2009 12:30:22 GMT -6
Headers actually look good with the yellow tips/inerds!!!! Just my two cents....
|
|
|
|
Post by hobbybobby on May 27, 2009 2:29:43 GMT -6
Thanks!  Somehow, everything is flowing in this build. Everything fits, I see exactly the direction in which it will go. It makes fun and I can continue to work. The body is filled and sanded. 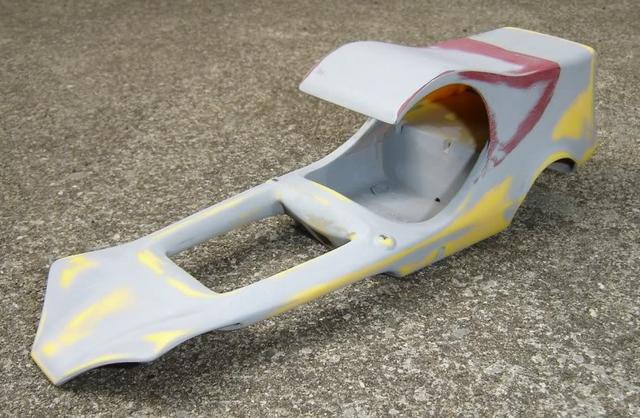 I have removed the roof spoiler and rear protection laps. In this picture are clearly visible, the small changes on the back which, in my opinion, represent a lot. 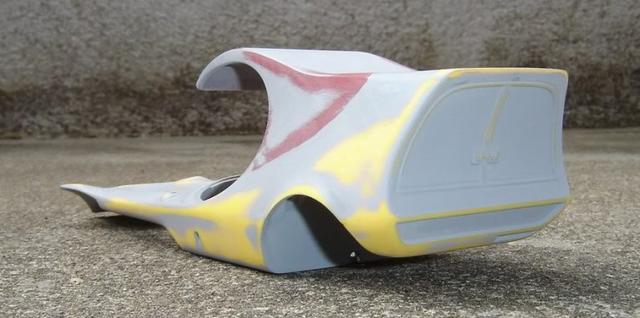 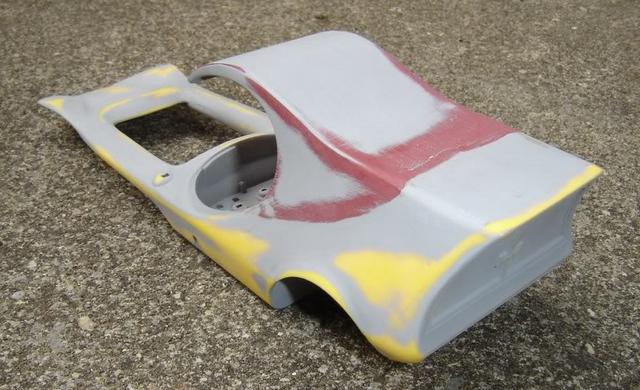 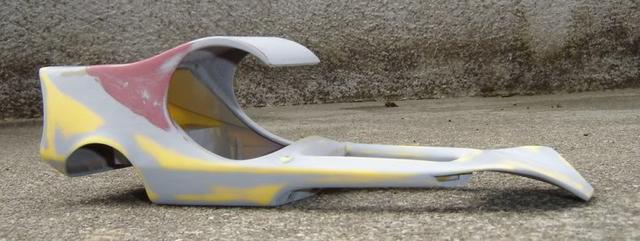 Hope, you like it so far. |
|
|
|
Post by badroadahead on May 27, 2009 5:41:28 GMT -6
Bobby,
This is looking great!
I like the rear improvements.
What if you rounded the front of the roof in the same shape as the dashboard?
Bicycle spokes on the front?
|
|
|
|
Post by dbash2006 on May 28, 2009 9:26:59 GMT -6
great detail Bobby!! as usual another Killer build!! ... Dean
|
|
|
|
Post by hobbybobby on May 29, 2009 18:11:23 GMT -6
Thanks!  More progress: Bicycle spokes on the front?Yes, i will use the front wheels from the sand Shark kit, but it goes in the rubric, refine it. I have already shown in my Red Devil build... coffincorner.proboards.com/index.cgi?board=wip&action=display&thread=5919&page=2 ... but here it is again. The spokes may be seen from the front, look reasonably good. Above the original, below the revised version. 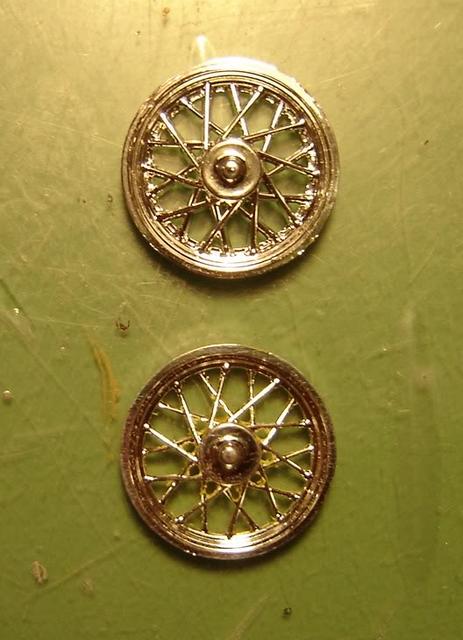 But from the back they look too fat. Above the original, below the revised version. 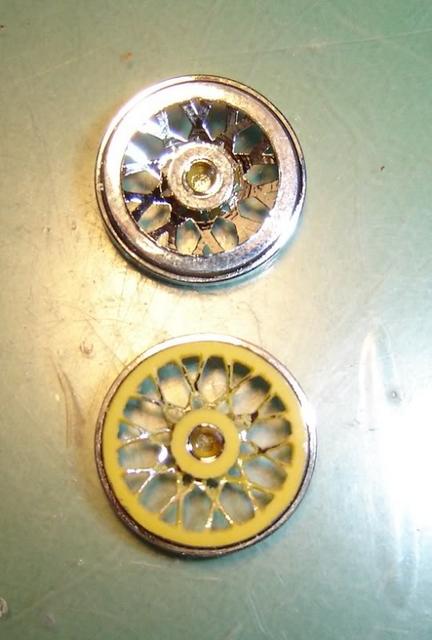 Here again, a bit clearer. Left the original, right the revised version. 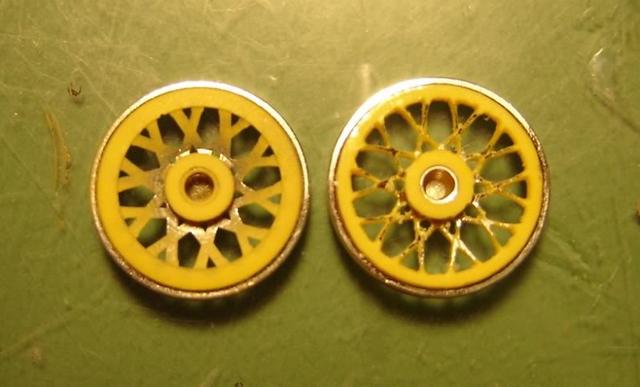 The refined version. 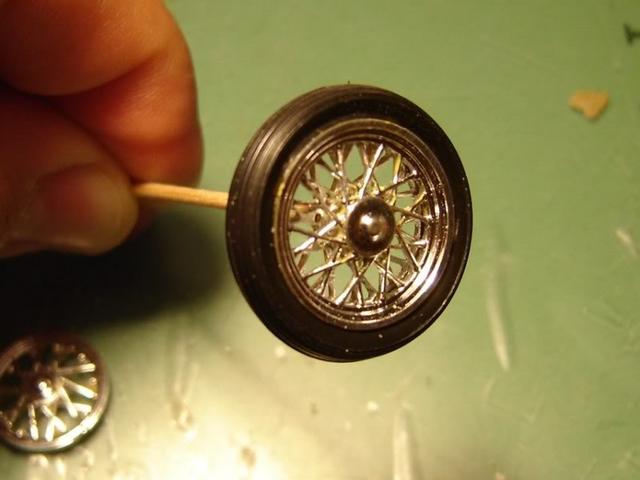 In the interior come to use, the seats of the Pie Wagon. 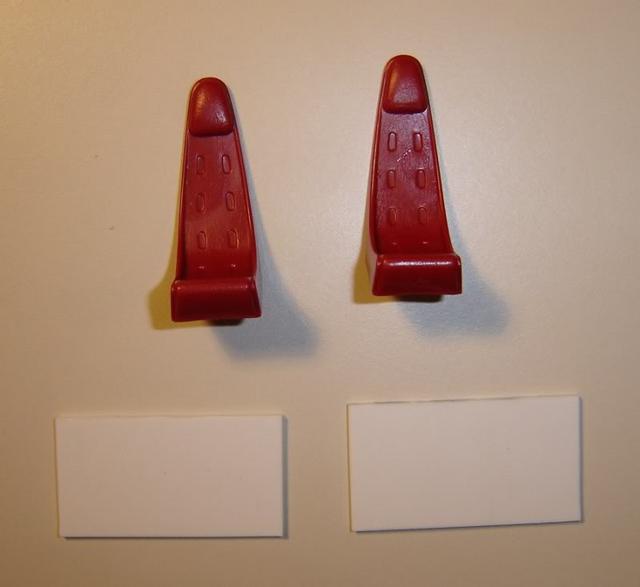 For these two boards, I come back later.  The seat was lowered, but so, that the backrest is a little steeper now. Black, the original - white, the new version. 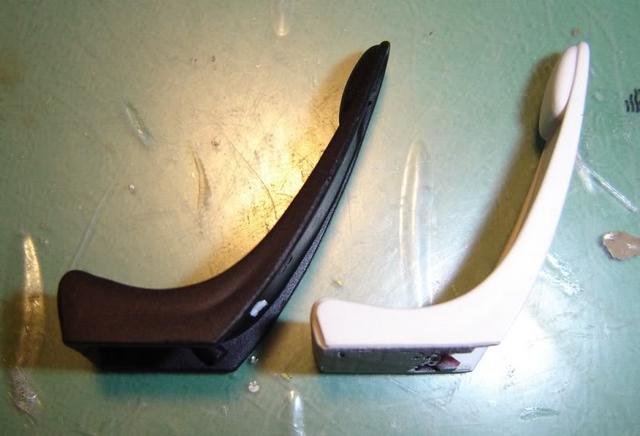 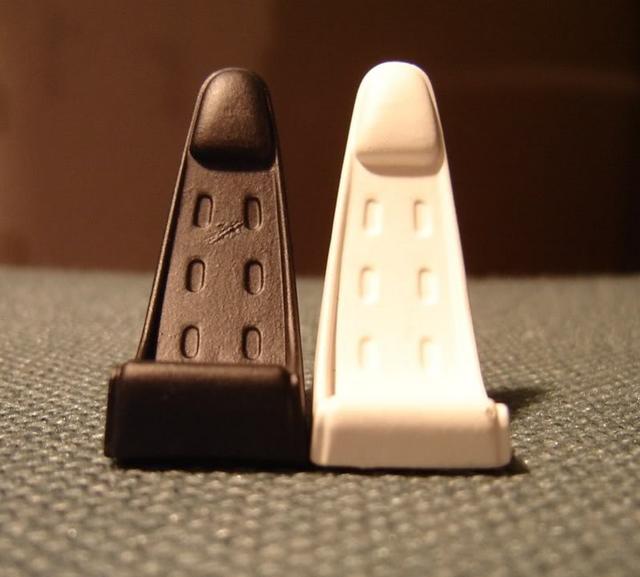 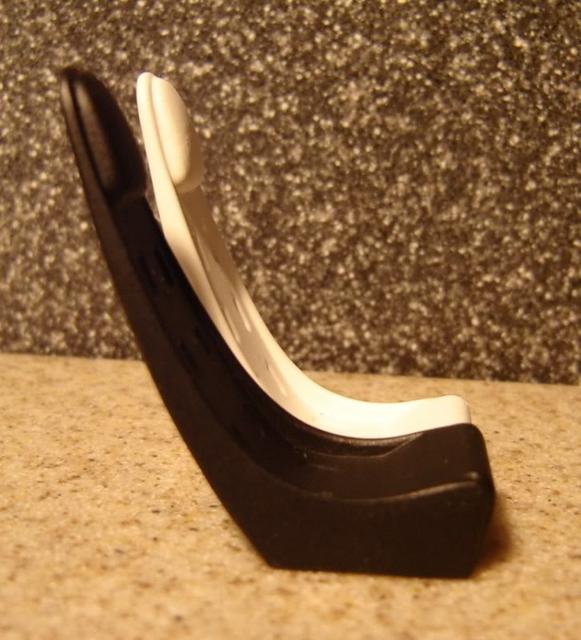 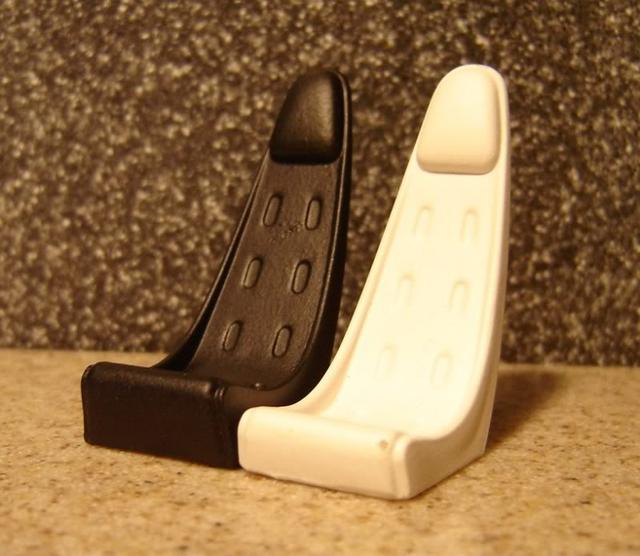 Hope, you enjoy. |
|
|
|
Post by hobbybobby on May 31, 2009 17:59:17 GMT -6
As I said, this build, it flows... ;D The color for the interior has not yet been fixed. I'm open for suggestions. The outer shell is already so far.  Initially, only one picture... 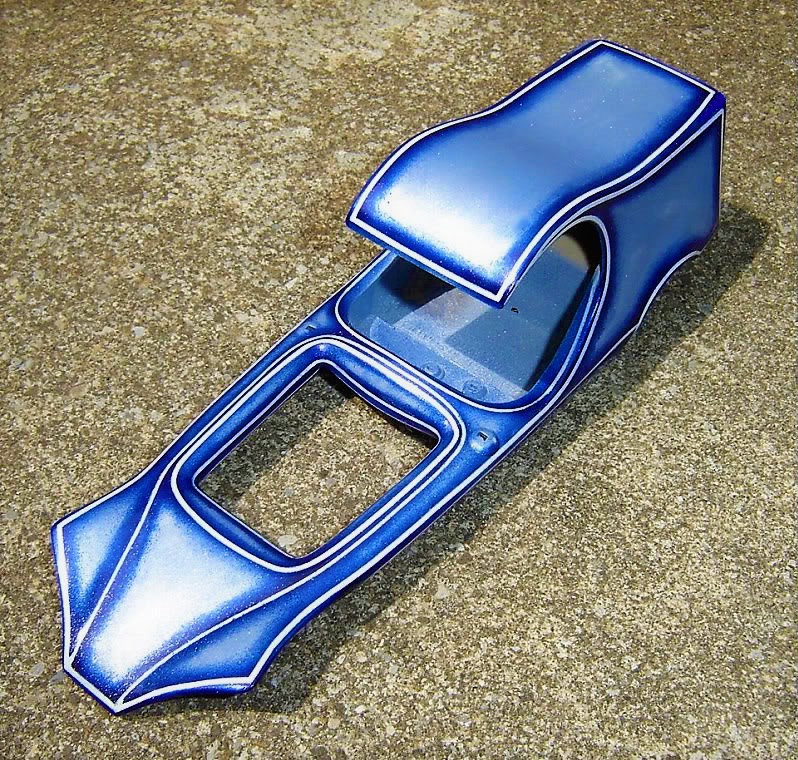 I hope you like it. |
|
Deleted
Deleted Member
Posts: 0
|
Post by Deleted on May 31, 2009 19:29:59 GMT -6
Great color scheme Bobby! Looks awesome.  |
|
|
|
Post by flounder on May 31, 2009 20:29:36 GMT -6
AWSOME paint, Bobby. You may be the first person to make that shark body - nose included - look good.
Keep the pics coming.
Flounder.
|
|
|
|
Post by bozobutt on Jun 1, 2009 1:23:49 GMT -6
Thanks for the tip on the drilled out header tubes...
|
|
|
|
Post by sakke on Jun 1, 2009 2:07:30 GMT -6
Fantastic paintjob!!! If you don`t mind, I would like to try that kind on my Big T ?
|
|
|
|
Post by quietwinds67 on Jun 1, 2009 4:14:51 GMT -6
wow thats wicked true period peice of the 70s  well done paint is perfect for it |
|
|
|
Post by smartresins on Jun 1, 2009 6:42:00 GMT -6
Now I like how this is coming. Great color choice! I love it. Jody
|
|
|
|
Post by dumpydan on Jun 1, 2009 8:11:28 GMT -6
Wow that looks great, I am lovin the way your going never thought of that. Really looken cool!
|
|
|
|
Post by ironheadchopper on Jun 1, 2009 11:16:35 GMT -6
Awesome as always.
|
|
|
|
Post by rustybill1960 on Jun 1, 2009 11:46:46 GMT -6
    Bobby, Bobby!!!! what brand of tape did you use to mask off your stripes!! i have been trying to mask off some stripe on a lowrider build , but, have had no success! help help please! ;D ;D
|
|

