|
|
Post by smartresins on Jun 1, 2009 12:01:36 GMT -6
I can say the best tape I have found for masking, though I can not always afford it is the 1/8" pin striping tape from the parts store. I have not been able to try the parafilm many reccomend! I know that cutting the tape edges on glass first does help as the old edges always seem to pick up dust and lint wich does not help for a clean crisp line! I am eager to hear how Bobby does his as those are nice lines indeed! I love the fade too! again I can not say how much I love this paint job enough!! LOL. Jody
|
|
|
|
Post by A.J. on Jun 1, 2009 15:08:39 GMT -6
That is some of your best paint work yet Bobby! Very nice! I'm really glad to see you getting back to your kit bash/scratch building. It's really your thing for sure. You have a great eye for the way some of these kits can be modified.
|
|
|
|
Post by chiefsspeedshop on Jun 1, 2009 18:52:04 GMT -6
|
|
|
|
Post by hobbybobby on Jun 3, 2009 5:02:48 GMT -6
Thank you for the kind words!      Bobby, Bobby!!!! what brand of tape did you use to mask off your stripes!! i have been trying to mask off some stripe on a lowrider build , but, have had no success! help help please! ;D ;D I've once mentioned in a thread, how or with what I create these lines. This is the link to: coffincorner.proboards.com/index.cgi?board=general&action=display&thread=7947I hope this helps a little. |
|
|
|
Post by rustybill1960 on Jun 8, 2009 22:10:41 GMT -6
    Well Bobby, Thanks very much on the thread, most informative! Guess i will have to start looking for some of that tape. And try my hand at "pin-taping".    Once again Thank You for sharing the info. Awesome builds as always!!!!! Later Gator ;D
|
|
|
|
Post by hobbybobby on Jul 13, 2009 16:52:29 GMT -6
I was very busy in the last time with these projects. Well, some have to wait, because I can not perform the appropriate parts.   Here is a small update to this one. For the rear wheels, I will use these rims: 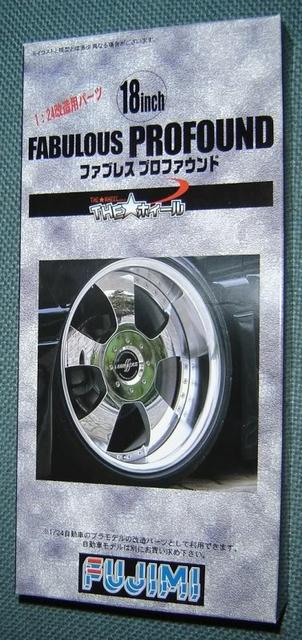 Incidentally, these were not expensive, but I've ordered it and waited six months until they were delivered...  Well, they are deep but not deep enough. ;D My new, deeper, from aluminum. 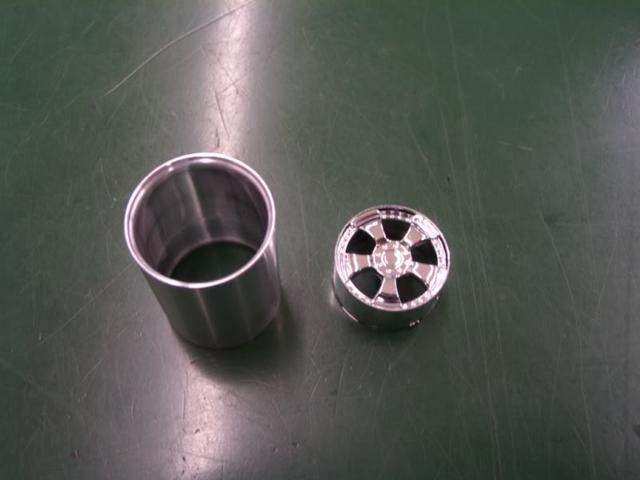 I like to go new ways to get better methods, to find new materials and manufacture so cheaper my tires. Here I have tried to make it from a piece of a hose. The important thing is, the hose should be made of rubber and may have no lichen or wall reinforcement. 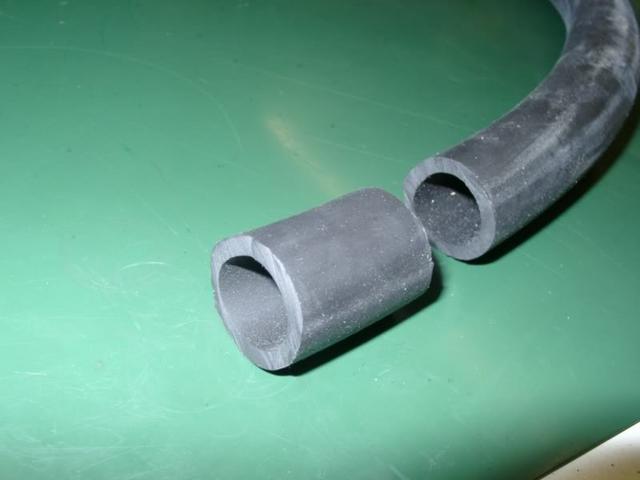 This hose has the name Perbunan®, is not very expensive and is easy to edit. techcenter.lanxess.com/trp/emea/en/products/description/article.jsp?docId=4030The inner tube diameter is chosen so, that it no longer needs to be processed. But he should be about one millimeter smaller than the outside diameter of the rim, for a better hold. 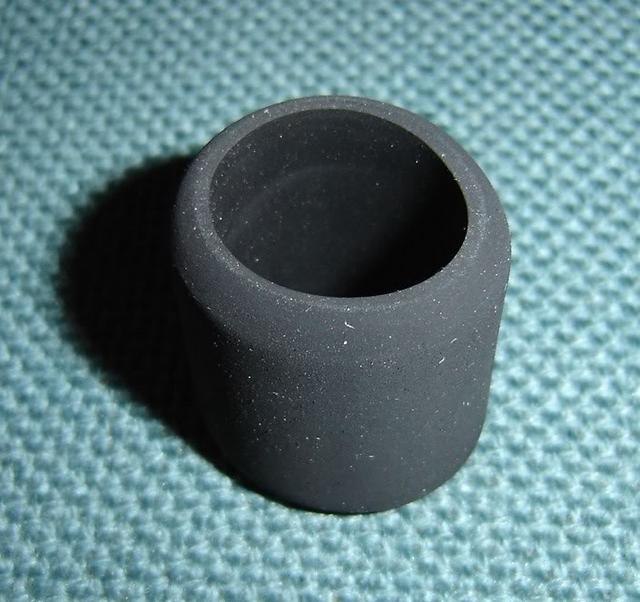 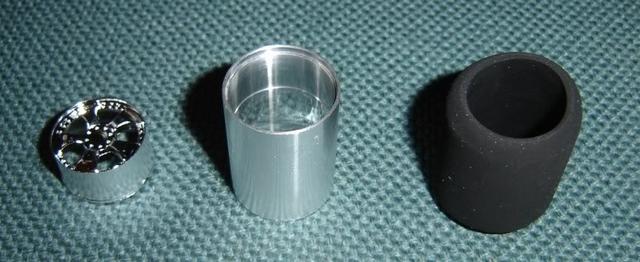 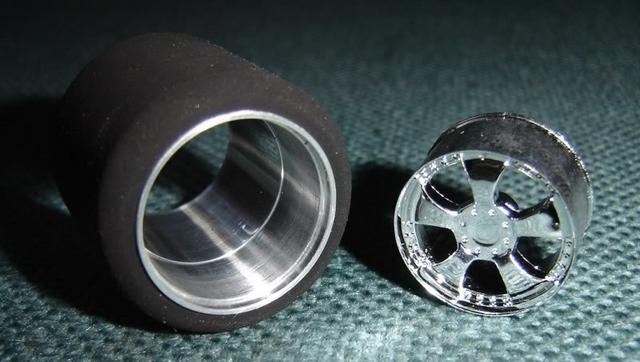 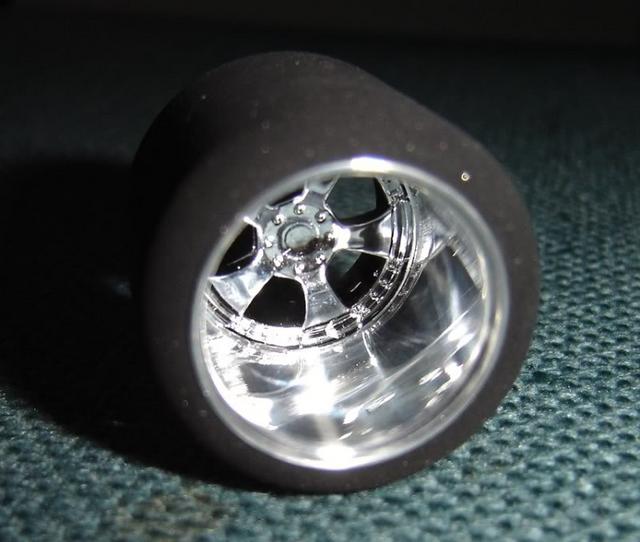 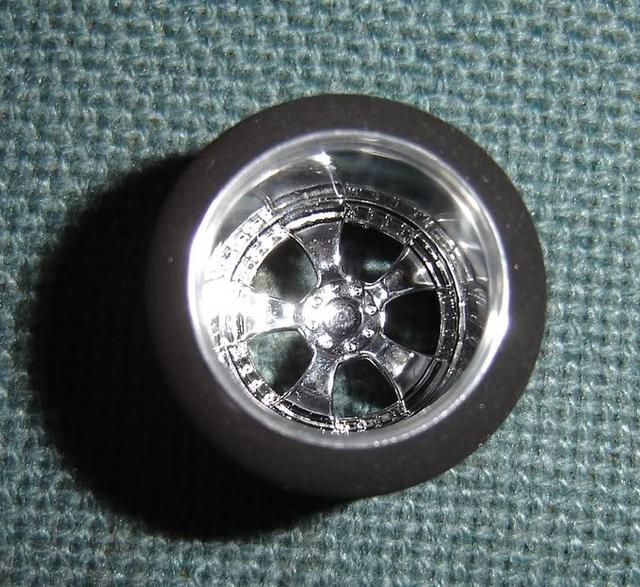 Hope, you like it. |
|
|
|
Post by RatRod on Jul 13, 2009 17:08:03 GMT -6
Great idea with the hose Bobby. I think you had mentioned the other medium you were using for tires was expencive. Now how many tires can be made from 50 feet of garden hose..... ;D
|
|
|
|
Post by ira on Jul 16, 2009 16:05:14 GMT -6
[glow=red,2,300]Great Wheels & Tires Bobby!!![/glow]
|
|
|
|
Post by dumpydan on Jul 16, 2009 20:04:31 GMT -6
Nice! great idea about the tires, I am going to look for something that might work like that........very cooooooool
|
|
|
|
Post by rustybill1960 on Jul 18, 2009 9:15:43 GMT -6
 that is just absolutely awesome with the tire making info bobby!!!! thanks again for sharing the wealth !!!! you are a master !!!! thank you !!!! 
|
|
|
|
Post by hobbybobby on Aug 31, 2009 16:32:05 GMT -6
Thank you for the kind words! Here is another small update to this one. I was torn at the decisive point, how it should be the body stance. Finally I decided: as far as it goes to the floor! ;D This requires some changes.  Let's start with the rear axle, originally from the Sandshark. At the end slightly tapered to accommodate the new extensions of stainless tube.  Well, here I go, probably a non-traditional path. Normally, the rear axle is reduced, but here it will be extended.  The old mounts were removed.  The axle is mounted as high as possible.  This is the new holder.  Looks fixed inside the body, like this:  The desired result:  The front axle was not spared either. Their suspension has also been reduced as much as possible.  That is, well, the desired ground clearance.   I hope, you like it so far. |
|
|
|
Post by RatRod on Aug 31, 2009 18:20:33 GMT -6
Really cool Bobby!!! We like 'em low!!!
|
|
|
|
Post by hobbybobby on Sept 6, 2009 16:16:46 GMT -6
Thanks John!  More progress: Now that the position of the rear axle is much higher, we need a new opening for the drive shaft. 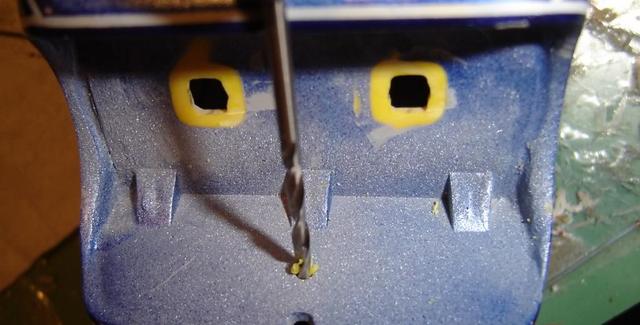 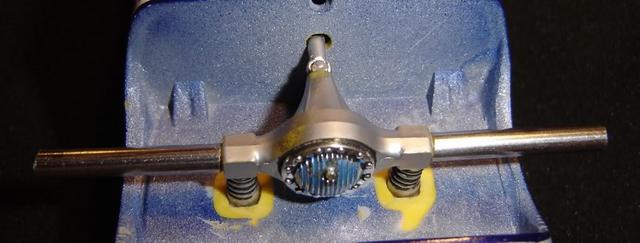 This is a roof rail, built from Evergreen Strip Styrene .040 "rod (1mm). 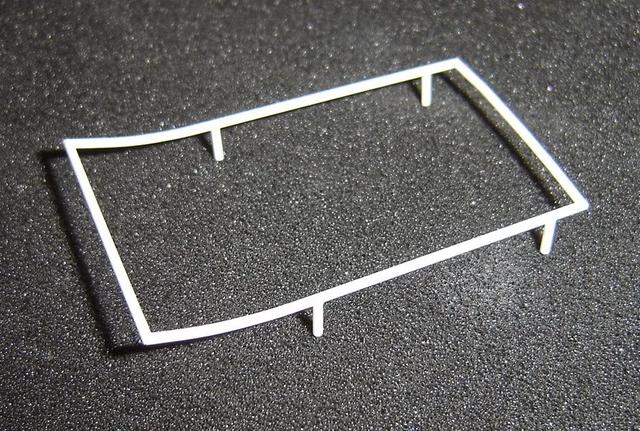  Hmm, but I'm still not sure, I should install it or not...  |
|
|
|
Post by RatRod on Sept 6, 2009 16:47:27 GMT -6
Sure you should add the rack.......Can you say SURF BOARDS??? Oh yeah, I thought you could ;D
|
|
|
|
Post by moparmarc on Sept 8, 2009 3:57:28 GMT -6
You have been moving right along with this one since the last time I seen it back in May and I must say I love that paint job and the new rear tires!!
|
|
|
|
Post by hobbybobby on Dec 24, 2009 18:31:58 GMT -6
Well, sometimes it's really bewitched.  Actually, this project was almost finished, only a few steps... At first, everything went very well with this project, until it came to this incident.  I was there, finished the interior and painting it. A process, as has been done countless times before, but this time...   I mixed the required color, with thinner, in a small plastic cup, as I said, as always. I held the cup in one hand and brushed around with the other, mending a few locations on the body and the interior.  Somehow, this process took a little longer and I did not notice that the thinner devoured the cup...   Unfortunately, the finished seats were just below this, now dripping cup.    Too bad, I thought, the paint must be stripped and the seats provided once again with color. I put it into a glass filled with lye, another, not strange process, rather it should be a demonstration effect, how it's done...  There was even more stupid, because I forgot to remove them again; My son came to me and we fooled around, we ate the dinner, etc. no idea how much time passed, until I suddenly remembered again...  Well, the color was off, but unfortunately not only ...  Warped, twisted and frayed, not exactly like in my imagination...  Consequently, it was, how not to do it... I have at the moment, no such seats to the hand, but I do not give up, someday...  Oh, and yes, I'm very open for a new name for this one, the present is already too long and not very appealing... Any suitable suggestions?  |
|
|
|
Post by snakeplissken81 on Dec 24, 2009 21:17:35 GMT -6
Man, this is gonna be cool.
|
|
|
|
Post by rocketeer on Dec 25, 2009 0:20:34 GMT -6
Man, what the heck happened to those seats? I've never seen that before! You could post a note in "Wanted-Kits/Parts" asking if anyone has a spare set of pie wagon seats--surely someone here has a couple. Heck, a guy as skilled as you could probably make a nice set of seats!  |
|
|
|
Post by chiefsspeedshop on Dec 25, 2009 9:31:33 GMT -6
|
|
|
|
Post by Steve-o on Dec 26, 2009 16:41:48 GMT -6
excellent project !!!!!!
great detail work
Steve-o
|
|
|
|
Post by hobbybobby on Feb 15, 2010 16:43:15 GMT -6
Thanks for the kind words!  A special thanks goes to Chris (chief).  Without his donated seats, this project would also stagnate. Now I have changed the shape of the seats again, they are already painted and installed. ;D  Well, actually, everything is almost done on this project, the next pictures you will soon see in the completed section.  What's missing now, is an appropriate name! What's missing now, is an appropriate name! 
Any suggestions? |
|
|
|
Post by badroadahead on Feb 16, 2010 7:05:40 GMT -6
glad you were able to recover it.
Name- Hmmmm - how about Bobbys Bash or The Sharkwagon?
Dave
|
|
|
|
Post by oldcarrestorer72 on Feb 16, 2010 8:47:38 GMT -6
Kool job on the exhaust !!!!!!
|
|
|
|
Post by showrodjohn on Feb 16, 2010 22:45:32 GMT -6
Looks great.
You could sell Shark Pies from it yummy.
|
|
|
|
Post by hobbybobby on Feb 18, 2010 5:50:25 GMT -6
|
|
|
|
Post by hobbybobby on Sept 1, 2017 18:07:00 GMT -6
|
|
|
|
Post by johnverkerk on Sept 2, 2017 7:28:25 GMT -6
WELL DONE!!BOBBY!!! Yet another very creative creation!!  |
|
|
|
Post by kabdriver on Sept 3, 2017 11:17:34 GMT -6
This thing is just amazing, man! TOOO cool! I love the paint, but the modifications you made to this body make it SOO much better! Just gorgeous...great job bud! Thanks for reposting the pics!
|
|

