|
|
Post by Steve-o on Jul 11, 2012 8:21:23 GMT -6
Everything is looking great !!! Keep on going !!! ;D
|
|
|
|
Post by Bud Tugly on Jul 11, 2012 10:25:09 GMT -6
Very Nice Bobby. I have to ask, what is the significance of the spikes on the barrel? not spikes, "bridges" to keep the strings off the engine |
|
|
|
Post by hobbybobby on Aug 3, 2012 17:27:14 GMT -6
Thank you very much for the kind words!  I'll show you now, my approach for the wheels, step by step... The rims before:   First, I have turned these rims in order to obtain a cylindrical surface.  Aluminum tubes...  The front side of the tubes now has the inside diameter of the rim. I turn the rear side of the tubes, so that it fit the outside diameter of the rim.  I turn it a bit tighter fit, so I can press in the wheel...  The finished product from the rear...  ... and from the front...  |
|
|
|
Post by hobbybobby on Aug 3, 2012 17:55:18 GMT -6
Two roughly pre-worked pieces of a Nitrile hose...  ... carved and finished...  ... these are slipped over the finished wheels, which was very demanding, since the inner diameter of the hose, is much smaller than the outer diameter of the new rims...  ... Finally, the finished front wheels...    |
|
|
|
Post by hobbybobby on Aug 3, 2012 18:17:24 GMT -6
For the rear wheels I found no matching rubbers, so I decided to produce them from PVC. Here is the black colored PVC version, on the new rim...  Unfortunately, I measured wrong by a millimeter, the diameter is too large, and the wheel does not fit anymore into the wheelhouse...    These are the time-consuming, unexpected things, well, back to the lathe...  |
|
|
|
Post by ira on Aug 3, 2012 18:44:23 GMT -6
[glow=red,2,300]BEAUTIFUL WHEELS & TIRES BOBBY!!![/glow]
|
|
|
|
Post by hobbybobby on Aug 7, 2012 4:51:46 GMT -6
|
|
|
|
Post by hobbybobby on Aug 13, 2012 17:48:14 GMT -6
Here are the revised tires:   ... and now they fit...   Hope, you like it. |
|
|
|
Post by RatRod on Aug 13, 2012 22:45:26 GMT -6
Your a knucklehead, but I love ya!!! Nice work Bobby!!! Please finish something buddy.... ;D
|
|
|
|
Post by hobbybobby on Aug 15, 2012 10:30:40 GMT -6
Thank you, John, that, I'm trying constantly...  The next step, the front axle from the TD T`rantula kit...  ... a piece of a very small stainless tube...  ... and glued between the rear joints...  ... two new recesses for receiving the two axles ...  ... always try several adjustments. With the depth of the recesses, I can now determine the required depth of the vehicle combination...   |
|
|
|
Post by hobbybobby on Aug 15, 2012 10:38:41 GMT -6
The wheels are mounted on the axle...  ... it fits, the position is still a good choice...   ... and the desired depth is reached, now it can be glued...  |
|
|
|
Post by ira on Aug 15, 2012 21:23:42 GMT -6
[glow=red,2,300]GREAT PROGRESS BOBBY!!![/glow]
|
|
Deleted
Deleted Member
Posts: 0
|
Post by Deleted on Sept 22, 2012 8:07:40 GMT -6
One the coolest builds i think I have seen in awhile, i was just thinkin a banana shifter would have been kinda funny since the Monkees but dang Sweet build
|
|
|
|
Post by hobbybobby on Nov 4, 2012 6:16:18 GMT -6
Thank`s!  More progress on this one: The rear axle and the "rolling parts" are now permanently installed, missing a few touch-ups with the color brush, but all in all, ready...   The following steps were necessary and the steering is now also complete...    For the strings, I was looking long time for a suitable material, this is for the selection:  |
|
|
|
Post by hobbybobby on Nov 23, 2012 19:37:24 GMT -6
I decided for this: This is a yarn, coated with a silver foilfilm.  It looks very nice, but it is a big crap to work with, because you have to constantly watch out that the coating does not become detached, it frays quickly...   So I had to work carefully, especially when I had to pull it through the holes, each of the six strings, three times...  These are the smallest parts that I have ever made on a lathe:  And this is their determination:  And so it looks now:  Hope, you like it so far. |
|
|
|
Post by Paul B. Canney on Nov 24, 2012 6:34:16 GMT -6
Just throwing this out there...
"Nothing looks more like guitar strings, than...
guitar strings"
|
|
|
|
Post by hobbybobby on Nov 24, 2012 17:35:29 GMT -6
Thank you Paul, you wise man...  I have also tried that, but it did not work, too rigid...  |
|
|
|
Post by Dennis M on Nov 27, 2012 22:35:26 GMT -6
Fantastic Bobby' I love it.
|
|
|
|
Post by mind9 on Nov 29, 2012 16:24:08 GMT -6
Bobby,
Great work man i have a Monkee mobiel but this one rocks
Gr
Dirk
|
|
|
|
Post by ShowRodFreak Don V. on Nov 29, 2012 17:33:12 GMT -6
Can you take a whole pick of the model ?? so we can see what it really looks like
with those strings
|
|
|
|
Post by barten on Dec 22, 2012 5:13:43 GMT -6
Bobby. . . your work is out of this world! very cool!
GB
barten
|
|
|
|
Post by sakke on Dec 23, 2012 16:56:21 GMT -6
Looks really great!! Keep posting pics!!
|
|
|
|
Post by futurabat on Dec 27, 2012 0:28:45 GMT -6
This is very interesting. Reminds me a lot of the Voxmobile by Barris. And even though George Barris takes a lot of credit for the Monkeemobile, he did not design or build it, although some of the work may have been farmed out to him. It was designed by Dean Jeffries and built by Jeffries and his sidekick Dick Dean. Sadly, over the years Barris has claimed or attempted to claim responsibility for ALOT of cars he had absolutely nothing to do with. The ultimate self promoter and agrandiser, Barris has even gone so far as to tell anecdotes of situations that NEVER existed. Such as his stories about Herbie the Love Bug. I don't know if it's senility or not, but it just seems like braggadocio and lies to me. While I love the actual Monkeemobile, this is a unique view of the car and a well executed build. I LIKE the barrel.  |
|
|
|
Post by Steve-o on Dec 27, 2012 12:31:15 GMT -6
I say Screw the guitar strings !!! 
That thing looks fantastically wild with out them !!!
I think the strings will hide all that excellent detail work Bob .
Just my two cents ... ;D ;D
|
|
|
|
Post by mind9 on Jan 2, 2013 11:01:48 GMT -6
Bobby, Great model love the air intake give's it that special fool thing  Gr Dirk |
|
|
|
Post by Bert on Jan 2, 2013 12:54:03 GMT -6
Hey Bobby! This has always been one of my favorite Bobby Builds. I have not read through the whole post and I may be repeating what someone else suggested. Could you use different types of fishing lines for guitar strings? Just a thought. (I just went to page three, I see you already have something going for the strings) Carry On!
|
|
|
|
Post by hobbybobby on Jan 2, 2013 13:54:45 GMT -6
Thanks for the kind words!  The strings are mounted, i can tell you, that was a fumbling, and so they remain as they are, no more experiments...  |
|
|
|
Post by ira on Jan 2, 2013 14:11:05 GMT -6
[glow=red,2,300]GREAT STRINGS BOBBY!!![/glow] Looks Wonderful , any more photos?  |
|
|
|
Post by barten on Jan 5, 2013 7:22:00 GMT -6
Killer as usual!
Gb
Barten
|
|
|
|
Post by hobbybobby on Jan 25, 2013 9:32:21 GMT -6
Thank`s!  You can not imagine, how long I've been looking for a matching cooler figure for this build here...  I have scoured all sorts of jewelery and kitsch shops... ... and searched on Internet sites for necklace pendants, earrings and stuff... ... You can not imagine what it is all there for stuff, everything possible and impossible, everything... ... but a little monkey, no, nothing!    So I have taken it out of my Dragon Wagon kit, (and another unfinished build... :  ... and I've carved it a little nicer  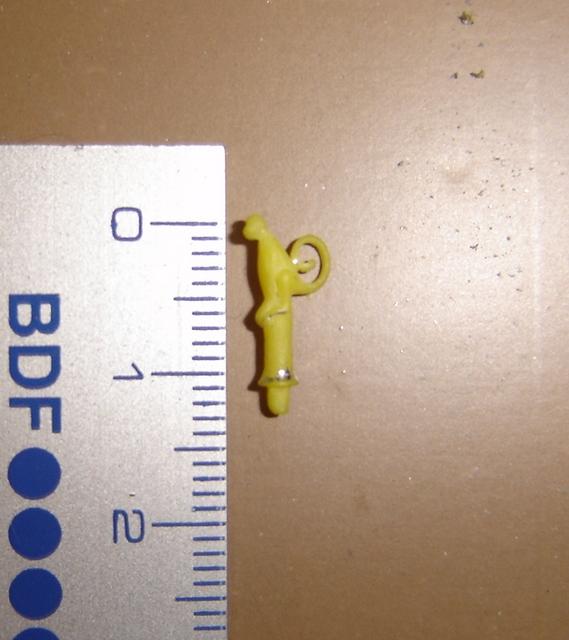 (in Millimeters  )  ... painted it in gloss black 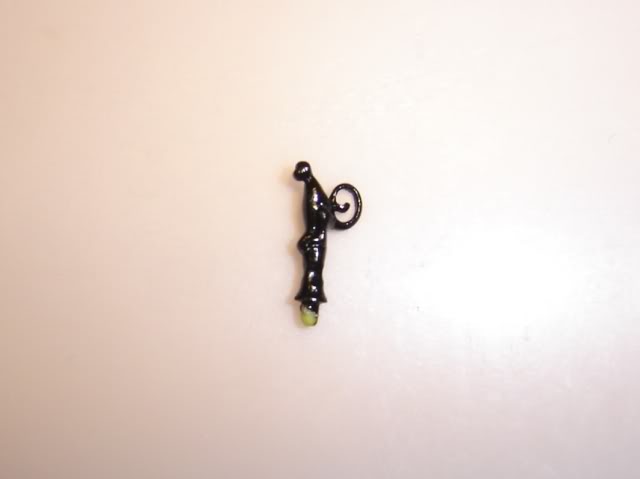 And tryied something completely different: This is a "Magic powder" 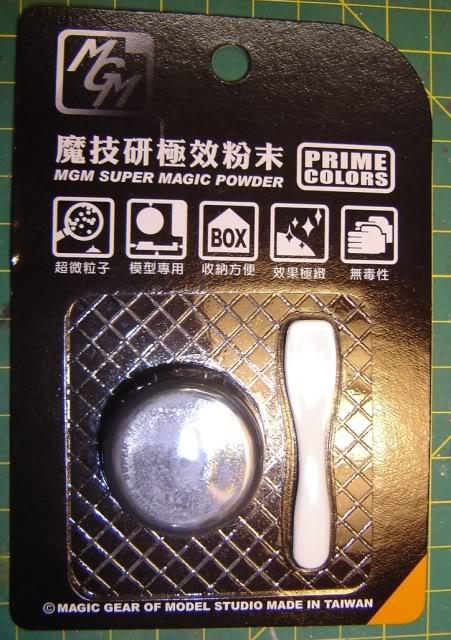 I took very little of it on a cotton swab and rub it on 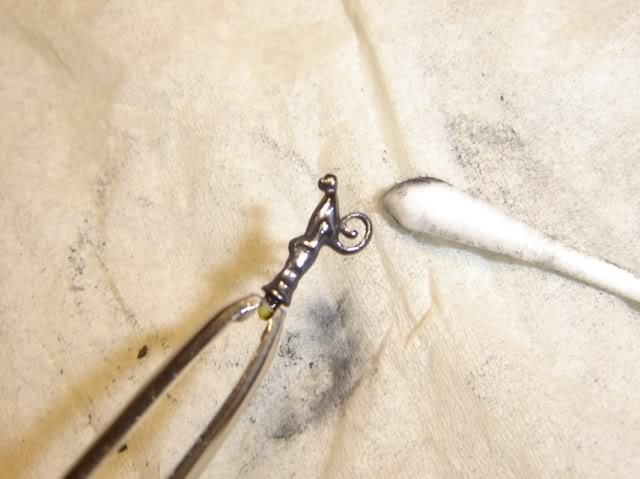 At first I thought not, that this works at all  ... but here is the result, and it's not bad 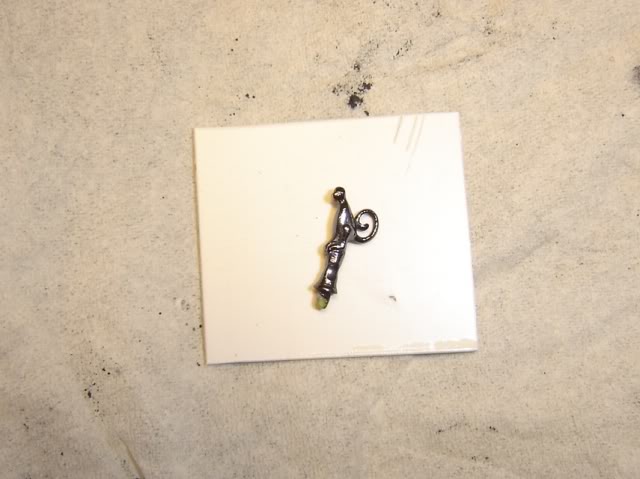 ... and here, in its final position 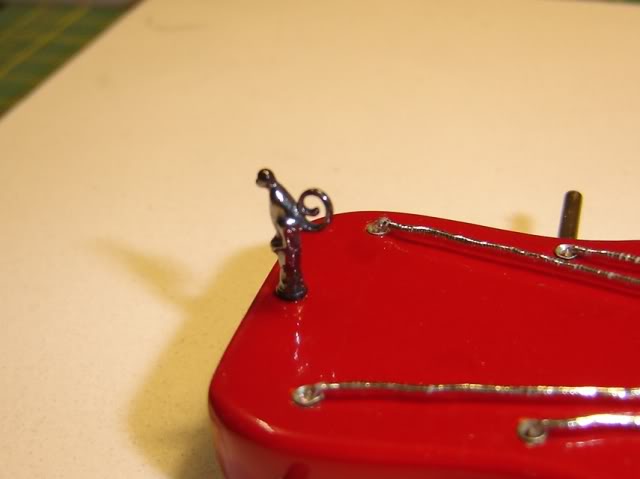 Hope, you like it! |
|

