Deleted
Deleted Member
Posts: 0
|
Post by Deleted on Aug 12, 2011 6:23:47 GMT -6
I know I'm watching it. I had the Wine Wagon at the NSRA Nats this past week in Louisville KY. Great reception, it was the feature vehicle at the Motorburg.com display.
|
|
|
|
Post by mind9 on Jan 5, 2013 4:57:49 GMT -6
What a great model this is,
I like to build this as well if i have some spare time.
You're almost done, took me some time to read the thread but it has a lot of info.
Gr
Dirk
|
|
|
|
Post by barten on Jan 5, 2013 7:13:59 GMT -6
OVER 16,000 HITS ON THIS THREAD!!!!! HOLY CRAPOLA!!!! DO YOU THINK THERES A BIT OF INTEREST IN THIS BUILD??!!This is absolutely one of the nicest showrod scratch builds I've ever seen Bobby! Finish it man!!! I love it!!!! Or. . . . Bobby is taking his sweeeeet time with this Build ! ! ! ! To drive us crazy! ! ! ! ! !        One of the coolest builds EVER! Your workmanship is outstanding. . . I want to be your apprentice! GB barten |
|
|
|
Post by hobbybobby on Dec 1, 2013 13:58:50 GMT -6
Thank you very much for the kind words!  Well, the same old Story... ... whenever I do not know how further, I put it away... That was earlier, the plan for the windshield: That will be the front window for the barrel cab, i carved that, from a 1mm thin plexiglass panel. (With both sides protective foil) 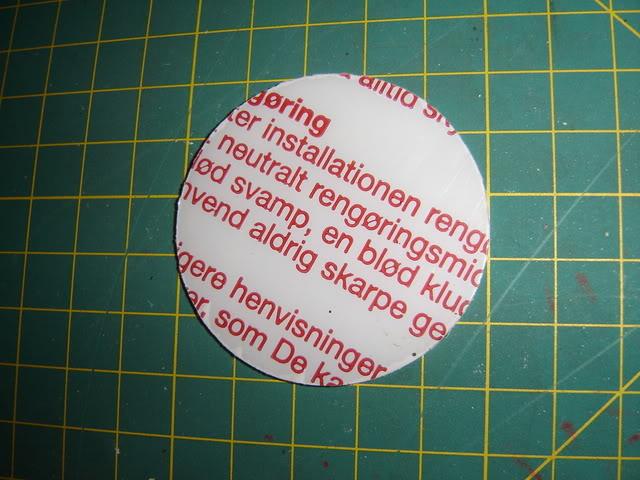 This is the drive of an old walkman: 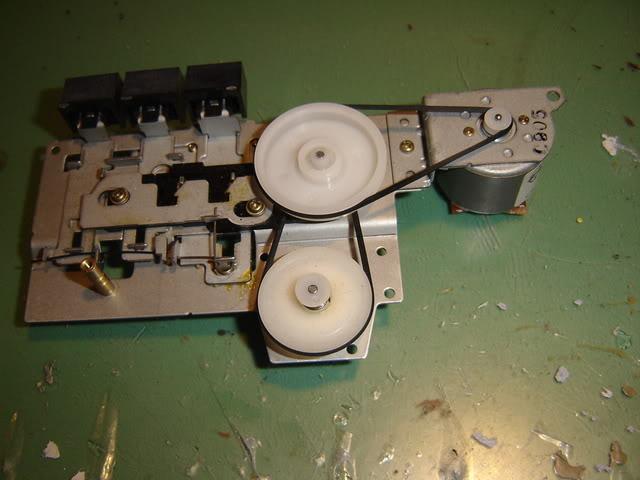 I need this drive belt: 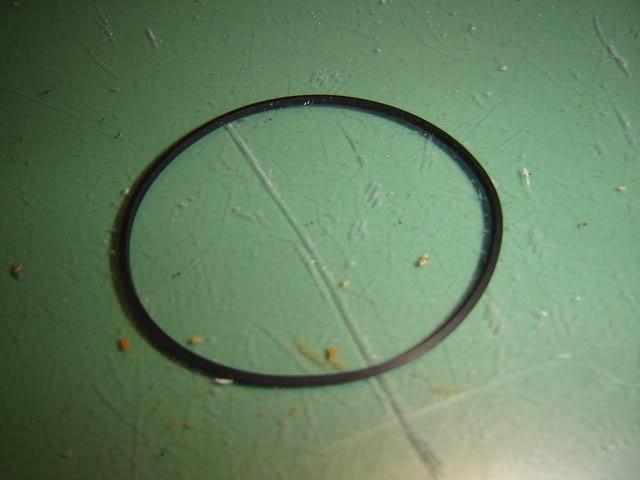 He is square in cross section and is better than an O-ring for an outline of the front window: 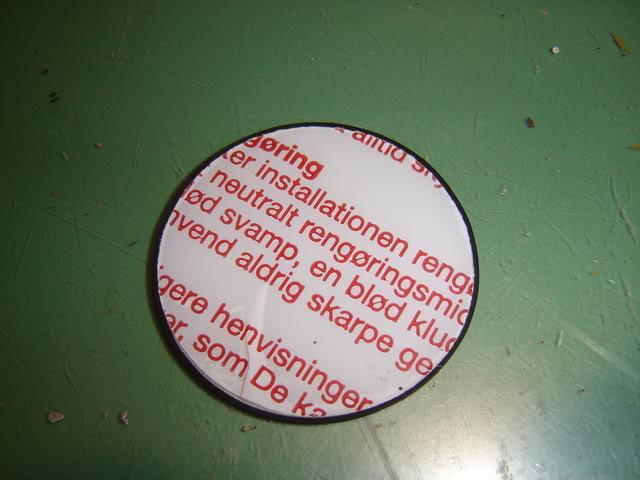 All good, the plan did not sound bad... ... but when I tried to stick the square belt to the glass, it went wrong... ... and as I had only one attempt, I threw it away, and let rest this Project for a long time... Here's the new plan: I cut a new front window, and now, in a slightly larger Diameter... 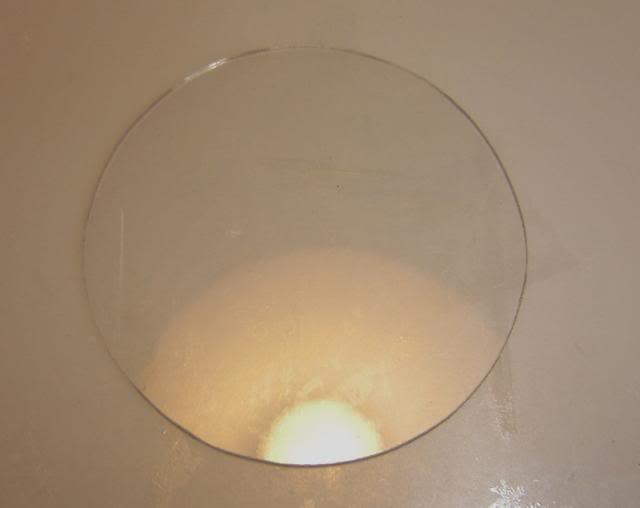 ... and fixed it in the cab... 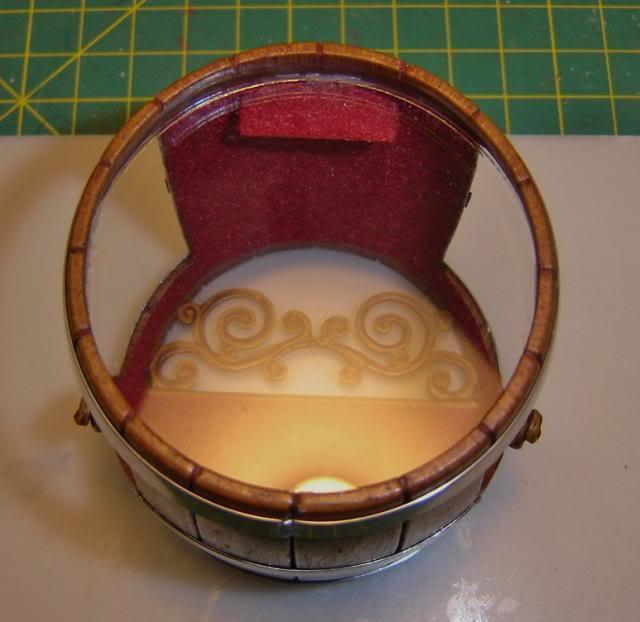 |
|
|
|
Post by hobbybobby on Dec 1, 2013 17:05:14 GMT -6
These three O-rings have a 1mm cord diameter, and are in diameter 50, 51 and 52 mm in size, from left to right ... 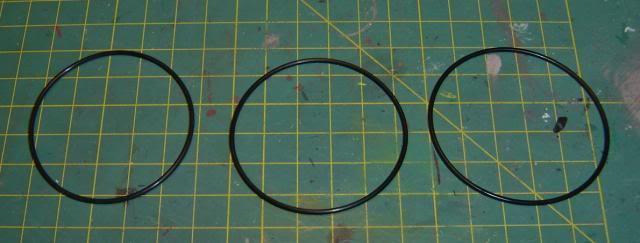 I have taken them, to try out, which diameter fits best... ... and after a few tests, i have decided for the one in the middle and glued it into place... 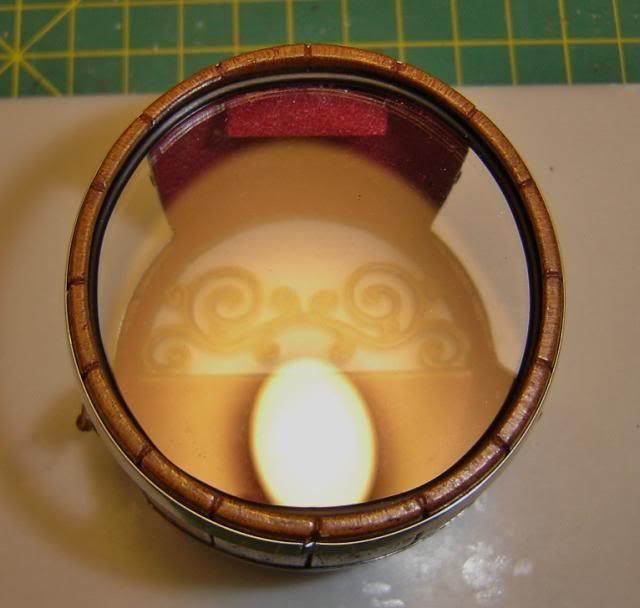 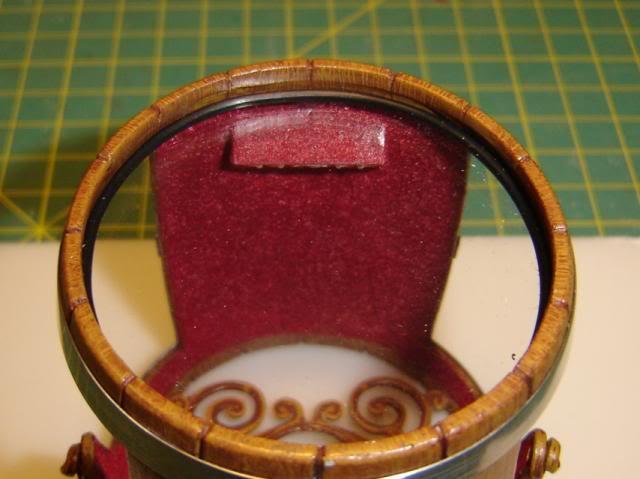 ... for the inside I took another one from the same size, this also fit best...  ... and so now looks like the whole thing...  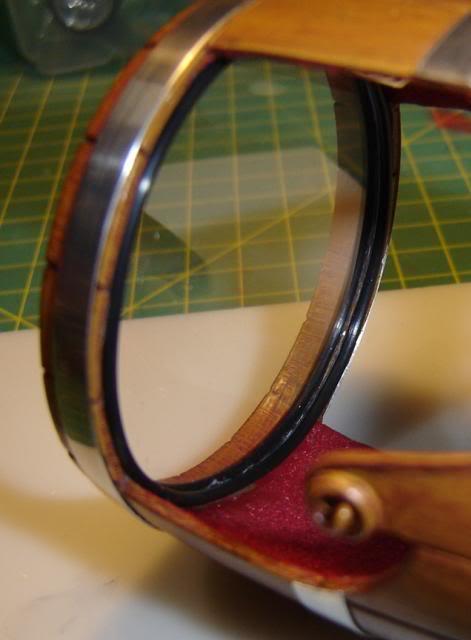 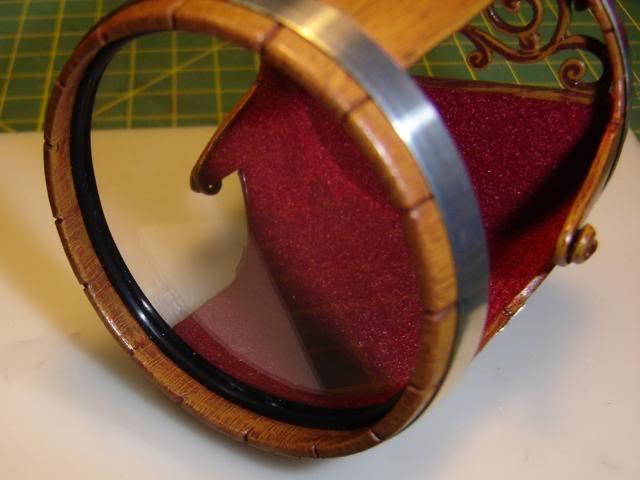 Hope, you like it. |
|
|
|
Post by AL on Dec 1, 2013 17:31:59 GMT -6
nice to see you working on this again Bobby, ... probably the most anticipated build on this entire site.
I'd think maybe, there's not a whole lot left to do on this build ........... ?
-AL
|
|
|
|
Post by hobbybobby on Dec 2, 2013 18:26:19 GMT -6
nice to see you working on this again Bobby, ... probably the most anticipated build on this entire site. I'd think maybe, there's not a whole lot left to do on this build ........... ? -AL Well, Al, that's what I tell myself constantly, and somehow I'm not going to finish it quickly... My problem is, that I have no guidelines, no plan exactly how something looks or should look like... ... so I try my way through, until it's "right", and on the way there, I change it several times, because I want to have it "perfect"... ... but what's already "perfect"? There are still missing: the steering, the exhaust system, the lateral front lighting, and the central front lighting I lost somewhere ... |
|
|
|
Post by ira on Dec 3, 2013 9:00:43 GMT -6
GREAT BUILD BOBBY! Real Nice Windshield assembly, thanks for sharing... 
|
|
|
|
Post by Dennis M on Dec 3, 2013 11:18:09 GMT -6
Beautiful job Bobby.
|
|
|
|
Post by hobbybobby on Dec 3, 2013 12:24:17 GMT -6
Thank you very much for the kind words!  I have now glued the seats in the cab... 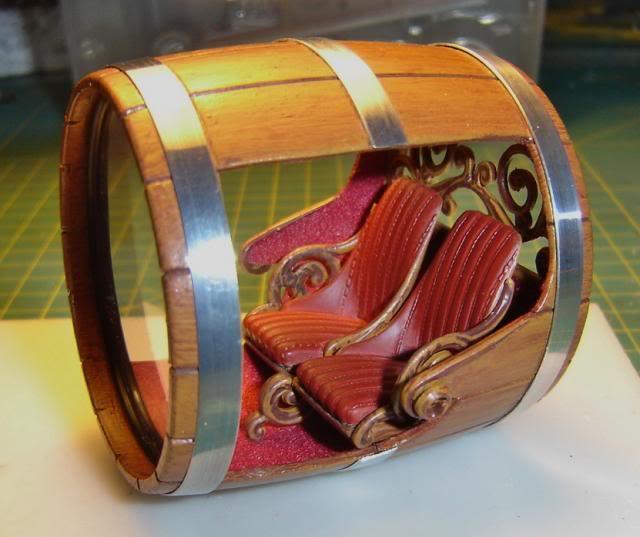 ... I have long wondered what steering should I install here... ... here is the latest variant, redrawn by the Master himself... ... it shows a kind, hand lever and the spindle with trapezoidal thread, as it is used on a hand press ... 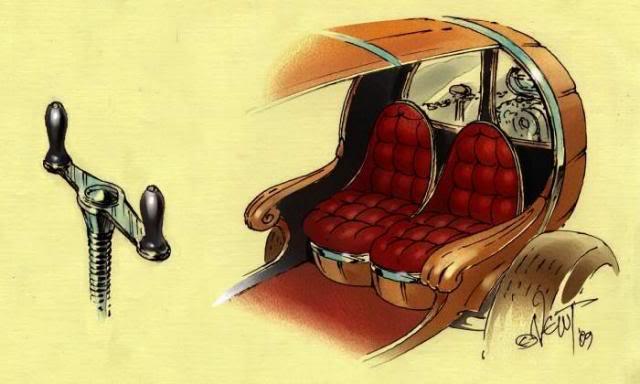 Hmm, let's see if I can this, simply replicate... |
|
|
|
Post by showrodjohn on Dec 5, 2013 4:58:04 GMT -6
Wow bobby so much detail rubbers on the windscreen that is cool I would have just put the plastic in. Great to see that you are working on this again.
|
|
|
|
Post by customhearse on Dec 5, 2013 14:41:48 GMT -6
This is really cool Bobby! I'm still watching and loving it!!!
|
|
|
|
Post by koffinbuilder64 on Dec 6, 2013 10:51:54 GMT -6
WOW Bobby!!! Love your approach to finishing the windshield! I can't wait to see this one finished. Keep working on it buddy!!
|
|
|
|
Post by AL on Dec 7, 2013 13:52:05 GMT -6
( from above ) ---well Bobby, you Must finish this "your way" NO Pressure !! -rock-on!
-AL
|
|
|
|
Post by mind9 on Dec 10, 2013 17:08:08 GMT -6
Bobby,
You amaze me again, love the way you handle the rubber seals.
And the interior is just great what a detail.
I,m so glad you share this thanks.
Gr
Dirk
|
|
|
|
Post by Bert on Dec 12, 2013 13:26:51 GMT -6
Keep going my friend, the build just continues to get better.
|
|
|
|
Post by RatRod on Dec 15, 2013 15:24:10 GMT -6
This is going to be the best Show Rod model ever!!! Keep at it buddy.
|
|
|
|
Post by hobbybobby on Dec 15, 2013 17:17:33 GMT -6
This means a lot to me, Thank you very much for the kind words and for the support!  |
|
|
|
Post by A.J. on Dec 16, 2013 13:41:55 GMT -6
Yes Bobby, this is one of the finest pieces of work you've pumped out. Very influential! Questionably so, you may have put more thought into this than the actual vehicle but either way I love both. It'll be cool to see you bring this one home!
|
|
|
|
Post by minimagneto on Jan 21, 2014 17:57:09 GMT -6
Wow Bobby, certainly not the first to say it, won't be the last...outstanding work.
And over 21 000 views to date, holy smokes!
Your detailed descriptions of your techniques has me inspired to stay hard at work at my own bench, learning and getting better.
Cheers,
Blake
|
|
|
|
Post by hobbybobby on Aug 24, 2017 18:13:55 GMT -6
The pictures are back in place... ... and this is the current state of the project:  |
|
|
|
Post by kabdriver on Aug 25, 2017 6:55:31 GMT -6
I am SO glad that you got the pictures restored on this thread Bobby - one of my favourite threads ever!! Incredible! Did you figure out a part to use for that steering rack? The threaded part? I would consider using an M3 metric screw, personally...it would be about the perfect diameter and it has the thread on already! Plus, you can use a nut to hold it on the floor  Let me know if you need some - I have thousands of them here... |
|
|
|
Post by kabdriver on Aug 25, 2017 6:56:42 GMT -6
PS: I saw that you posted this thread last night, but decided to save it until today so I could read through it all in one go. TOTALLY the right decision  |
|
|
|
Post by hobbybobby on Nov 11, 2018 9:11:26 GMT -6
Well, somehow I have to finish this one here, I know… ... but it's very hard to find the right parts, or the ones I've produced I do not like anymore, i think that's the bane, when the builds take so long...  This is also the case here, the front lamp I do not like anymore:  … so I have created a new version on my lathe, here on the right:  … and here in the middle, to see the size:   |
|
|
|
Post by hobbybobby on Nov 11, 2018 9:28:23 GMT -6
|
|
|
|
Post by hobbybobby on Nov 11, 2018 9:30:05 GMT -6
Anyway, it would look like that, so far I am satisfied:   Hope, you like it. |
|
|
|
Post by kabdriver on Nov 11, 2018 10:12:21 GMT -6
When I saw that you'd posted in this thread I was hoping it would be an update...and it was!! Awesome!
I really like the new lights Bobby - the chimney especially is really cool! You're such a great fabricator!
So, assuming you're pleased with the light now, what's the next piece?
|
|
|
|
Post by flounder on Nov 11, 2018 10:22:16 GMT -6
It's back!
|
|
|
|
Post by hobbybobby on Nov 23, 2018 17:38:17 GMT -6
I am SO glad that you got the pictures restored on this thread Bobby - one of my favourite threads ever!! Incredible! Did you figure out a part to use for that steering rack? The threaded part? I would consider using an M3 metric screw, personally...it would be about the perfect diameter and it has the thread on already! Plus, you can use a nut to hold it on the floor  Let me know if you need some - I have thousands of them here... Thanks Jim, I already posted this: ... I have long wondered what steering should I install here... ... here is the latest variant, redrawn by the Master himself... ... it shows a kind, hand lever and the spindle with trapezoidal thread, as it is used on a hand press ...  A hand lever and the spindle with trapezoidal thread: 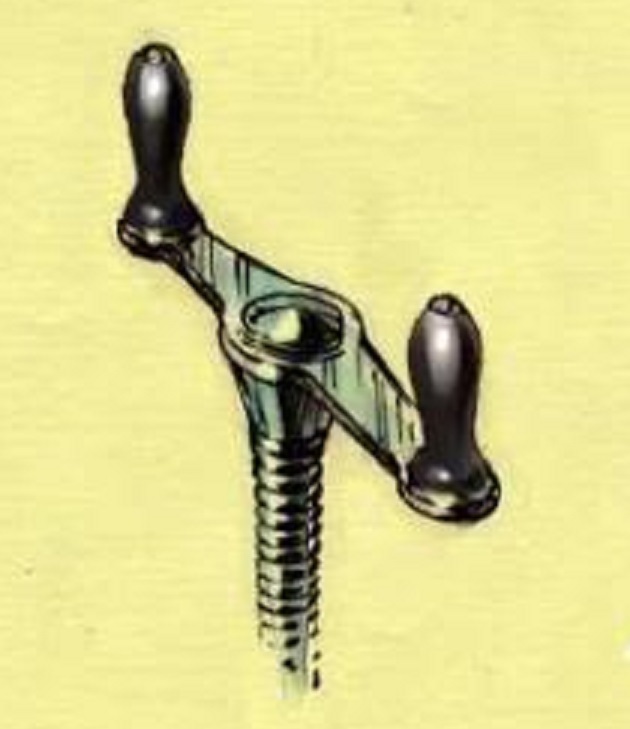 I've been looking for a long time, but original trapezoidal spindles start at 8mm outside diameter, and I would need about 3mm, so you're totally right, why not try an M3 screw? Well, the metric thread has a flank angle of 60 °, and is very sharp, so I turned it off a bit, unfortunately, you do not see that so good in this pic...  In the meantime, I have found this one, it comes from a cheap jewelry pendant and it fits in perfectly with the Diameter and the theme...   … and so after a little editing…  I will first create the upper part with the handles next and then finish both variants… ... and then decide, what comes in... |
|
|
|
Post by kabdriver on Nov 23, 2018 21:56:02 GMT -6
Another piece for the masterpiece! Great work Bobby! The center section is perfect, nice find!
One of the things that really sets you apart as a builder is your ability to find just the right part from an everyday object. Really inspirational!
|
|

