|
|
Post by Mysterion on Mar 9, 2014 12:25:19 GMT -6
Chrome! I tried cementing some sub-assemblies before painting this time. It worked well, I don't have to worry about glue marks and scratches, plus less chance of wearing through the Alclad from handling the parts.  |
|
|
|
Post by minimagneto on Mar 9, 2014 17:04:16 GMT -6
|
|
|
|
Post by Mysterion on Mar 10, 2014 7:34:32 GMT -6
The suspension is mounted to the frame. Getting the front end aligned was a bit of a pain, it's amazing how a little paint will throw things out of alignment.   You can also see I've stripped the front wheels. With a little luck I'll get them painted today. |
|
|
|
Post by knarf on Mar 10, 2014 8:56:28 GMT -6
some very nice builds goin on!
|
|
|
|
Post by AL on Mar 10, 2014 15:27:25 GMT -6
some very nice builds goin on! I Agree Knarf !!! .... GoooooD StuuuuF !!! |
|
|
|
Post by Mysterion on Mar 12, 2014 9:24:14 GMT -6
It's official, I HATE 1/25 scale wire wheels! Even though the wheels in the Outlaw kit seem to be the best out of all the wires I have, I thought I could make them better. I shaved the flash and stripped them, then put a light coat of black on them that looked smooth enough to me for the Alclad. Boy was I wrong, they came out silver. I stripped them and put on a syrup coat of black before the Alclad, I had chrome, but they were right back where I started. Now I had to sand the paint to glue them together, which of course the enamel balled up because I don't have the time to let them fully cure leaving fuzzy bits here and there. Not to mention you can't put the tires on without the Alcad coming off on them. So they're back in the pond waiting for a build that will use painted wheels.
Luckily I had another Outlaw kit to steal the wheels from. I'm leaving these alone!
|
|
|
|
Post by TooOld on Mar 12, 2014 15:50:40 GMT -6
It's official, I HATE 1/25 scale wire wheels! |
|
|
|
Post by TooOld on Mar 12, 2014 16:09:27 GMT -6
I painted my Roswell Rod with an Orange that I thought would look okay , but it's not even close to the correct color !  I pressed on and installed the decals without much trouble , but then I sprayed some clear which orange peeled worse than I've ever seen !  So after it dried for a couple of days I began wet sanding the clear and not only did I sand thru the clear , I managed to sand off part of the decals !  Luckily I had scanned the decals before I even started so I was able to print the decals I needed and re - apply them , of course the colors don't match !  If there were enough time I'd buy another set of decals and start all over with the correct color of paint ! I guess the moon must be screwing with me because I have another build going and that paint job is giving me fits too ! So here it is . . . along with the interior and the bubble top . I made the ring for the top out of styrene and it's also going to be hinged .   |
|
|
|
Post by Mysterion on Mar 12, 2014 21:22:58 GMT -6
I'm getting close to painting the body and you guys have me scared, I hope I have better luck and don't have to do any repairs. After detailing the engine my patience is wearing very thin. I'm plumbing the fuel lines and let me tell you it's getting tight in here. I have the lines from the tank to the inside of the trunk, then through the floor and into the frame. It exits the frame back by the engine. The return lines are done from the engine to the frame, the feed lines are done from the frame to the fuel pressure regulator. I also have the lines coming out of the fuel rails and still have to glue them to the regulator. I made a fuel pump and need to plumb it in, but that's after the body gets mounted.   I already have worn through the Alclad on the idler and crank pulley, I really hate how fragile this stuff is. I also have noe clue on how I'm going to make the drive belt as I can't mount the blower until I mount the body. I'm hoping I can find a rubber band that will fit. |
|
|
|
Post by jimbertges on Mar 13, 2014 2:06:27 GMT -6
Such amazing detail! I'd be lucky to get sewing thread attached to the distributor and spark plugs.
|
|
|
|
Post by Mysterion on Mar 14, 2014 7:23:01 GMT -6
I managed to make an acceptable drive belt for the supercharger out of a couple of strips of .020. It was a bit of a PITA and I almost gave up, but it came together in the end. I also sanded down the blower and the intake as they didn't look that great. I also added some linkage and made a butterfly for it. Mocking up the belt.  After some sanding and a coat of satin black.  The linkage.  The butterfly.  |
|
|
|
Post by Mysterion on Mar 14, 2014 14:44:04 GMT -6
I think this will be my last update as I'm getting ready to put color on this thing and after that there won't be much to show other than a finished model. I've got the white base on. I would personally like to wring the neck of whoever thought it would be a good idea to mold a model in red or yellow.   |
|
|
|
Post by TooOld on Mar 14, 2014 16:37:49 GMT -6
It's looking great David , I'm looking forward to seeing it finished ! Speaking of finished , only two more weeks to go . . . I wonder how many builds will actually be finished ? I finished one today and the other should be done in about a week !  |
|
|
|
Post by Dennis M on Mar 14, 2014 16:42:16 GMT -6
Amazing work guys.
|
|
|
|
Post by mykturk on Mar 14, 2014 17:04:35 GMT -6
I think this will be my last update as I'm getting ready to put color on this thing and after that there won't be much to show other than a finished model. I've got the white base on. I would personally like to wring the neck of whoever thought it would be a good idea to mold a model in red or yellow. If it's Monogram red or yellow, there's no stopping or getting rid of it ether, it WILL bleed through. Only way I know to stop it is painting it black and leaving it black. |
|
|
|
Post by ira on Mar 14, 2014 17:20:49 GMT -6
ONLY 2 MORE WEEKS!!!Oh Oh... 
|
|
|
|
Post by Mysterion on Mar 14, 2014 17:32:10 GMT -6
If it's Monogram red or yellow, there's no stopping or getting rid of it ether, it WILL bleed through. Only way I know to stop it is painting it black and leaving it black. Have you tried epoxy primer by chance? The next time I have to paint something molded in red I'm going to try it, unless someone already has done so and knows it doesn't work. |
|
|
|
Post by mykturk on Mar 15, 2014 6:15:36 GMT -6
It's been so long, I honestly don't remember all the different primers I tried. I'd made a roadster from the Monogram '37 Ford (Before they made it a roadster) and I'd used a part of the ZZ Top Eliminator roof as the rear deck. The rest of the rear section came from a black older car, I don't recall what now, but it was missing the trunk lid, that's why I cut up the ZZ roof and stuffed it back there. I was painting it a cream color, and every time I put the finish coat on and let it dry, there was a large "redded" area on the deck. I stripped and reprimed with several different types of paint. It came back through them all, and is still there to this day. I've heard Future will stop it (Water based accrillic), but I can't say. I can't say one way or another if epoxy primer will stop it ether. Good luck, we're all counting on you!
|
|
|
|
Post by TooOld on Mar 15, 2014 7:11:56 GMT -6
Future does work ! Use it as a sealer then prime and paint as usual . |
|
|
|
Post by Mysterion on Mar 15, 2014 8:14:58 GMT -6
Good luck, we're all counting on you! If you are counting on me, you're in trouble. I've said it before and I'll say it again, "The only thing I'm good at is screwing things up!" BTW, those shifters for steering the tracks on your build is a great touch. Future does work ! Use it as a sealer then prime and paint as usual . Something about using Future scares the crap out of me, probably just because I've never used it before. So if you don't mind I'll ask a few questions Bob. How thick does it go on? Do I need to worry about panel gaps on opening hoods, doors, and trunks? As I usually use nail polish for my colors, sometimes with a craft store acrylic base, do I have to worry about adhesion when masking for graphics? (This is what scares me the most.) Do you wetsand the Future before applying your color coat? Sorry for all the questions, but inquiring minds need to know. TIA |
|
|
|
Post by johnverkerk on Mar 15, 2014 8:55:38 GMT -6
Yep , had the same problem, used a water base paint and no problems after that.
|
|
|
|
Post by TooOld on Mar 15, 2014 10:02:02 GMT -6
Good luck, we're all counting on you! If you are counting on me, you're in trouble. I've said it before and I'll say it again, "The only thing I'm good at is screwing things up!" BTW, those shifters for steering the tracks on your build is a great touch. Future does work ! Use it as a sealer then prime and paint as usual . Something about using Future scares the crap out of me, probably just because I've never used it before. So if you don't mind I'll ask a few questions Bob. How thick does it go on? Do I need to worry about panel gaps on opening hoods, doors, and trunks? As I usually use nail polish for my colors, sometimes with a craft store acrylic base, do I have to worry about adhesion when masking for graphics? (This is what scares me the most.) Do you wetsand the Future before applying your color coat? Sorry for all the questions, but inquiring minds need to know. TIA All good questions and I'm in no way an expert but here goes . It goes on very thin , in fact since it is self - leveling and it thins itself out . I don't think it is possible to put it on too thick , I've sprayed it with an airbrush and also used a foam brush to apply it to finished models and it always smooths out beautifully ! It's so thin it won't bury any details or imperfections like primer will so there's no reason to worry about panel lines . Adhesion is absolutely not a problem , tape and even BMF sticks to it just fine . And lastly , I've never wet sanded Future before painting over it . I can understand why you would want to but I really don't think it is necessary . If you are unsure about using it you should try it first on an old body and see for yourself how easy it is to use . Here's a link to a very long thread with lots of good info ! www.modelcarsmag.com/forums/index.php?showtopic=8964 |
|
|
|
Post by RatRod on Mar 15, 2014 10:18:14 GMT -6
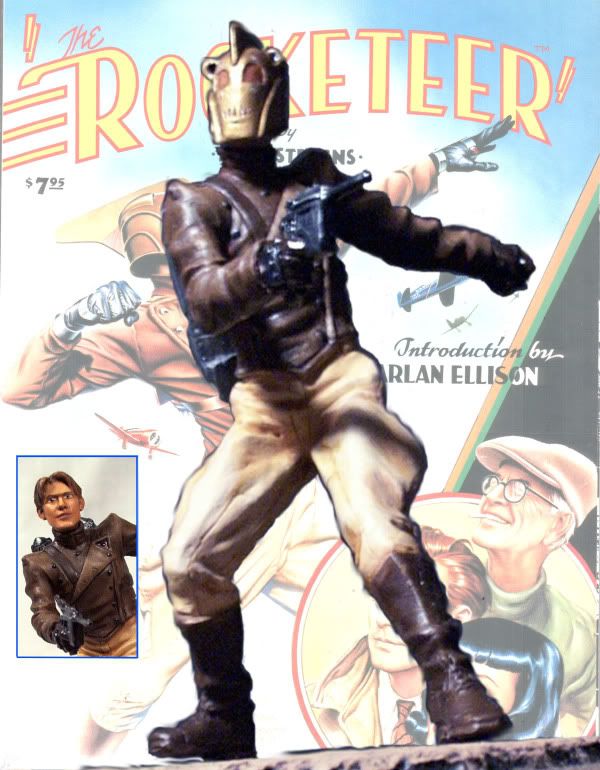
If it's Monogram red or yellow, there's no stopping or getting rid of it ether, it WILL bleed through. Only way I know to stop it is painting it black and leaving it black. Have you tried epoxy primer by chance? The next time I have to paint something molded in red I'm going to try it, unless someone already has done so and knows it doesn't work.  After removing the helmet, I sanded smooth, NOT stripping, I shot a coat of filler primer, a coat of silver, then my white base over that, then my color & clear.....NO bleed through!!! After removing the helmet, I sanded smooth, NOT stripping, I shot a coat of filler primer, a coat of silver, then my white base over that, then my color & clear.....NO bleed through!!! It works!!! It works!!! |
|
|
|
Post by Mysterion on Mar 15, 2014 15:56:08 GMT -6
Have you tried epoxy primer by chance? The next time I have to paint something molded in red I'm going to try it, unless someone already has done so and knows it doesn't work. I've tried the silver/white, along with the silver/black trick, neither worked for me. I think as long as the paint/solvent combo of your top coats are "hot" enough to penetrate the paint underneath, it will allow the dye or whatever it is they use to color the plastic to migrate to your top coats. I picked up a bottle of LA's Mop and Glow today, it's supposedly the same as Future, but can be had at the dollar store for (what else) a buck. I'll let you guys know how I make out with it. BTW, I've got my colors on the body and I must say, "I'm impressed, it looks great!" Now if I can clear it without messing it up is a whole' nother story.  |
|
|
|
Post by sakke on Mar 15, 2014 16:03:03 GMT -6
It works!!![/quote] Looks so darn cool, like all your builds !!!
|
|
|
|
Post by TooOld on Mar 15, 2014 17:38:23 GMT -6
I picked up a bottle of LA's Mop and Glow today, it's supposedly the same as Future, but can be had at the dollar store for (what else) a buck. I'll let you guys know how I make out with it. Supposedly the same doesn't mean it is the same , good luck ! |
|
|
|
Post by Mysterion on Mar 15, 2014 18:35:54 GMT -6
I picked up a bottle of LA's Mop and Glow today, it's supposedly the same as Future, but can be had at the dollar store for (what else) a buck. I'll let you guys know how I make out with it. Supposedly the same doesn't mean it is the same , good luck ! I know, but I thought of it this way, if it doesn't work, I wasted $1. If it does work I save $4 or $5. I have the back half of the Cola wagon to try it out on. Hey Bob, what do you clean your airbrush with after you use the future? |
|
|
|
Post by Mysterion on Mar 16, 2014 20:27:36 GMT -6
OK so I lied, I found some more things to do that won't give away the final outcome of this build. I've got the rear brakes plumbed and made a master cylinder.  I also made the gas, clutch, and brake pedals. I know I only have four toes on it, but It's all I could fit.   |
|
|
|
Post by TooOld on Mar 17, 2014 4:56:57 GMT -6
Supposedly the same doesn't mean it is the same , good luck ! I know, but I thought of it this way, if it doesn't work, I wasted $1. If it does work I save $4 or $5. I have the back half of the Cola wagon to try it out on. Hey Bob, what do you clean your airbrush with after you use the future? That makes sense , but if it doesn't work you need to remember that it's not Future . Warm water works okay for cleaning your airbrush but I like to use Windex ( the ammonia in it will also strip Future off your model ) and then a quick shot of thinner just to make sure . Your brake lines look great ! And four toes looks just fine , it kind of fits the mood of the build ! |
|
|
|
Post by Mysterion on Mar 17, 2014 9:00:14 GMT -6
Thanks Bob.
You do know that ammonia is bad for chrome. Windex makes an ammonia free glass cleaner called Rain, this is what I use to clean my AB when using acrylics, always followed by a quick shot of lacquer thinner to displace the water that might be left from the Windex.
|
|


 I pressed on and installed the decals without much trouble , but then I sprayed some clear which orange peeled worse than I've ever seen !
  So after it dried for a couple of days I began wet sanding the clear and not only did I sand thru the clear , I managed to sand off part of the decals !
 If there were enough time I'd buy another set of decals and start all over with the correct color of paint !