|
|
Post by Mysterion on Mar 31, 2014 21:11:51 GMT -6
You and me both, it's been a long time coming. Did some Alclad today, my braided line for the radiator hoses should be here tomorrow. Then it's on to mounting an alternator, pulleys and fanbelt.  |
|
|
|
Post by Dennis M on Mar 31, 2014 22:15:41 GMT -6
Wow Dave' Beautiful job.
|
|
|
|
Post by Mysterion on Apr 2, 2014 17:15:41 GMT -6
I ordered some #4 braided line for the radiator hoses. It was too small for my fittings which are drilled to 1/16". I had some braided cord from ebay and from Micheal's, but both were to big. I made another trip to Micheal's as I needed ribbon for my seatbelts. After looking around and asking, it looked like nothing was available, so I went to pick up some ribbon and ponder what I would use. Then in the ribbon section I found some Mylar braided 1/16" elastic. It was a Royal PITA to work with, but after a little careful enlarging of the holes in the fittings, I got them done.  I also have the alternator bracket done. It's even adjustable, so hopefully that will help when it's time to make the belt.  I've also started on the seatbelts.  With the front of the engines almost buttoned up, it was time to see how tight I could fit the grille shell and headlights. This was one of the things I was disappointed with, it just seemed to stick out way to far. I was lucky in that it tucks up right against the engines. Between that and the cycle fenders, I'm back to being pleased with the overall look of this build.    |
|
|
|
Post by Mysterion on Apr 4, 2014 6:34:23 GMT -6
I finished my exercise in patience and coordination, both are things that seem to be failing me in my old age. Ahhh who am I kidding, I've never had much of either in my whole life. I think the seatbelts came out pretty good. I thought it would be smarter and easier to mount the shoulder belts to the cage first. To mount them to the floor and cage, I cut small pieces of the PE sprue, bent them to 90 degrees, drilled small holes in the floor and cage, and Ca glued them in place. I have a few more pieces to build or finish before I can mount the cage, then I can glue the shoulder straps to the seats.  After a year I don't remember how to fit the clear transaxle cover. So I started to design a new one. This is another time that the second time around is better. Of course that depends on if I can pull off my idea for it.  |
|
|
|
Post by Mysterion on Apr 5, 2014 12:12:32 GMT -6
|
|
|
|
Post by fiftiesdiner on Apr 5, 2014 14:08:03 GMT -6
Mysterion, Nice Jeep and a Good looking build,she is going to be a show-stopper!!
|
|
|
|
Post by Mysterion on Apr 7, 2014 6:35:45 GMT -6
|
|
|
|
Post by TooOld on Apr 7, 2014 6:43:07 GMT -6
Really great looking interior ! I haven't been following along , guess I better go back and read the entire thread !  |
|
|
|
Post by Mysterion on Apr 10, 2014 7:12:01 GMT -6
Plan ahead! This bit of advise has obviously been lost on me during this build. I started plumbing the airline for the bags, what a pain that was for a detail that is almost unnoticeable. I decided to make them look like they run through the frame, the back ones weren't bad, but the front one sucked to do. Bending them into shape with the front suspension arms in place was an exercise in frustration. The front lines are too hard to get a pic of, here's the back lines.  I also made an airpump and tank, and got them mounted. I can't plumb these until the interior tub is permanently mounted to the frame.  I also made a battery box.  |
|
|
|
Post by ira on Apr 10, 2014 8:07:58 GMT -6
Great Progress Dave! 
|
|
|
|
Post by hobbybobby on Apr 12, 2014 18:24:34 GMT -6
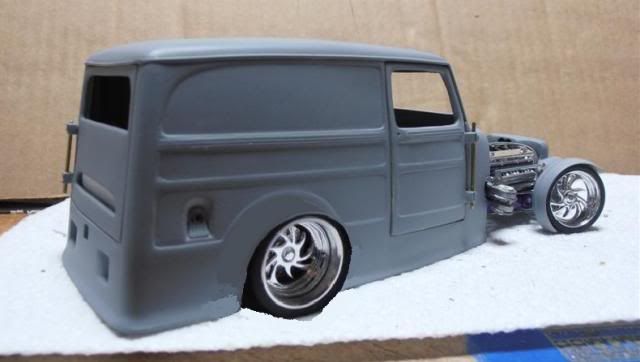
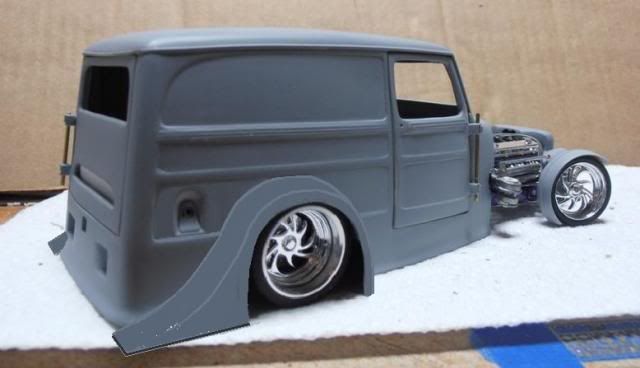
Dave, Your art, skillfully to "produce" the missing parts, from Something, fascinates me extremely...  Everything on your builds always looks very well thought out...  Please excuse me, my friend, but in this build, I do not like a fact: Somehow bothers me the rear track width, which, in my opinion, is advised a bit too narrow...  I know, it's your concept and your style... ... and I do not know whether or at all, you want to change it... ... and I will not fool you... ... but I beg to submit you the following proposal, please excuse the quality:  It is known, You should not argue about taste... Oh, yes, I am aware that this would entail a number of changes, but as I said, my friend, that's just my opinion...  |
|
|
|
Post by SgtDRecon on Apr 13, 2014 19:29:41 GMT -6
Mr. Hobbybobby, I agree with your statement. The rear end looks out of balance with the front wheels and the trailer when put together. My honest opinion. This is your build Dave. Keep up the good work.
|
|
|
|
Post by Mysterion on Apr 14, 2014 4:13:57 GMT -6
Nope, not gonna happen. This design was heavily influenced by a pro street look, you did see all that tubing in the interior, right?  It's just not the direction I want to take this. I like the boxy delivery truck look to the body, the flares would kill that. The other problem is that photoshop pic wouldn't work as edited. You would have to start the top of the flare up into the second indent in the body and I really wouldn't like that. |
|
|
|
Post by hobbybobby on Apr 14, 2014 10:53:32 GMT -6
Dave, my friend, I did not want to offend you...  I wanted only to challenge you just a little...   Here is another Version... ... just for fun... ... and as I said before, ist a very quick, rough sketch, so please excuse the Quality...  And Dave, I said it also before, my friend, that's just my opinion...  I am convinced that this build, once you finish it in either way, will be killer!  |
|
|
|
Post by Mysterion on Apr 17, 2014 21:06:24 GMT -6
The driveshaft is in and I've started working on the plumbing, linkages and electrical cables. I think I've put the last coat of primer on the body. It's not perfect, but where there are flaws I have no idea how to fix them, the details are just to small and any more sanding will erase them.  |
|
|
|
Post by Mysterion on Apr 23, 2014 17:47:13 GMT -6
Things are wrapping up quickly, I made a fan belt out of tape and painted it satin black.  An electric fan made from a slice of an inner rim, some strips of .010 x.080 and a circle cut from some .030. I made it real quick and with not much detail, the blades are flat but airbrushed to look like they're mounted at an angle. I didn't go crazy on this as it is barely seen behind the grille.  Other things I've managed to finish, the ignition coils, throttle linkages, door panels, radiator and coolant lines, steering and brake linkages, headlights, the grille shell is mounted with new brass mounts, front and rear glass, and the body is out of the booth. I'm very disappointed in the paint, hopefully a quick sand and re-clear will take care of things.  It looks like the Jeep just might make NNL East this year. |
|

